Table of Contents
In this article, we will go through step by step guide to create a bucket in Google Cloud Storage. If you are planning to store some data in Google Cloud for longer period of time or planning to use the data with some other google cloud services then probably Cloud Storage is the best option. As all the data in the Storage Service are stored through bucket so you need to first create a bucket. This can be easily done by following below mentioned Steps.
What is Bucket
Bucket are basically the containers to store the data in Google Cloud Storage. You can compare it from folders or directories which are used in windows and Linux OS to hold and store the data inside the disk. But unlike folders and directories, bucket cannot be nested. One can control the access to the buckets using ACLs and permissions. More on Google Cloud Buckets.
Step by Step Guide to Create a Bucket in Google Cloud Storage
Also Read: 5 Best Steps to Register SSH Key for Cloud Source Repositories in GCP
Step 1: Prerequisites
a) You should have a valid Google Email ID and Password.
b) You should have required permission to Create a Bucket in Cloud Storage.
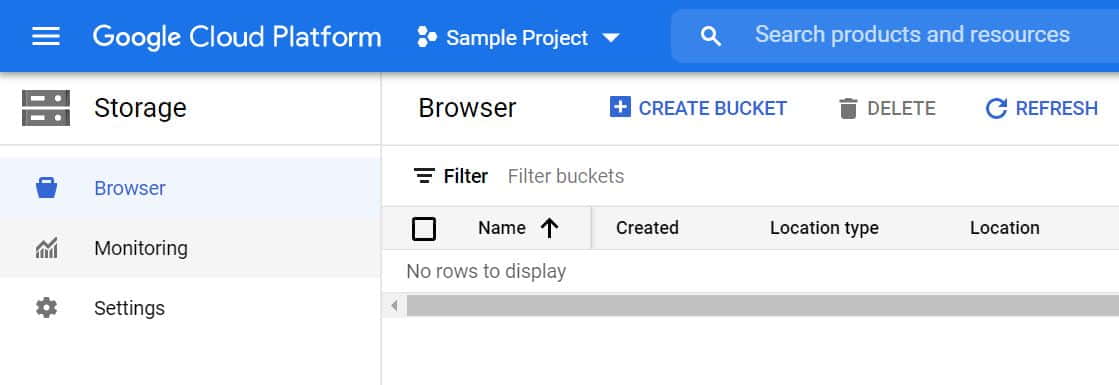
Step 2: Go to Cloud Storage
In the first step, you need to Open Google Cloud Storage either by scrolling left side down to Storage or by searching Storage from top Search Box.
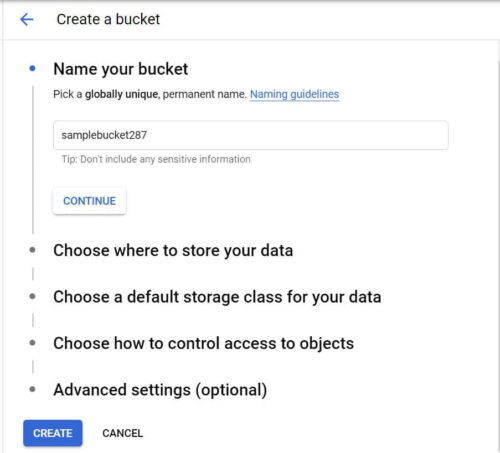
Step 3: Name Your Bucket
First you need to provide a global unique name of the bucket. You can click the Naming guidelines shown below to check the name of the bucket which can be used below. Here we are using bucket name samplebucket287 as you can see below.
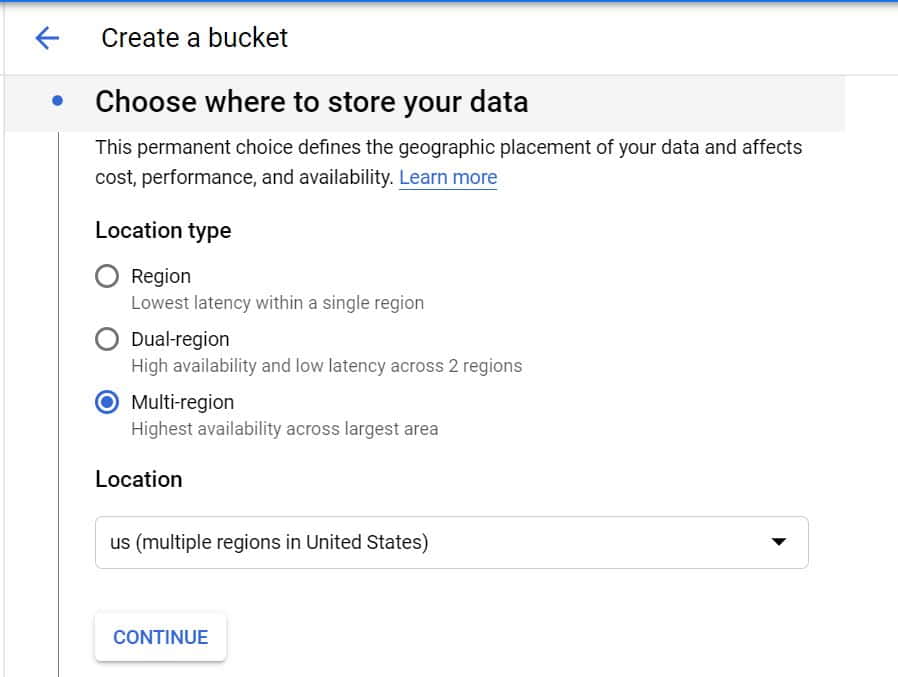
Step 4: Choose Data Storage Region
Next step is to choose the data storage region where you want to store your data. Google Cloud provides three location types:-
- Region: This location type provides lowest latency within a single region.
- Dual-Region: This location type provides high availability and low latency across 2 regions.
- Multi-Region: This location type provides highest availability across largest area.
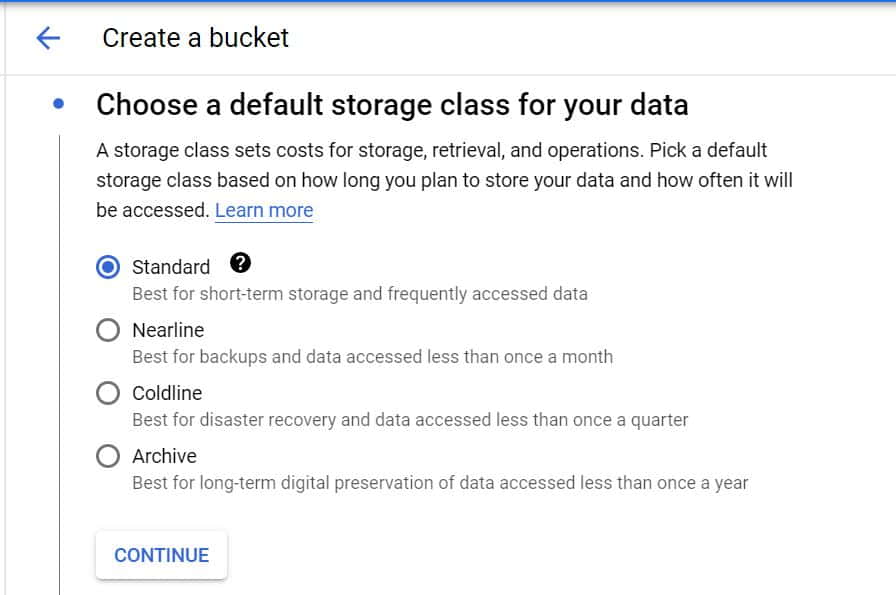
Step 5: Choose Default Storage Class
Then you have to choose your default storage class. A storage class is used to set the cost for storage, retrieval and operations. Here Google Cloud provides four different options:-
- Standard: This option is best suited for short-term storage and frequently accessed data.
- Nearline: This storage class is best suited for backups and data accessed less than once a month.
- Coldline: This storage class can be used for disaster recovery purpose and for accessing data less than once a quarter.
- Archive: This is another storage class used for long term preservation of digital data which is accessed for less than once a year.
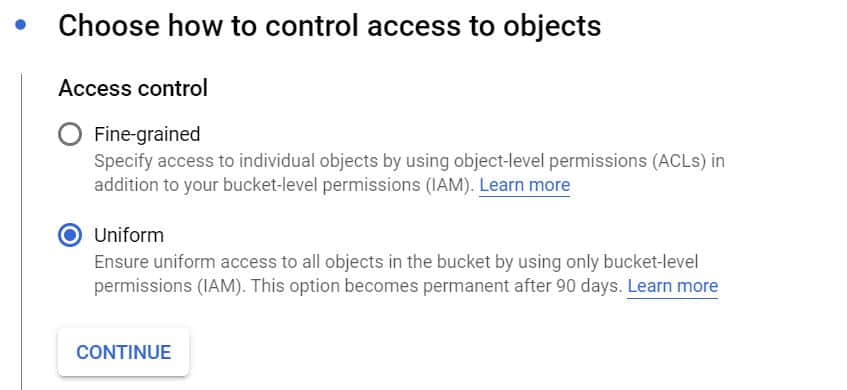
Step 6: Choose How to Control Access to Objects
After Storage Class, you will get an option to choose the access control to the objects. As of now, there are two options available:-
- Fine-Grained: This option will allow to specify access to individual objects by using object-level permissions, also called ACLs(Access Control Lists) in addition to your bucket-level permissions which is through IAM.
- Uniform: The second option is called uniform access control. This option will allow uniform access to all the objects in the bucket by using only bucket-level permissions(IAM). This option will also becomes permanent after 90 days.
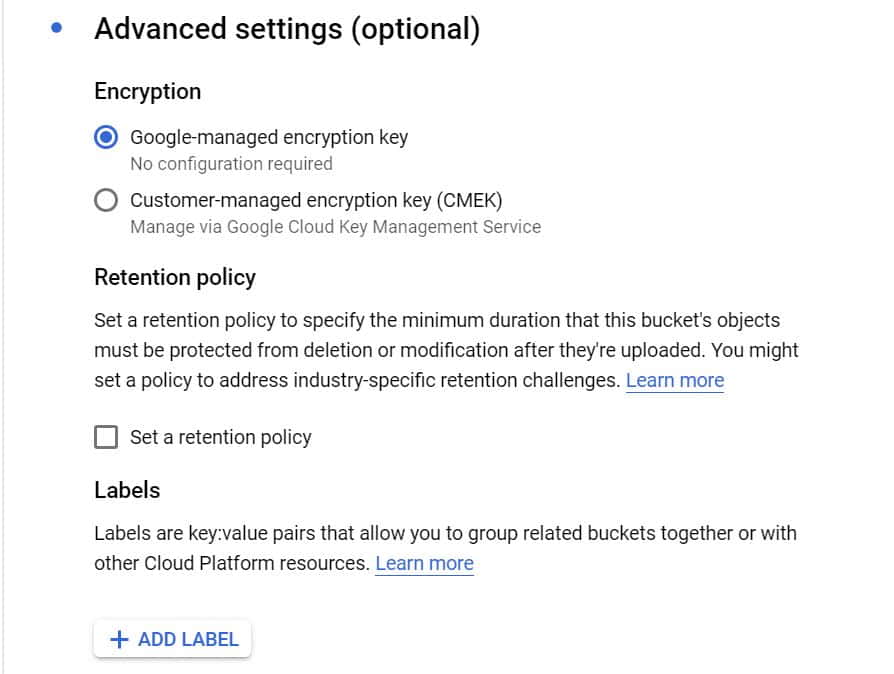
Step 7: Choose from Advanced Settings
Then the last step is to set the Advanced settings which is also an optional settings. In this step, you need to specify the Encryption you want to use and the retention policy if you want to set. In Encryption section, you will have two option:-
- Google-managed encryption key: In this option, no configuration will be required as Google Cloud itself will manage the encryption key. There is less overhead in this option.
- Customer-managed Encryption key(CMEK): Another option is to use Customer-managed Encryption Key(CMEK) in which Customer can manage its own encryption key through Cloud Key Management Service.
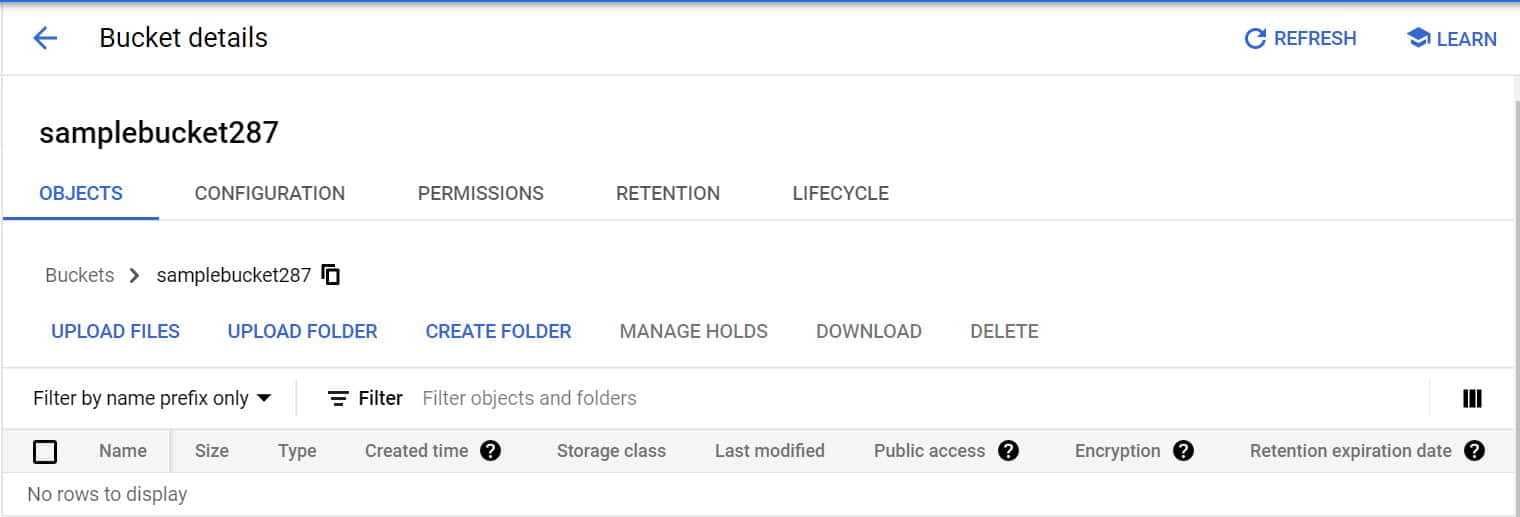
Step 8: Create Bucket
After following all the above steps, you can simply Click on Create Bucket and if everything goes well then your bucket will get created as shown below.