Table of Contents
In this article, we will look into 5 Best Steps to Register SSH Key for Source Repositories in Google Cloud(GCP). If you are developer or programmer then you might be checking out your project code in remote Git Repository after you register ssh key pair. In case of Google Cloud Source Repositories also, you need to follow the same steps to check out your code. But before this you need to first register ssh key in Google Cloud. This can be easily done by following below given steps.
Steps to Register SSH Key in Google Cloud(GCP)
Also Read: How to Disable Cloud Build API in Google Cloud(GCP) Using 5 Simple Steps
Step 1: Prerequisites
a) You should have ssh-keygen tool installed in your Server.
b) You should have permission to run ssh-keygen utility in your Server.
c) You need a valid Google Email ID and Password.
d) You should have Git Client tool installed in your Server.
e) You should have a Repo created in your Cloud Source Repositories.
Step 2: Generate SSH Key Pair
In the first step, you need to generate SSH Key pair using ssh-keygen tool. You can either use any Linux based Server or even Cloud Shell to generate the Key pair. Just run ssh-keygen -t rsa command as shown below. It will first ask the file name and path to save the private key. Since we are using default path here so we won't change anything and will just press Enter. Next, it will ask for passphrase. Since we are not using any passphrase so here also we will just press Enter. You can notice that the chosen default path is also used to save the public key id_rsa.pub as both the keys will be on same path.
[centos@localhost ~]$ ssh-keygen -t rsa
Generating public/private rsa key pair.
Enter file in which to save the key (/home/centos/.ssh/id_rsa):
Created directory '/home/centos/.ssh'.
Enter passphrase (empty for no passphrase):
Enter same passphrase again:
Your identification has been saved in /home/centos/.ssh/id_rsa.
Your public key has been saved in /home/centos/.ssh/id_rsa.pub.
The key fingerprint is:
SHA256:VrXtpj7OeH1LdVxk6/Zg40Ql2dH+LyjRlUaHPBcGcLI centos@localhost.localdomain
The key's randomart image is:
+---[RSA 2048]----+
|      oo+oBB      |
|    .+oB=*        |
|  .E..oB.         |
|  . o=.o          |
|     S   . oBo=   |
|   . . .*.o=      |
|    ..o..o        |
|   .++ + o        |
|     .++. +.      |
+----[SHA256]-----+
You can go to /home/centos/.ssh path and check your both the keys.
[centos@localhost .ssh]$ ls -lrt
total 8
-rw-r--r--. 1 centos centos 410 Apr 1 22:26 id_rsa.pub
-rw-------. 1 centos centos 1679 Apr 1 22:26 id_rsa
If you open your public key, then it should look like below. You can use Linux utility like cat command to open a file. You can just do cat id_rsa.pub command to open public key.
[centos@localhost .ssh]$ cat id_rsa.pub
ssh-rsa AAAAB3NzaC1yc2EAAAADAQABAAABAQC8o1tZNa3VzYySZIy8YVDTPd+e78f4QYMdFKVNs3THnEX9uB2N0hji2M7nT5rqH34Fnjx11/ka3697J9hNKeQmAbU51L2YVkdOduVy9hX9x2Pb/jWKaJ6etW3KIxHOAEN8AlYvD+lmkfllFHkhvfv70WqcGmq+k1NppH7H4Qjpy1PrkXqUTtoZm/Z/SaXKQpb22hb6VH3kuKr727D/Bb1eBVfe7hHpsBzAig/Rs//3Px0j+wuvA5Eukqx4DubfWmYtgANDz/p4tzH+E9gb+igafxrxrwPa2i4oAUpre0DO8BwQrRbY2pRj2NBPNHGyWAoRJfOXptNnA6/KChLR4qyH centos@localhost.localdomain
Similarly, if you open your private key using cat id_rsa command then it should look like below.
[centos@localhost .ssh]$ cat id_rsa
-----BEGIN RSA PRIVATE KEY-----
MIIEpAIBAAKCAQEAvKNbWTWt1c2MkmSMvGFQ0z3fnu/H+EGDHRSlTbN0x5xF/bgd
jdIY4tjO50+a6h9+BZ48ddf5Gt+veyfYTSnkJgG1OdS9mFZHTnblcvYV/cdj2/41
imienrVtyiMRzgBDfAJWLw/pZpH5ZRR5Ib37+9FqnBpqvpNTaaR+x+EI6ctT65F6
lE7aGZv2f0mlykKW9toW+lR95Liq+9uw/wW9XgVX3u4R6bAcwIoP0bP/9z8dI/sL
rwORLpKseA7m31pmLYADQ8/6eLcx/hPYG/ooGn8a8a8D2touKAFKa3tAzvAcEK0W
2NqUY9jQTzRxslgKESXzl6bTZwOvygoS0eKshwIDAQABAoIBAFbGvwr2ypUEDZp6
btNp4QiL+gbfPxpQ6MQW75ci6qG4nentfIr1D0WrfuKhmB4DhrGG7UE4rPtT0yHQ
XoyArNdfCcMkvmMJrZvGzh5oXg10X9efxXl6Tx2rUGogX9xn+qNdX9AefbwVgqih
FmgTQYvB9k0BSgGJPGHorfm856DEgcP9F+btcSGhxjMWWTBo9DubW01sTzB6eVh8
dJ5O4xDChbTcN/wzz7BGSbwPYUL7jJm1g7Au7/v1oc9rS5ICZDK/+yFvajKVVYmR
9FX+EhOn3CZiZpz9i9vRl4BaQj08H7P9/ppTRrpAvAu3K+OBPnxhk5vzwhxdNMaZ
mcHSeEECgYEA6Es0eaDOormhkLygXldYURhEVNn540pY8XuSxWJT6Xvgpw23MCTe
W89yPTqilFmqn61XplBw8fsjI8zagJKjRePMNxMMOWagrkM5Ra6UIeVkDSnYAjg2
iZEemCEK3Znnilgrs/xE3eLKY942cYUnTCmM5wjoTXTdbJVxTLANMHkCgYEAz+Og
DZYVZLoh72HjW7P5sBwRB4MHHGEpVHY3Nv9c15axHkKcF7yipOKkDNr9eKNqTuK7
vNEd8rK5xJwDOcseiHw1OaZvN2ylCK5khlYCeKKZR+CC5g9uI77iiErmS293710F
bE0qVpCiKeYLfQvCKpTSnwFIPKWP/P/2r6+JhP8CgYEA3+S0pFKhN+iR2A5mx+eK
IUexfNNH7pIXXlGL6qHWXSHgK0OmAEpY48bzxh5A25n9QcByzcOUyTcU7ImjRO+R
XWityZubWawYTT5P8mDNOEp//8wH/kOuFTKOeAHJFkQkDozjOqx4uCJyXMWuVgZQ
FTGrNHe6aAWu8dysgozheYkCgYEAzBHpUozqkUc5+q//rExepWbXvKT9vPkPxi6J
gv0tuN/fHBOPAewVSICGg2wQ93SK7ccafX5VxKL3RC3V6MygO2CaKu5bLHAFDSGL
4mbZ49wPJUSZmla5SnOeEiZcLN7OP/TzVt3k2rb9yN1el7CMOJqAqr9qdsYbM0Lc
mJdbCmcCgYAwvs+IJGmGGy3TGGFUU52bKeHV8o1bNEqXCt6apOq0xKrl720ajJ7v
98C0thV8om4JH7ifsHU1E8OWYy7FqSapo6kwVI+yzcOxQsuPCpc6j3EnpmW7B4aT
n+lCqlxXqK6y+O6kzqL4uUFJY8ccju3IDXeQxkJjoRXQWHJyWmHFIg==
-----END RSA PRIVATE KEY-----
Step 3: Open Cloud Source Repositories
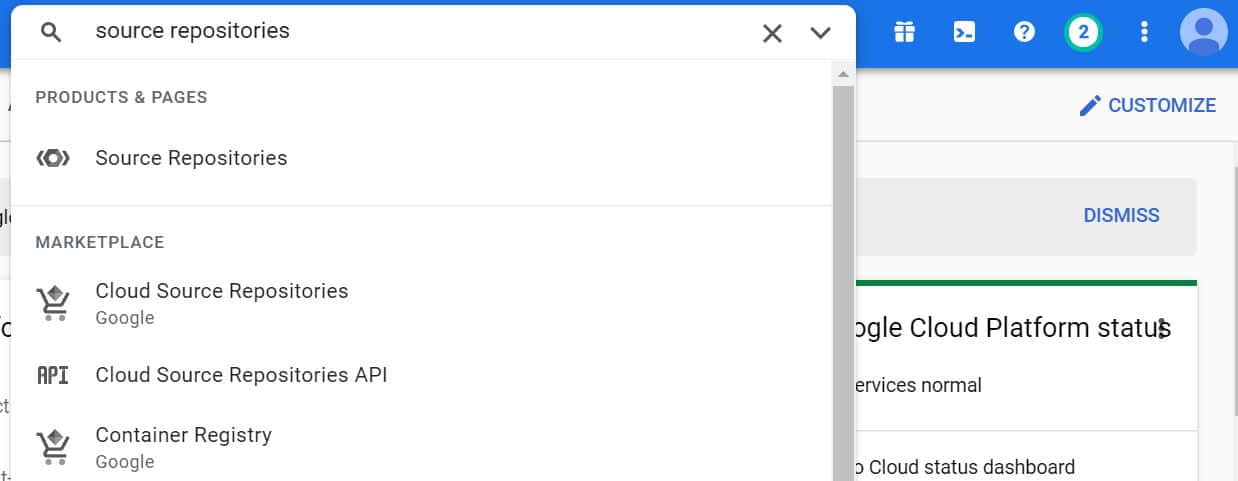
Once the key pair is generated, you can open Cloud Source Repositories either by scrolling down to Source Repositories option on Dashboard or by searching Source Repositories from the Search Box as shown below.
Step 4: Register Public Key in Google Cloud
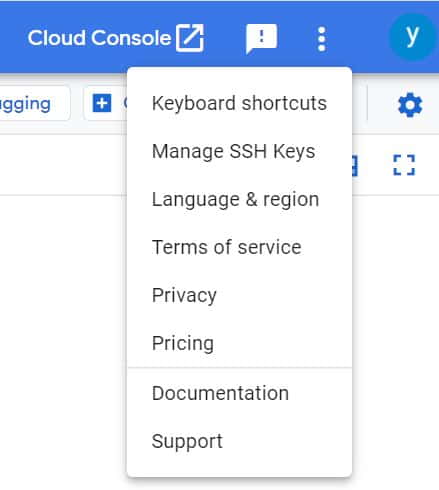
In the Cloud Source Repositories, you will see 3 vertical dots on top right corner. If you Click that you will see a list of options like below. You need click on Manage SSH Keys option.
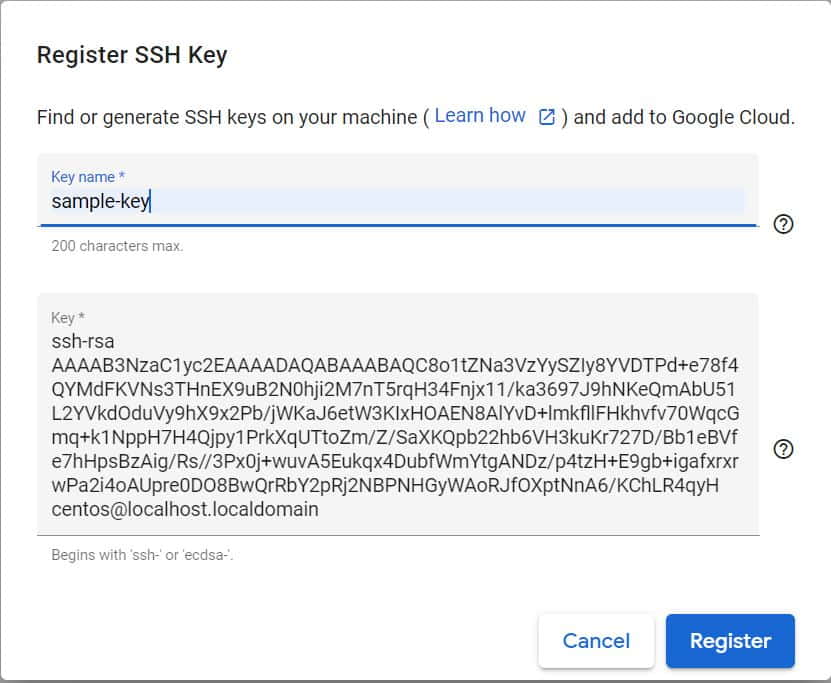
Once you clicked on Manage SSH Keys, you will be able to see below screen where you need to click on Register SSH Key.

Here you need to provide a unique Key Name and paste the public key from id_rsa.pub that you generated in the previous step. Then Click on Register.
If everything goes well, then the key will get registered successfully and it will look like below.

Step 5: Authenticate through Private Key
Now it is time to test your key by authenticating through private key that you have generated in earlier step. You will find your private key under /home/centos/.ssh/id_rsa path. We have a repo sample-project-repo1 created in Google Cloud which we will clone first in our local git repository using git clone command as shown below.
[centos@localhost ~]$ git clone ssh://cyberithub@gmail.com@source.developers.google.com:2022/p/sample-project-308612/r/sample-project-repo1
Cloning into 'sample-project-repo1'...
The authenticity of host '[source.developers.google.com]:2022 ([74.125.68.82]:2022)' can't be established.
ECDSA key fingerprint is SHA256:AGvEpqYNMqsRNIviwyk4J4HM0lEylomDBKOWZsBn434.
ECDSA key fingerprint is MD5:74:84:6c:08:d5:b5:54:68:19:da:2a:8e:4c:5b:d3:0d.
Are you sure you want to continue connecting (yes/no)? yes
Warning: Permanently added '[source.developers.google.com]:2022,[74.125.68.82]:2022' (ECDSA) to the list of known hosts.
warning: remote HEAD refers to nonexistent ref, unable to checkout.
Once the repo is cloned you can see a directory sample-project-repo1 created below. You need to go inside the directory using cd sample-project-repo1 command. Since our repo was empty so you won't able to see any files here if you try to list it using ls -lrt command.
[centos@localhost ~]$ ls -lrt
total 0
drwxrwxr-x 3 centos centos 18 Apr 2 06:34 sample-project-repo1
[centos@localhost ~]$ cd sample-project-repo1/
[centos@localhost sample-project-repo1]$ ls -lrt
total 0
We will go ahead and try to create a sample cloudbuild.yaml file using touch cloudbuild.yaml command. Then add that in our current local git repo.
[centos@localhost sample-project-repo1]$ touch cloudbuild.yaml
[centos@localhost sample-project-repo1]$ git add .
Before committing anything it is required to setup your email ID and user name in the repo.
[centos@localhost sample-project-repo1]$ git config --global user.email "cyberithub@gmail.com"
[centos@localhost sample-project-repo1]$ git config --global user.name "John Wick"
Once everything is done, you can simply commit by giving any useful comment as shown below. More on git documentation.
[centos@localhost sample-project-repo1]$ git commit -m "Initial Commit"
[master (root-commit) 3d3c806] Initial Commit
1 file changed, 0 insertions(+), 0 deletions(-)
create mode 100644 cloudbuild.yaml
If the commit is successful then you can push your changes to your Cloud Repo using git push -u origin master command as shown below.
[centos@localhost sample-project-repo1]$ git push -u origin master
Counting objects: 3, done.
Writing objects: 100% (3/3), 223 bytes | 0 bytes/s, done.
Total 3 (delta 0), reused 0 (delta 0)
To ssh://cyberithub@gmail.com@source.developers.google.com:2022/p/sample-project-308612/r/sample-project-repo1
* [new branch] master -> master
Branch master set up to track remote branch master from origin.
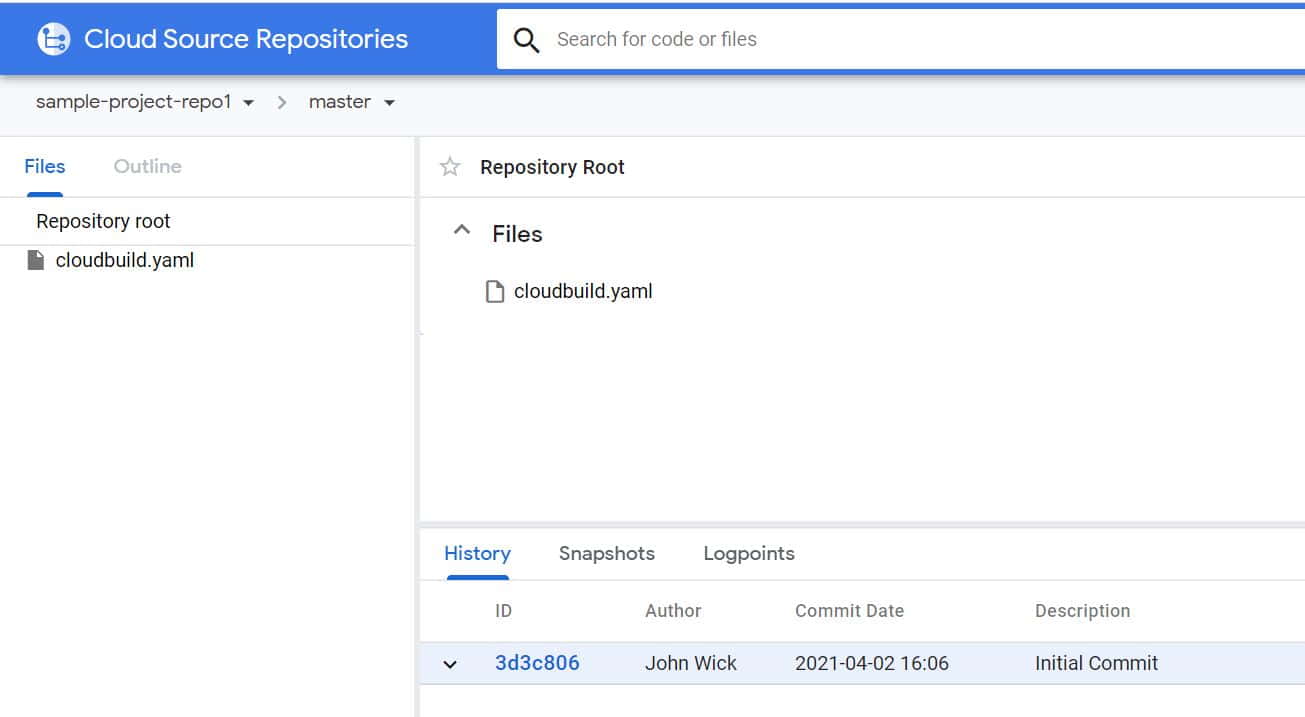
Now if you go to your Google Cloud Repositories and check the recently added file then it should like below. It confirms that you have successfully registered your ssh key and it is working fine.