
Table of Contents
In this article, we will see how to install and use timeshift on Ubuntu. TimeShift is a free and open source utility on linux designed to take snapshot of your system filesystems at regular intervals so that your system can be restored in the event of any failure by rolling back to the previous state. Unlike other system backup and restoring tools, timeshift uses a more efficient approach where instead of taking entire backup every time, it takes incremental snapshots so that it saves lot of time and storage space. It only takes full snapshot in the beginning. More on GitHub.
It is very much comparable to the system backup and restore application used on Windows and macOS systems. Using timeshift, system backup and restoration can be easily performed without disturbing any existing files or configuration. Timeshift is also available to be installed in almost all the linux distributions. Here we will see the steps to install and use timeshift on Ubuntu based systems.
Modes of Operation
TimeShift has basically two modes of operation - BTRFS and Rsync.
a) BTRFS
- When snapshot type is selected as BTRFS, then timeshift uses the linux B-Tree file system native capabilities to take snapshot.
- Since BTRFS snapshots work at the filesystem level, it is fast and space-efficient.
- It does not duplicate the data, instead it references the existing data blocks and only store the changes thereafter.
- If your system root partition is formatted with BTRFS then you can take the advantage of native snapshot capabilities.
b) Rsync
- Rsync is another mode of operation used by timeshift to create snapshots.
- It is used in the cases where system is not using the BTRFS file system.
- Rsync is widely employed by timeshift in almost all the linux distribution.
- It provides the flexibility to include or exclude specific files and directories.
- Unlike BTRFS snapshots, Rsync snapshots involve copying files to a backup location.
How to Install and Use TimeShift on Ubuntu
Also Read: How to Install Screen command on Ubuntu 22.04
Step 1: Prerequisites
a) You should have a Ubuntu based running system. In our case, we are using Ubuntu 22.04 LTS.
b) You must have sudo or root access to work with timeshift commands and application as it requires administrator privileges to run.
c) You would require apt or apt-get package manager to install updates and manage installation and removal of timeshift package.
Step 2: Update Your Server
If you have not updated your system packages from quite sometime then it is highly advisable to check for any available upgrades and install them by using sudo apt update && sudo apt upgrade command as shown below.
cyberithub@ubuntu:~$ sudo apt update && sudo apt upgrade
Step 3: Install TimeShift
In the next step, you can install timeshift from default Ubuntu repo by using sudo apt install timeshift command as shown below. This will download the package from repository and install in your system along with all dependencies which are currently not installed.
cyberithub@ubuntu:~$ sudo apt install timeshift
Step 4: List Devices
To list all devices in your linux system, run sudo timeshift --list-devices command as shown below.
cyberithub@ubuntu:~$ sudo timeshift --list-devices

Devices with Linux file systems:

Num     Device         Size  Type  Label
------------------------------------------------------------------------------
0    >  /dev/sda3  106.8 GB  ext4
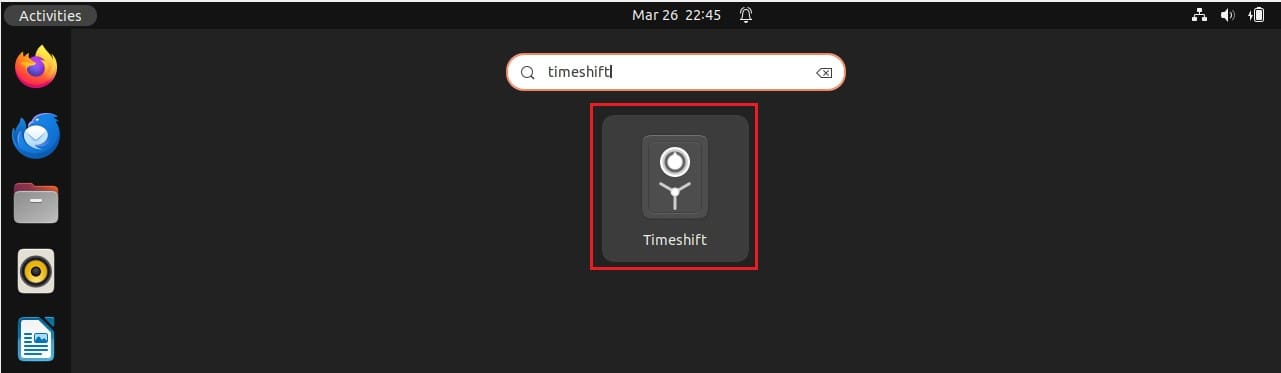
Step 5: Launch from GUI
To launch timeshift, go to Desktop and search timeshift in the search box as shown below. Once it appears, tap on it to open.
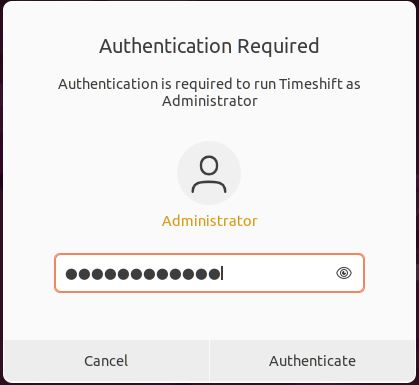
If you are opening it from non-root account then it will ask for administrator password for authentication as you can see below.
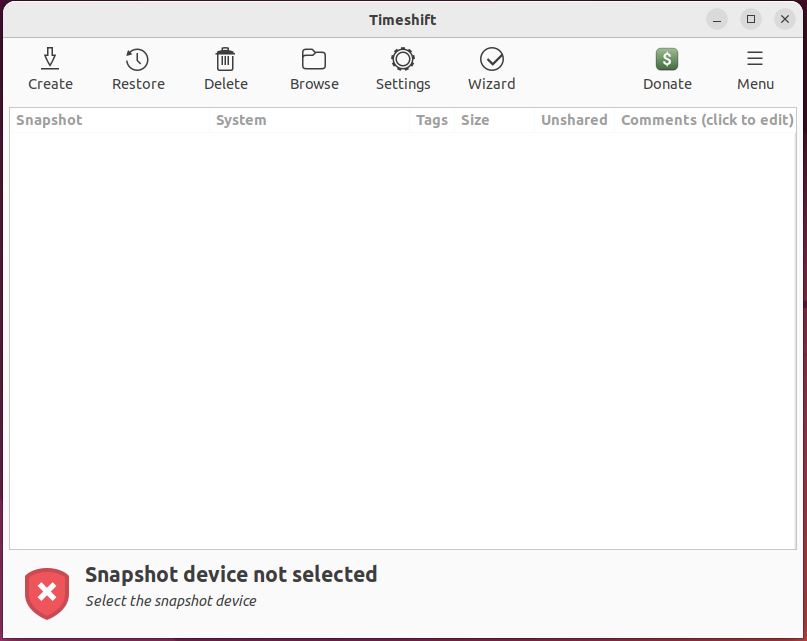
After successful authentication, timeshift main window should be launched as shown below.
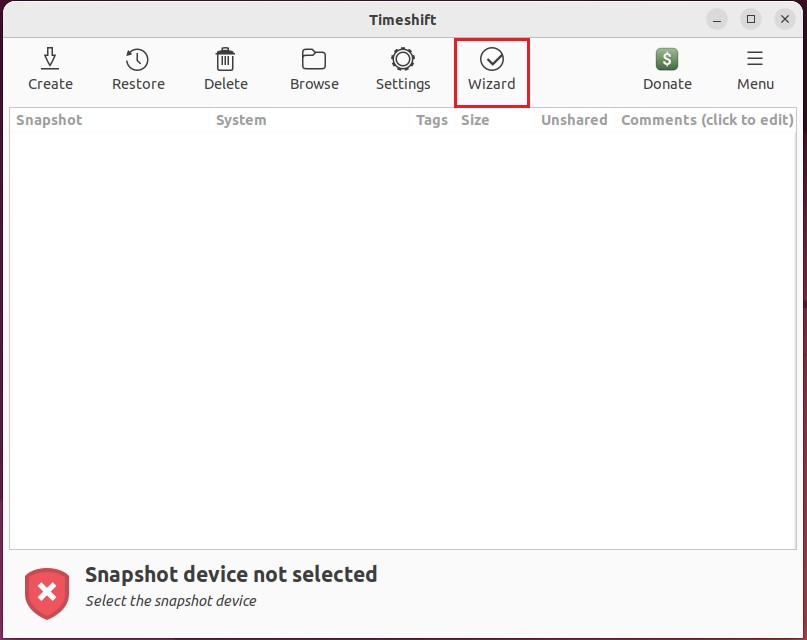
Step 6: Setup Wizard
To select snapshot type, go to Wizard as highlighted below.
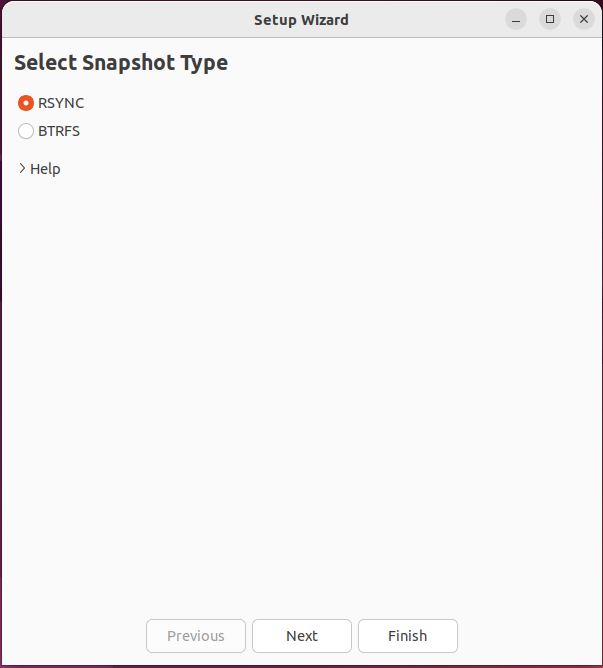
Then select snapshot type from below and then click on Finish.
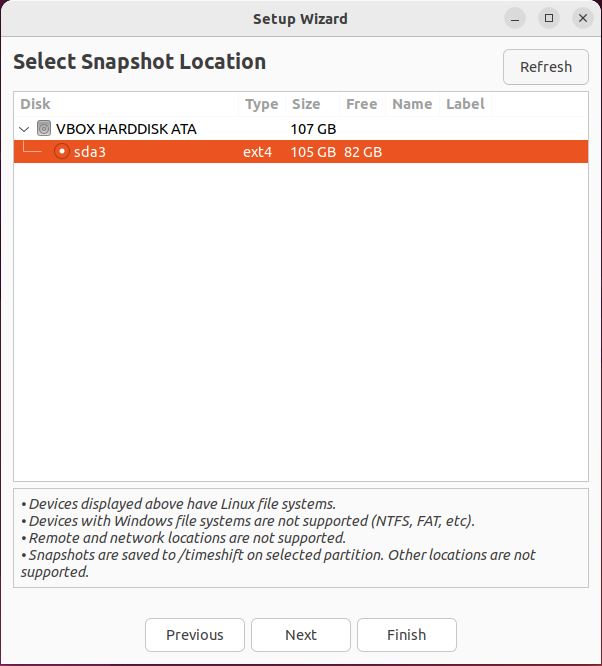
Then select snapshot location from below list of devices. Since in our case, its just one device so we will select that only and then click on Next.
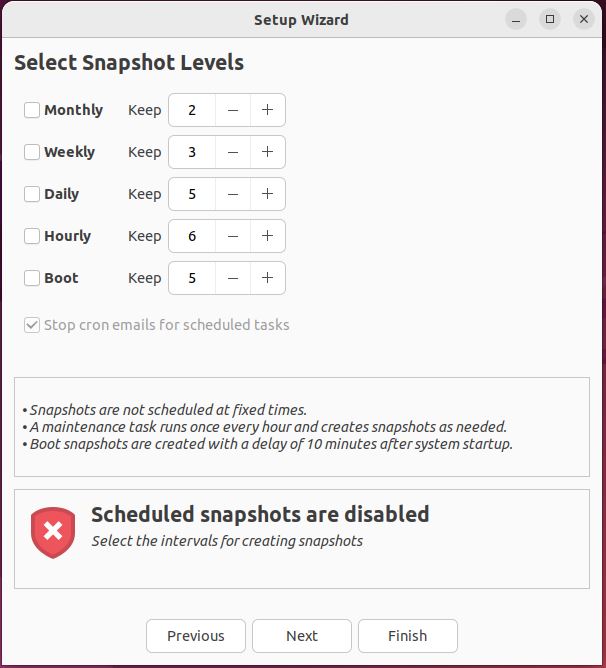
Then the next step is to schedule snapshot. You can schedule to take snapshot on monthly, weekly, daily, hourly basis. You can even create a boot snapshot. For now we will proceed without enabling the schedule and click on Next.
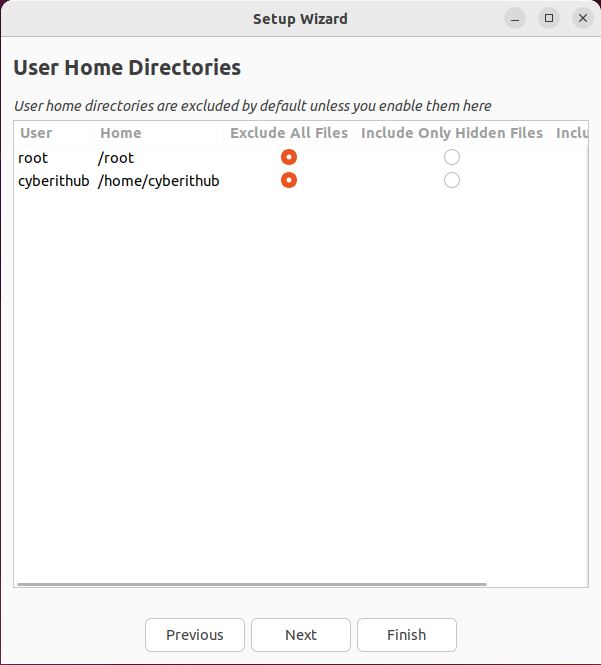
By default, all files and directories from root and local user account location are excluded from snapshot. In case needed, you can always include them in the snapshot. For the moment, we will just proceed with default selection and click on Next.
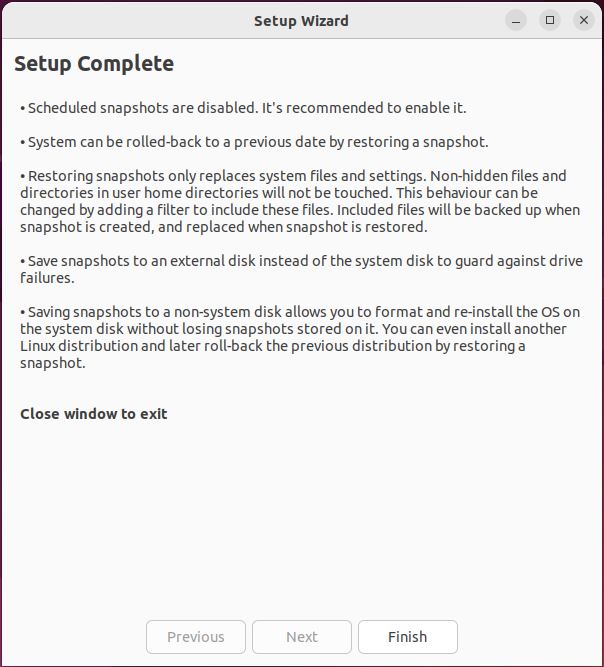
Finally, you will see setup completion message below. You can click on Finish to exit window.
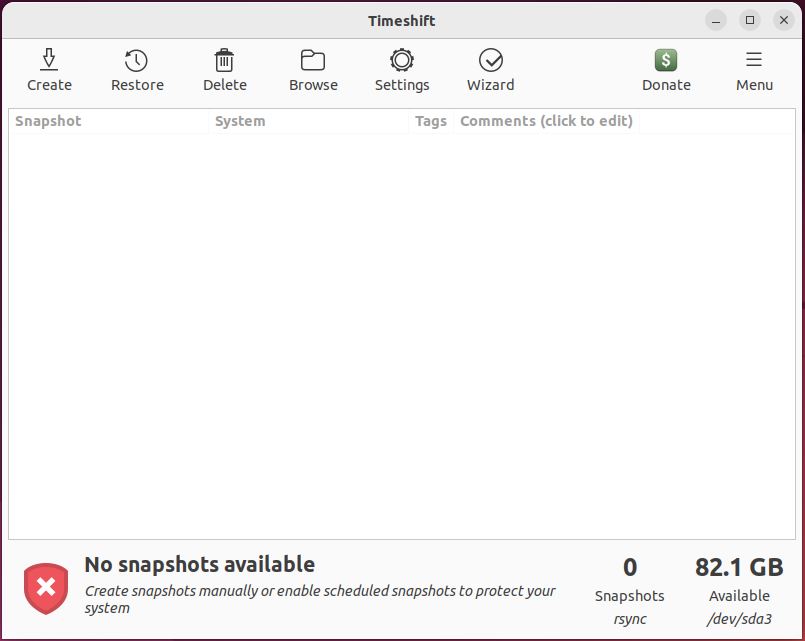
After setup completion, you should be able to see something like below. Now you are ready to take the first snapshot.
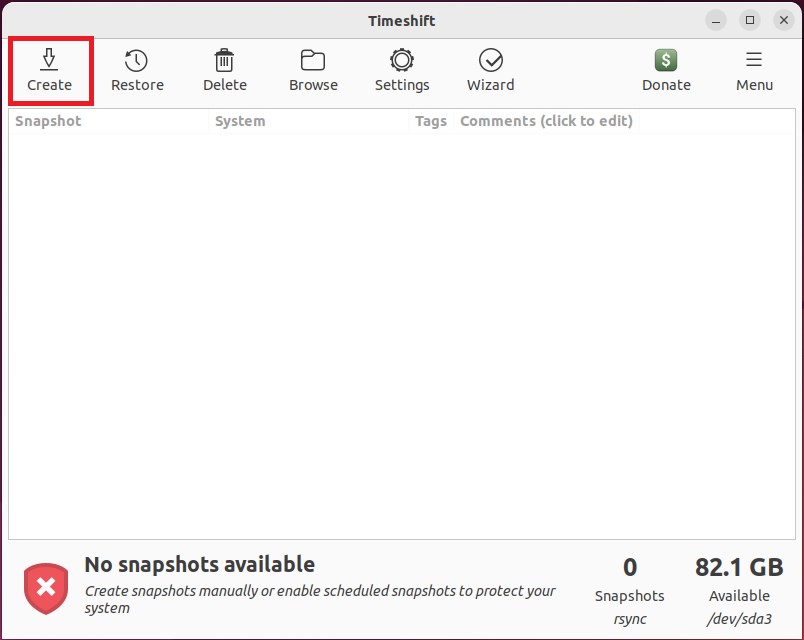
Step 7: Create Snapshot
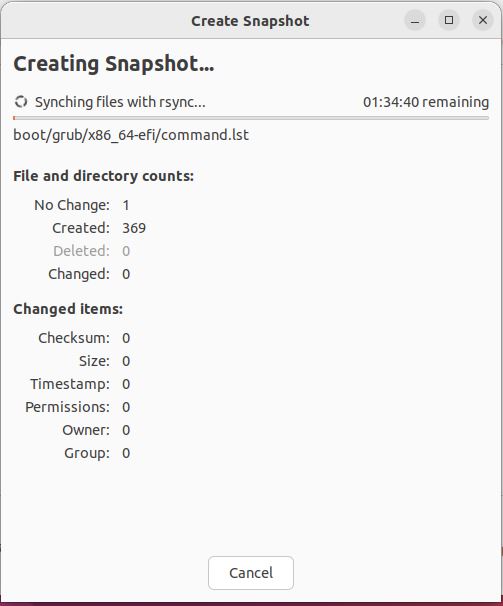
To create snapshot, click on Create as shown below.
Snapshot creation should start progressing with some estimated time given as shown below. The time for creating snapshot would depend on several factors such as snapshot type, data size, system performance, storage medium etc . For example, in our case it is going to take around 1 hr and 34 mins to complete. Wait till it gets completed.
Once snapshot is created, it should show in the main window list as shown below.
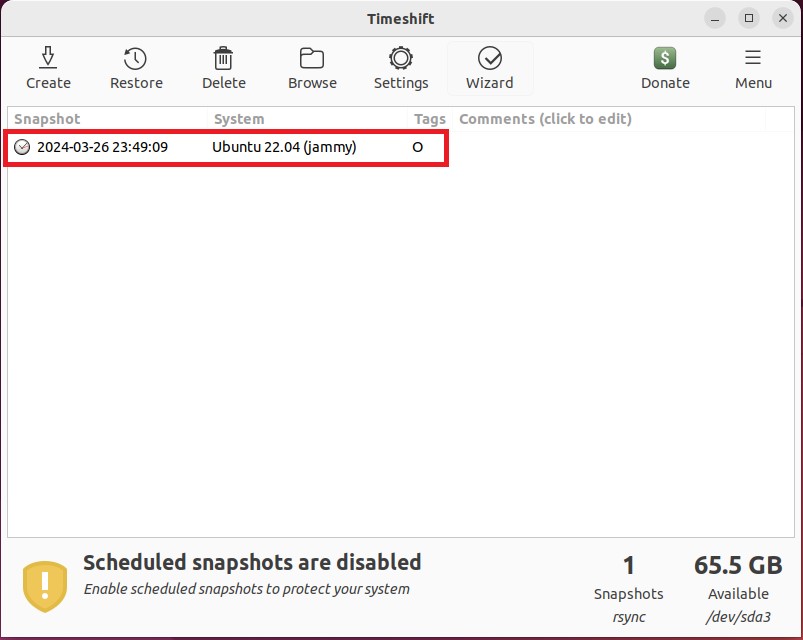
You can also check the snapshot created from terminal by using sudo timeshift --list command as shown below.
cyberithub@ubuntu:~$ sudo timeshift --list

/dev/sda3 is mounted at: /run/timeshift/backup, options: rw,relatime,errors=remount-ro

Device : /dev/sda3
UUID : ac65fc28-4556-4066-83af-1e50e953068a
Path : /run/timeshift/backup
Mode : RSYNC
Status : OK
1 snapshots, 65.5 GB free

Num    Name                 Tags  Description
------------------------------------------------------------------------------
0   >  2024-03-26_23-49-09  O
Step 8: Schedule Snapshots
Now let's come back to scheduling snapshots which we left out during setup. To schedule snapshots, go to Settings.

Go to Schedule and select snapshot levels. For example, here we are selecting weekly snapshot. You will see that now schedule snapshots are enabled. Click on OK to finish.

Step 9: Restore Snapshot
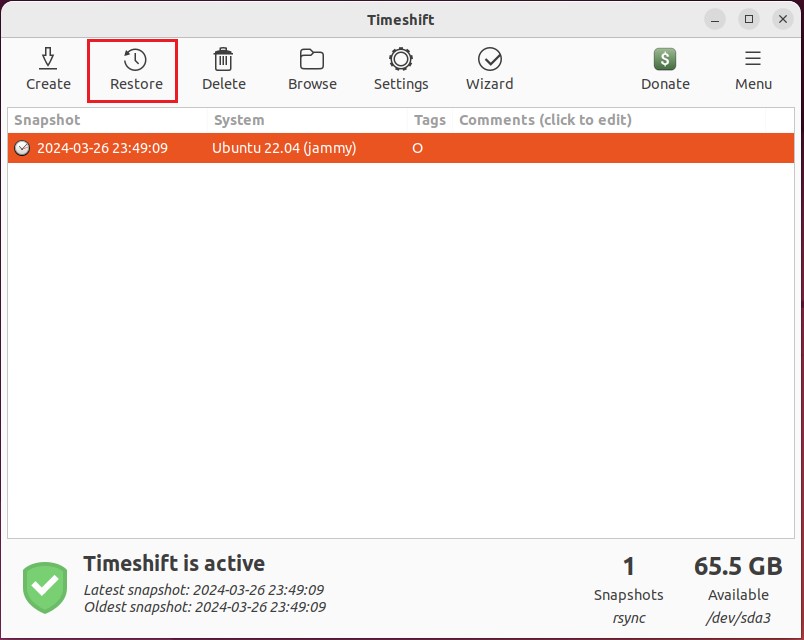
When it comes to restoring snapshot, all you need to do is to select snapshot from main window and then click on Restore as highlighted below.
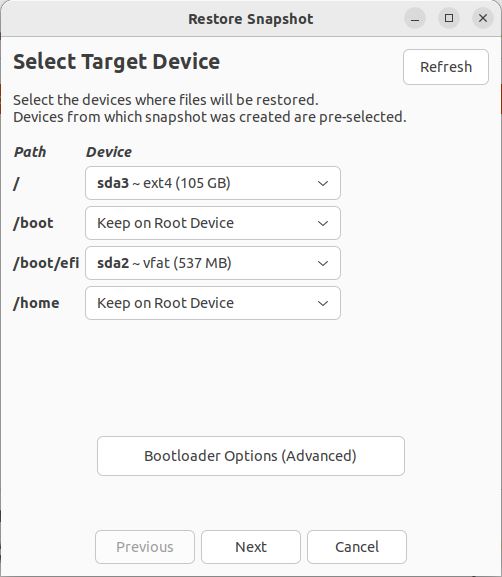
Select the target device where files will be restored. You can select the appropriate device and then click on Next.
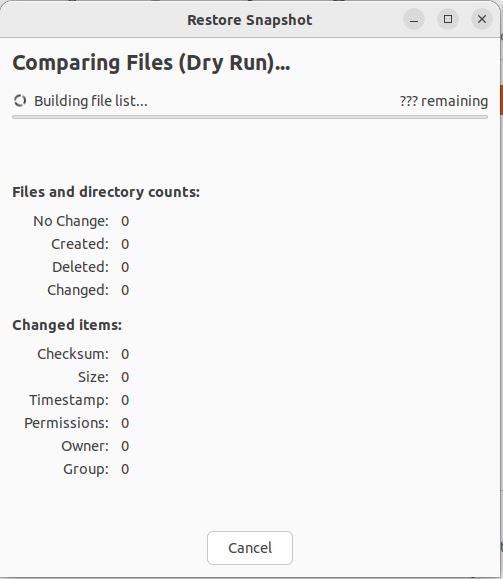
You will notice that the restoring activity is started and currently in progress. Wait till it finishes out.
If you are restoring backups from running system then it requires a reboot to complete the restore process.
Step 10: Delete a Snapshot
You can also delete a snapshot, either from GUI or from terminal. From GUI, you just have to select the snapshot you would like to delete and then click on Delete. But my personal favorite is from terminal. To delete a snapshot 2024-03-26_23-49-09, run sudo timeshift --delete --snapshot 2024-03-26_23-49-09 command as shown below.
cyberithub@ubuntu:~$ sudo timeshift --delete --snapshot 2024-03-26_23-49-09

/dev/sda3 is mounted at: /run/timeshift/backup, options: rw,relatime,errors=remount-ro

------------------------------------------------------------------------------
Removing '2024-03-26_23-49-09'...
Removed '2024-03-26_23-49-09'
------------------------------------------------------------------------------
Step 11: Uninstall TimeShift
If you don't need timeshift anymore in your system then you can also easily remove it by using sudo apt remove timeshift command as shown below.
cyberithub@ubuntu:~$ sudo apt remove timeshift
Reading package lists... Done
Building dependency tree... Done
Reading state information... Done
The following packages will be REMOVED:
timeshift
0 upgraded, 0 newly installed, 1 to remove and 0 not upgraded.
After this operation, 3,312 kB disk space will be freed.
Do you want to continue? [Y/n] Y
(Reading database ... 244931 files and directories currently installed.)
Removing timeshift (21.09.1-1) ...
Processing triggers for hicolor-icon-theme (0.17-2) ...
Processing triggers for gnome-menus (3.36.0-1ubuntu3) ...
Processing triggers for man-db (2.10.2-1) ...
Processing triggers for mailcap (3.70+nmu1ubuntu1) ...
Processing triggers for desktop-file-utils (0.26-1ubuntu3) ...