Table of Contents
In this article, we will see the deployment of serverless ci/cd workflow in google cloud using 8 practical steps. If you are Google Cloud DevOps Professional then you might be aware of the tools and services which can be used for CI/CD Serverless deployment but if you are beginner or new to this technology then you have come to the right place. Here we will see the CI/CD workflow Steps from scratch with the help of a sample deployment.
What is Serverless Deployment
It is a kind of deployment which does not require creation of Server or virtual machine and its resources. It uses microservices architecture kind of environment in which multiple deployments can run as a separate process with all the required resources like CPU and memory and finally it gets terminated once finished execution.
Deploy Serverless CI/CD Workflow in Google Cloud
Also Read: Step by Step Guide to Create a Bucket in Google Cloud Storage
Step 1: Prerequisites
a) You should have a valid Google Email ID and Password.
b) You should have access to create files and objects in Google Cloud.
c) You should have access to a Project where you want to deploy the workflow.
d) You should have suitable IAM permission to use Cloud Build, Source Repositories and GCR Services.
e) Cloud Build and Cloud Run API must be enabled.
f) Cloud Run must be Enabled in Cloud Build.
Step 2: Create Repository in GSR
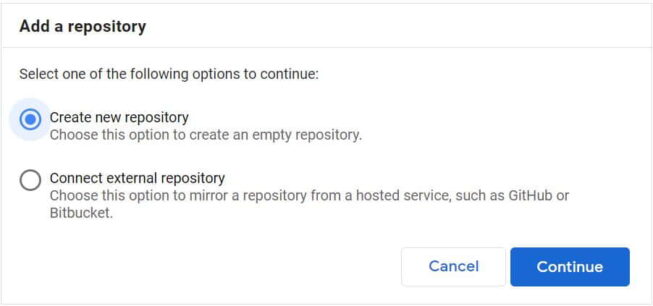
In the first step, you need to either create a repository to keep all your source code files or connect to an external repository like Github, Bitbucket etc to mirror the repository files.
NOTE:
Step 3: Create Trigger Using Cloud Build
Next step is to create a trigger in Cloud Build so that every commit in source repository triggers an automatic deployment. Trigger can be based on Push or Pull request. We will use the Push based trigger so that every push done by a developer triggers a deployment. There are other options available as well which you can check below.

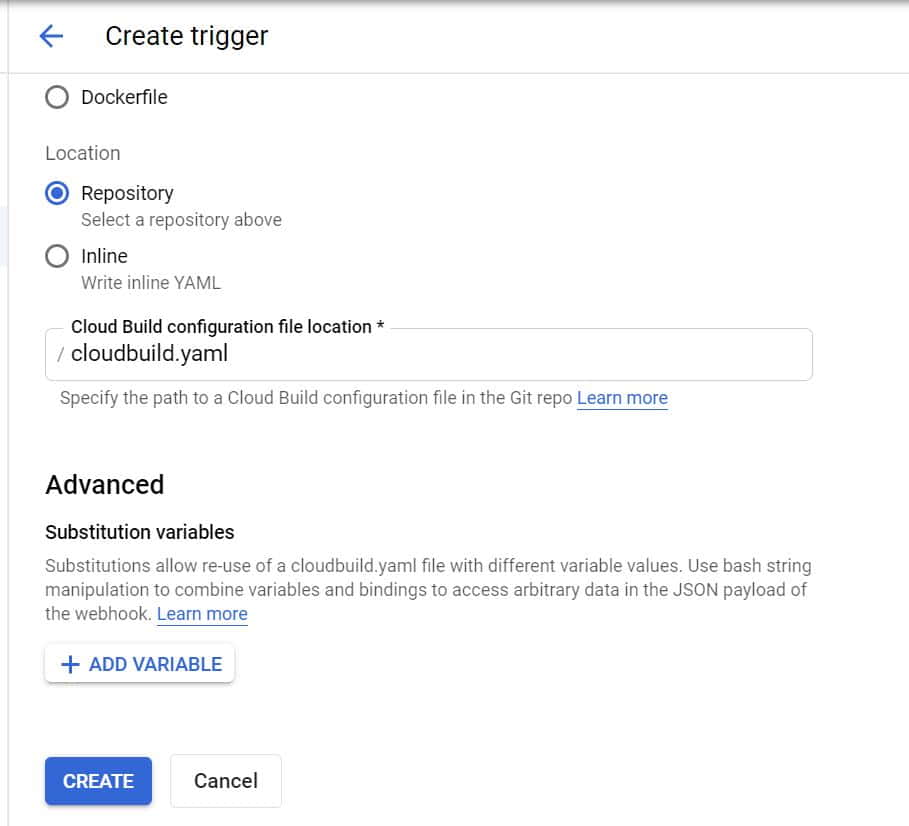
If you further come down you will get an option to select Cloud Build Configuration file. Here either you can use Dockerfile or YAML file to write your build script. We will use default cloudbuild.yaml file for our build script.
Step 4: Create a Docker File
Next is to create all the required files. In that, first one is to write a Dockerfile to build the image. Here we are using python:3.6-slim-buster as base image. Work directory is defined to be /app. Then we need to copy all the files and install all the requirements as mentioned in requirements.txt. Finally run the CMD exec gunicorn with all the necessary arguments. More on docker official website.
NOTE:
sample-project-308612 project. You can also create a project or use any available project for your workflow deployment.cyberithub@cloudshell:~/sample-project-repo (sample-project-308612)$ vi Dockerfile FROM python:3.6-slim-buster WORKDIR /app COPY . . RUN pip install -r requirements.txt CMD exec gunicorn --bind :$PORT --workers 1 --threads 8 --timeout 0 app:app
Step 5: Create requirements.txt file
If you have a certain dependency then you are going to need another file called requirements.txt. In this file you need to mention all the required dependency along with its correct version. For example, gunicorn version should be 20.0.4.
cyberithub@cloudshell:~/sample-project-repo (sample-project-308612)$ vi requirements.txt
pandas==1.1.1
gunicorn==20.0.4
flask==1.1.2
flask-api==2.0
Step 6: Unit Testing with pytest
If you also have Unit testing included in the workflow then you can do that as well. Here we are using python unit testing to test a sample logic as you can see below.
cyberithub@cloudshell:~/sample-project-repo (sample-project-308612)$ vi test.py
import math

def test_sqrt():
   num = 25
   assert math.sqrt(num) == 5

def testsquare():
   num = 7
   assert 7*7 == 49

def testequality():
   assert 10 == 10
Step 7: Create Your Cloud Build Script
Now we need to write our Cloud Build Script with all the steps that needs to followed during the deployment. Below are the steps that needs to added in workflow script.
- Clone: First step is to clone all the files from repo.
- Unit Testing: This step will perform Unit Testing using python library and pytest command.
- Build: This step is to finally build the docker image.
- Push: This step will push the docker image into the GCR(Google Container Registry)
- Deploy: Finally, in this step docker image will be deployed to Cloud Run as a service.
cyberithub@cloudshell:~/sample-project-repo (sample-project-308612)$ vi cloudbuild.yaml
steps:
- name: 'gcr.io/cloud-builders/git'
  args: ['clone','https://source.developers.google.com/p/${_PROJECT}/r/${_REPO_NAME}']

- name: 'docker.io/library/python:3.7'
  id: test
  entrypoint: /bin/sh
  args: ['-c','pip install pytest && pip install -r requirements.txt && pytest test.py']

- name: 'gcr.io/cloud-builders/docker'
  args: ['build','-t','gcr.io/${_PROJECT}/${_CONTAINERNAME}/${_VERSION}','.']
- name: 'gcr.io/cloud-builders/docker'
  args: ['push','gcr.io/${_PROJECT}/${_CONTAINERNAME}/${_VERSION}']

- name: 'gcr.io/google.com/cloudsdktool/cloud-sdk'
  entrypoint: gcloud
  args: ['run','deploy','test-service','--image','gcr.io/${_PROJECT}/${_CONTAINERNAME}/${_VERSION}','--region','us-east1','--platform','managed']
images:
- 'gcr.io/${_PROJECT}/${_CONTAINERNAME}/${_VERSION}'

substitutions:
 _PROJECT: sample-project-308612
 _ZONE: us-east1-b
 _REPO_NAME: sample-project-repo
 _CONTAINERNAME: sample-container
 _VERSION: '1.1'
Step 8: Serverless Deployment
After creating all the relevant files, it would look like below. First we need to clone our repo using git clone command and then go to locally created directory using cd sample-project-repo command. Here we have kept all our project related files.
cyberithub@cloudshell:~ (sample-project-308612)$ cd sample-project-repo/
cyberithub@cloudshell:~/sample-project-repo (sample-project-308612)$ ls
cloudbuild.yaml  Dockerfile  requirements.txt  test.py
Once we have our project files created, we need to add all these files and commit our changes. As usual for adding all the files in the current location you need to use git add . command and then commit all the changes using git commit command. Finally push all the changes to your repo dev branch using git push -u origin dev command.
NOTE:
dev branch which we created before hand. You can also create a branch if you like where you want to commit all your codes or you can simply use default master branch.cyberithub@cloudshell:~/sample-project-repo (sample-project-308612)$ git add . cyberithub@cloudshell:~/sample-project-repo (sample-project-308612)$ git commit -m "Initial Commit" [dev 4322916] Initial Commit 1 file changed, 1 insertion(+), 1 deletion(-) cyberithub@cloudshell:~/sample-project-repo (sample-project-308612)$ git push -u origin dev Enumerating objects: 5, done. Counting objects: 100% (5/5), done. Delta compression using up to 4 threads Compressing objects: 100% (3/3), done. Writing objects: 100% (3/3), 299 bytes | 299.00 KiB/s, done. Total 3 (delta 1), reused 0 (delta 0) remote: Resolving deltas: 100% (1/1) To https://source.developers.google.com/p/sample-project-308612/r/sample-project-repo 8917e9c..4322916 dev -> dev Branch 'dev' set up to track remote branch 'dev' from 'origin'.
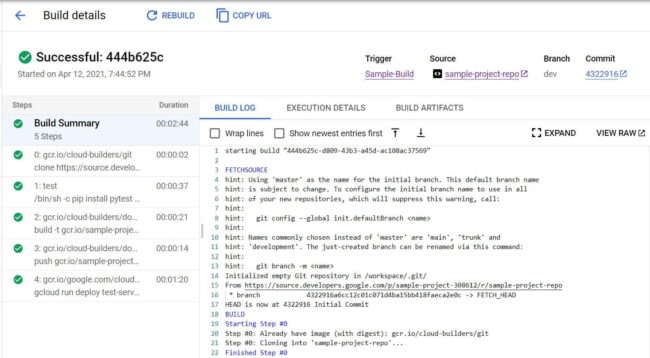
After successful build if you go to Cloud Build and check the Build history, then it should like below where all the build steps are successful.
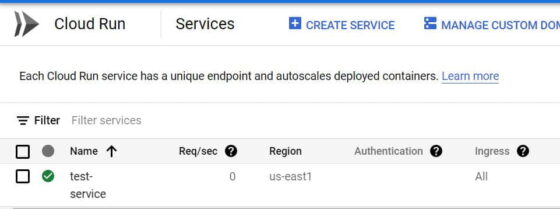
Now if you go to Cloud Run and check your deployed service then it should look like below where a service called test-service got created under us-east1 region. This confirms our successful serverless deployment.