
Table of Contents
In this article, I will take you through the steps to Install and Configure an NFS Server on Ubuntu 18.04 Using 11 Easy Steps. Network File System(NFS) Server is a generally and easily used File Sharing Server over the network. You can configure this server with minimum overhead and a remote directory can be used as a local directory in the Client System. NFS File sharing also provides you an option of sharing same directory with multiple Servers and handle multiple client connections at a time. we will go through the steps to install and configure an NFS Server on Ubuntu 18.04 in below section.
Install and Configure an NFS Server on Ubuntu 18.04
Also Read: Popular Apache Kafka Architecture Explained Using 4 Basic Components
Step 1: Prerequisites
a) You need to have a running Ubuntu 18.04 System.
b) You should have Ubuntu/RHEL/CentOS based Client System.
c) You should have root or sudo access to run all privileged commands.
d) You should have apt get tool available in your Ubuntu Server. Check 20 Useful APT GET Examples on Ubuntu 18.04 to know more about this tool.
Step 2: Update Your System
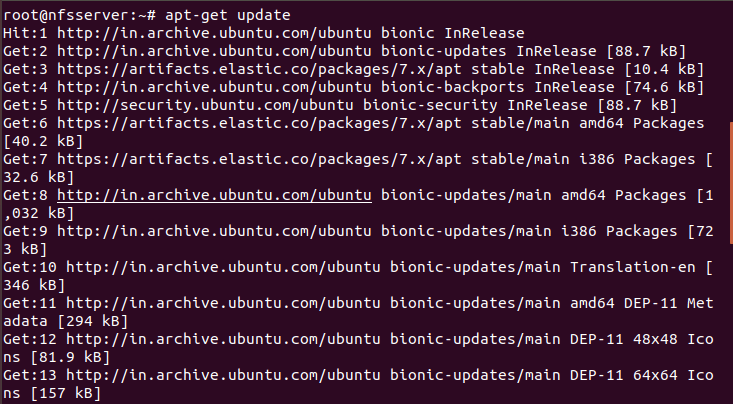
Many times you might have observed that older version of installed libraries and packages create some issue with the installation of any new packages. Hence it is always recommended to first update your Ubuntu Server with latest release versions using apt-get update command as shown below.
NOTE:
root user to run all the below commands.You can use any user with sudo access to run all these commands. For more information Please check Step by Step: How to Add User to Sudoers to provide sudo access to the User.Step 3: Install NFS Server
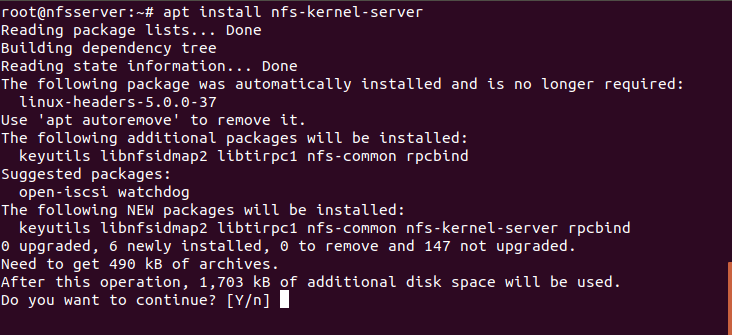
Once the Server is successfully updated, you need to install the NFS Server by using apt install nfs-kernel-server command as shown below. This command will find and install all the dependent packages required by nfs-kernel-server package. New installed packages include nfs-common which will install NFS Client tool and rpcbind package which is required by NFS Server to get the client requests over the network.
Step 4: Create NFS Directory
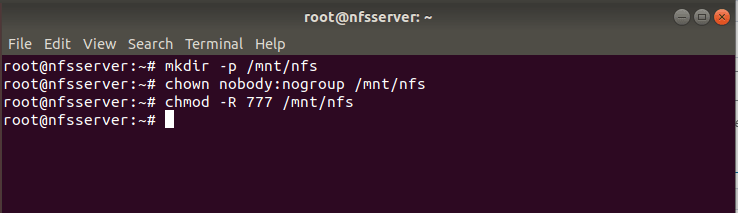
Then you need to create a directory which can be used for NFS Sharing. Here we are creating a directory /mnt/nfs using mkdir -p /mnt/nfs command as shown below. Then we are changing the ownership of /mnt/nfs directory to user nobody and group nogroup using chown nobody:nogroup /mnt/nfs command. If you want provide access to the Client to write in the shared directory then you need to change the permission of /mnt/nfs directory to 777 using chmod -R 777 /mnt/nfs command.
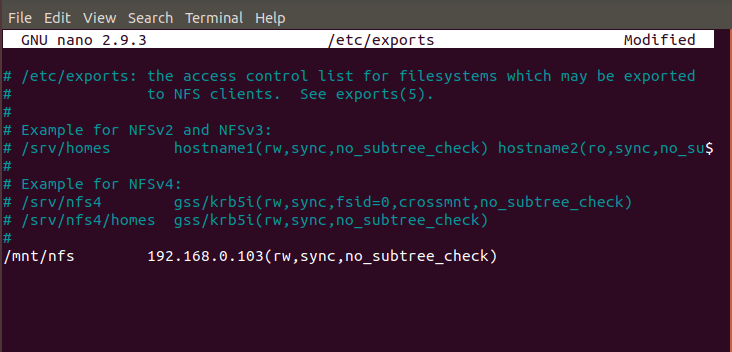
Step 5: Edit /etc/exports File
Now we need to export the /mnt/nfs directory through /etc/exports file. Here we are using our favorite nano editor to edit the /etc/exports file and adding the entry as shown below. We are exporting /mnt/nfs directory to Client 192.168.0.103 with rw, sync and no_subtree_check permission.
- rw : Provide access to read and write file in the shared directory.
- sync : Server will only reply to requests once changes has been done. This is safer than
asyncoption. - no_subtree_check : this will disable the subtree checking.
Step 6: Export NFS Directory
Next step is to export the directory /mnt/nfs using exportfs -a command as shown below. Then restart the NFS Server using systemctl restart nfs-kernel-server command. Check exportfs Man Page to know more about different available options.

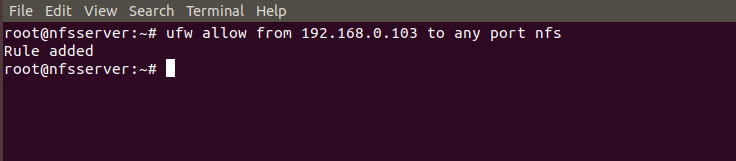
Step 7: Allow Access through Firewall
If you have firewall enabled in your Server then you need to allow NFS Port through the Firewall using below ufw command. This command will allow all nfs related requests from Client 192.168.0.103. You can also allow multiple clients through firewall using same ufw command. You can check Top 25 ufw firewall commands every Linux admin should know to find more about ufw command usage.
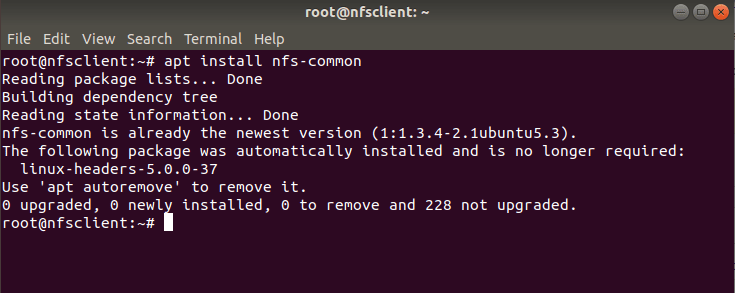
Step 8: Install NFS Client on Client-System
Once Server setup is completed, you need to come to the client system and install few packages to test the NFS Share. If you are using RHEL/CentOS Based System then you need not to install any packages but if you are using Ubuntu/Debian based client systems then you need to install nfs-common package using apt install nfs-common command as shown below.
Step 9: Create Mount Point on Client System
You need to first create a local mount point to mount the NFS shared files. Here we are creating a mount point /nfsclient in our Client System using mkdir -p /nfsclient command as shown below. Using -p option with mkdir command will check for any error and will create the parent directory as needed.
[root@localhost ~]# mkdir -p /nfsclient
Step 10: Mount NFS Shared Partition on Client System
Now we need to mount the NFS file system using mount -t nfs 192.168.0.108:/mnt/nfs /nfsclient command as shown below. This command will mount the NFS Shared directory /mnt/nfs under a local mount point /nfsclient so that all the remotely shared files acts like a local file. You can use df -h command to see NFS mounted partition size. If you want to permanently mount the partition then you can put a entry in /etc/fstab file. This will prevent the partition to get unmounted during a reboot of the System.
[root@localhost ~]# mount -t nfs 192.168.0.108:/mnt/nfs /nfsclient
[root@localhost ~]# df -h
Filesystem              Size Used  Avail Use% Mounted on
devtmpfs                1.4G  0    1.4G   0%    /dev
tmpfs                   1.4G  0    1.4G   0%   /dev/shm
tmpfs                   1.4G  8.6M 1.4G   1%    /run
tmpfs                   1.4G  0    1.4G   0%   /sys/fs/cgroup
/dev/mapper/centos-root 37G   11G   27G   28%     /
/dev/sda1               1014M 282M 733M   28%   /boot
tmpfs                   280M  0    280M   0%    /run/user/0
192.168.0.108:/mnt/nfs  20G   11G  7.8G   58%   /nfsclient
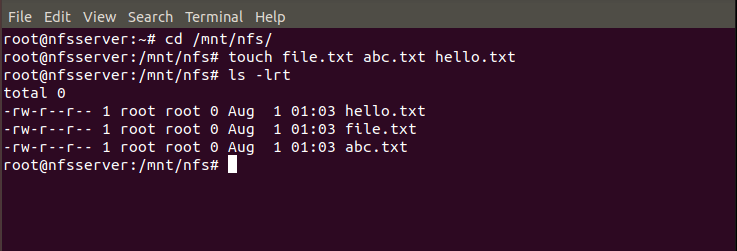
Step 11: Test Your NFS Connection
If you want to test your NFS connection then you can create few files under /mnt/nfs directory in your Server and check the availability of those files in the Client System and vice versa to confirm the NFS Share. Here we are creating file.txt, abc.txt and hello.txt files under /mnt/nfs directory as shown below.
Now if you go to your client node and check files under /nfsclient mount point then you will see all the files are visible here. This completes your NFS Server setup and configuration.
[root@localhost nfsclient]# pwd
/nfsclient
[root@localhost nfsclient]# ls -lrt
total 0
-rw-r--r-- 1 root root 0 Jul 31 2020 hello.txt
-rw-r--r-- 1 root root 0 Jul 31 2020 file.txt
-rw-r--r-- 1 root root 0 Jul 31 2020 abc.txt
Popular Recommendations:-
Tutorial: How to do Elasticsearch Backup and Restore (v7.5)
17 Useful Apache Kafka Examples on Linux (RedHat/CentOS 7/8)
How to Install Apache Zookeeper on Ubuntu 18.04
Top 20 Elasticsearch API Query for Developers Part – 1
How to Delete Elasticsearch Unassigned Shards in 4 Easy Steps
How to Delete Elasticsearch Red Status Indices in 3 Easy Steps
Understanding Kafka Console Producer and Consumer in 10 Easy Steps