Table of Contents
In this example, we will see how to create an application Insights resource to monitor your application. Application Insights is an excellent and very powerful Application Performance Management(APM) Azure service to monitor your Cloud as well as on-premise applications. It is currently supported on a wide variety of platforms like .NET, Java, Python, Nods.js etc. It can easily integrate with DevOps Process and can continuously help in detecting performance anomalies. More on Azure docs.
How to Create an Application Insights Resource to monitor your Application
Also Read: How to Create an App Service Plan in Azure{Step By Step Guide}
Step 1: Prerequisites
a) You should have a valid Azure account.
b) You should have access to create resource in Azure Portal.
c) In case you want to use any existing Resource Group, then you should already have the access of that Resource Group.
Step 2: Login to Azure Portal
You need to first go to URL https://portal.azure.com and login to Azure Portal using your valid user account and password.
Step 3: Open Application Insights
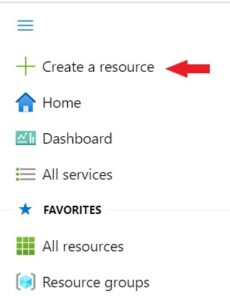
Once logged in, you will be taken to the Azure Portal Home Page from where you can go to Portal Menu on top left Corner of the Screen and Click on + Create a Resource as shown in below screenshot.
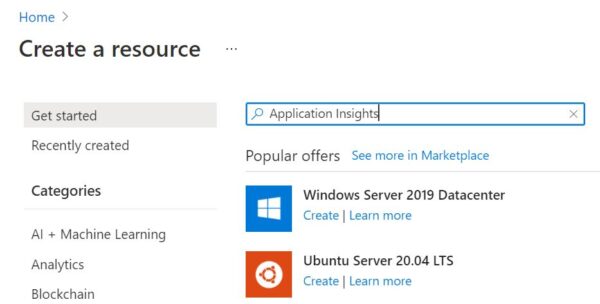
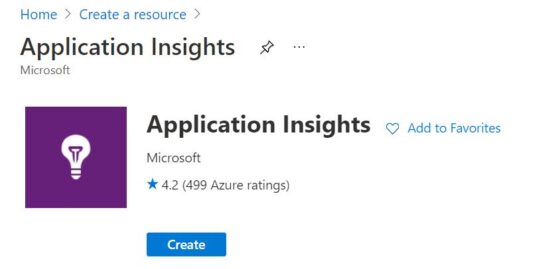
Then you need to search Application Insights in the Search Box. While searching you will get the service name in the drop down. You need to Click on that Service.
It will take you to the below page where you need to click on Create.
Step 4: Create an Application Insights Resource
Once clicked on Create, you will be taken to below Application Insights page which has few different sections that needs to be filled.
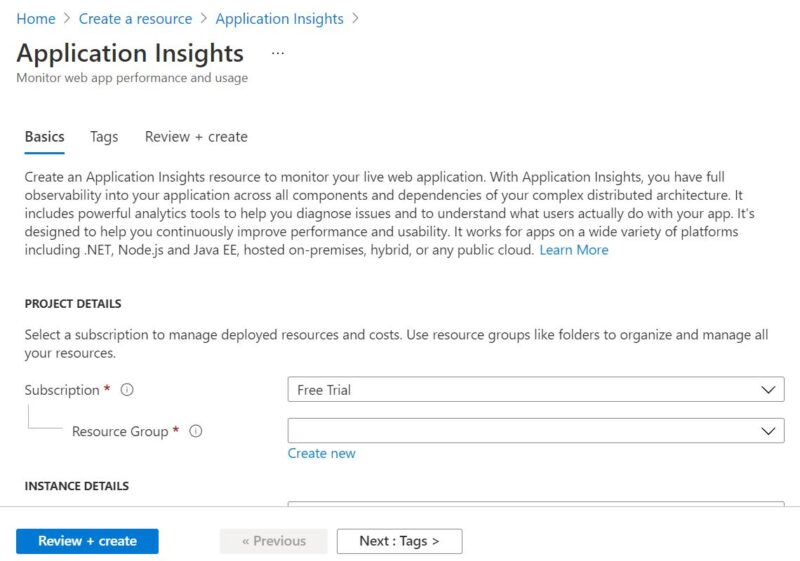
a) Basics
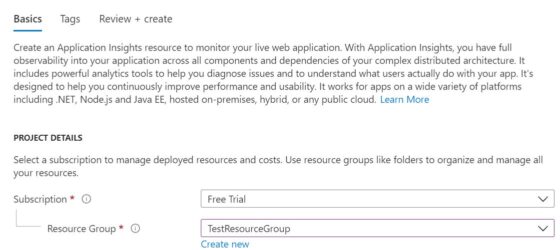
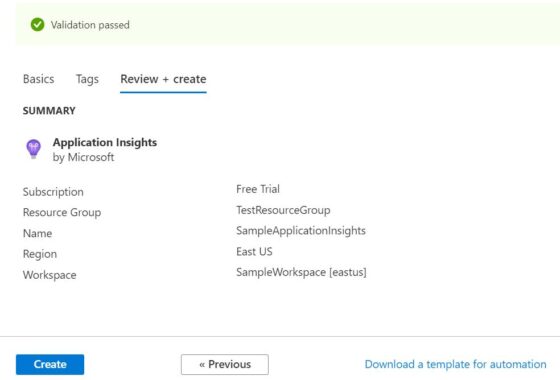
In the Basics section, first you need to provide the Project details where Subscription and Resource Group information needs to be given. In my case, I am selecting Free Trial as my Subscription and TestResourceGroup as my Resource Group.
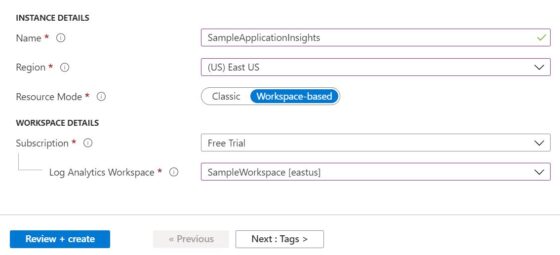
If you now scroll down a bit then you will be able to see Instance Details and Workspace details which also needs to be given. I am providing Instance name as SampleApplicationInsights and region as East US. I am also going to use Resource Mode as Workspace-based as you can see below. You can also choose classic mode depending on your requirement.
In workspace details, I will choose Free Trial Subscription and SampleWorkspace as my Log Analytics Workspace. You can check How to Create a Log Analytics Workspace in Azure{Step by Step} to create a new Workspace. Then Click on Next: Tags >
NOTE:
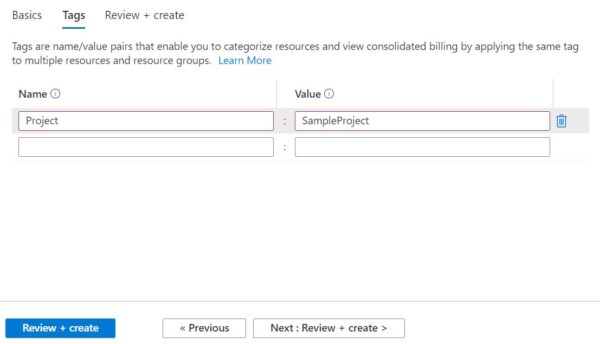
b) Tags
Tags are used for tracking and viewing the consolidated billing of multiple resources by applying same tag to those resources. I have been tagging my resources based on Project name so here also I will tag Application Insights resource based on my project. Since tag should be in name/value pairs so I will use Project as name and SampleProject as value. Then Click on Next: Review + create >
c) Review+Create
After completing all the validation checks, you should see below screen where you just need to Click on Create to start with the deployment.
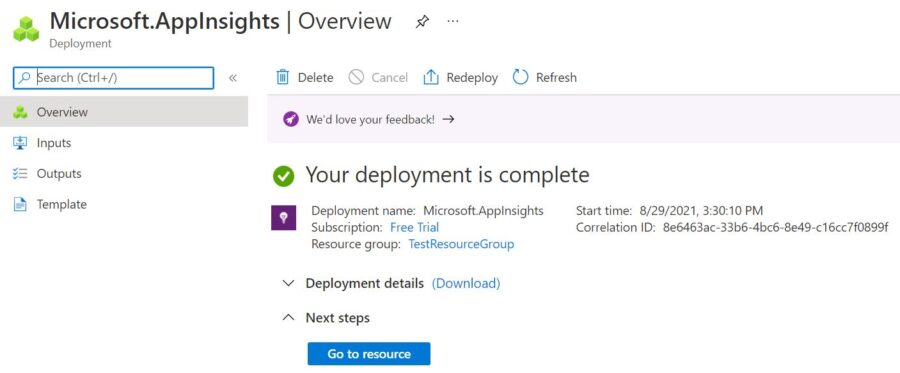
After waiting for few mins, you can see that deployment is completed now and it should look like below. To get more information about this deployment Click on Go to Resource.
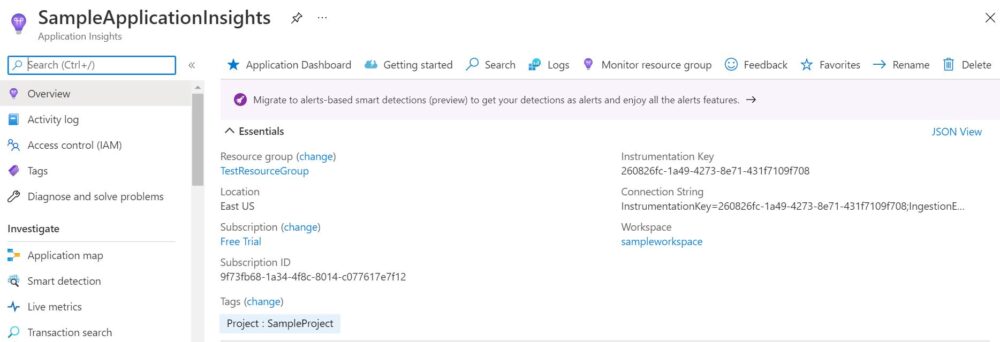
It will show complete information about SampleApplicationInsights Resource as you can see below.