Table of Contents
In this article, we will go through the steps to create a log analytics workspace in Azure. But before that Let's try to understand why we need to use Log Analytics Workspace ? If you are planning to use Application Insights to monitor your Azure resources then you also need to configure a logical storage to centrally store all the monitoring logs collected from multiple different sources. At the same time you might also want the facility to query all those logs for any troubleshooting purposes or to get some unique information. All these facilities are provided only by the Log Analytics Workspace which we need to create in Azure Log Analytics Workspaces Service. More on Azure docs.
Each workspace will have its own data repository and configuration. So you need to use Log Analytics Workspace if you intended to collect data from below sources:-
- Azure resources in your subscription
- On-premises computers monitored by System Center Operations Manager
- Device collections from Configuration Manager
- Diagnostics or log data from Azure storage
How to Create a Log Analytics Workspace in Azure
Also Read: How to Create App Services in Azure Portal{Step by Step Guide}
Step 1: Prerequisites
a) You should have a valid Azure Account.
b) You should have access to create resource in Azure Portal.
c) In case you want to use any existing Resource Group, then you should already have the access of that Resource Group.
Step 2: Login to Azure Portal
You need to first go to URL https://portal.azure.com and login to Azure Portal using your valid user account and password.
Step 3: Open Log Analytics Workspaces
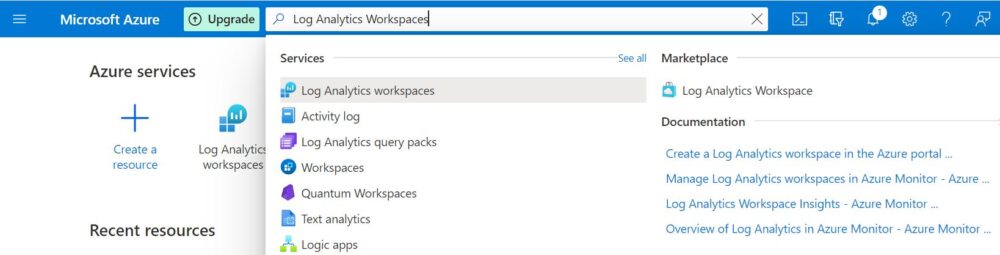
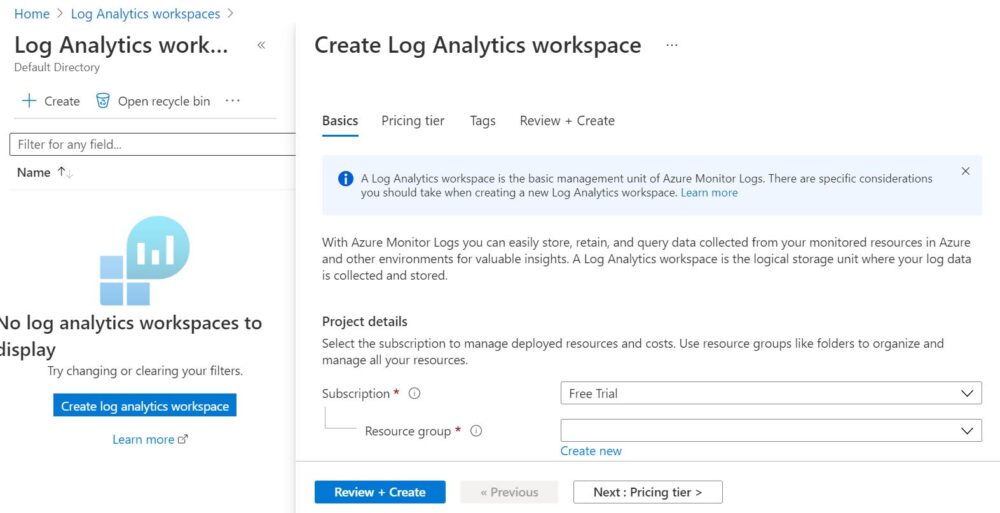
Once logged in you will land into Azure Portal Home page. Here you need to search Log Analytics Workspaces in the Search box available on top of the Home Page as shown below.
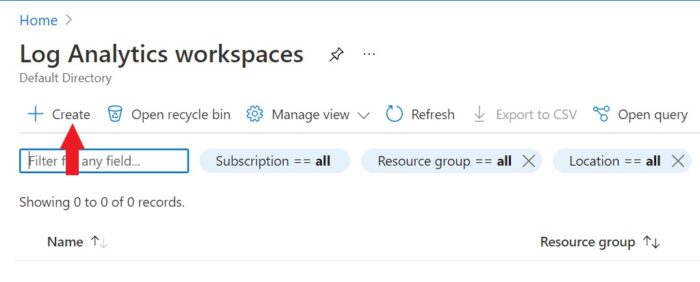
Then you need to Click on Log Analytics workspaces which will take you to the below Page where you need to Click on Create.
Step 4: Create a New Workspace
This brings you to the Create Log Analytics workspace page which has multiple sections that needs to be filled.
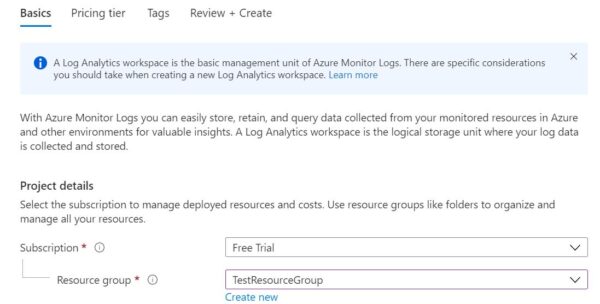
a) Basics
First is the Basics section where you need to provide Subscription and Resource group details. Since I am using my free tier account so I will select Free Trial as my subscription. Also I will be keeping my resources in TestResourceGroup so I will select this as my Resource Group as you can see below. In case you want to create a new Resource Group then you might want to check How to Create a Resource Group in Microsoft Azure Cloud.
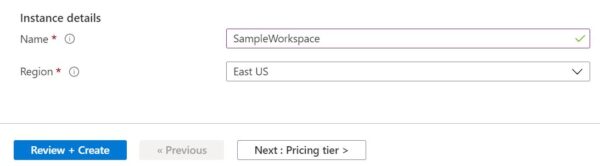
Another important details that you need to provide in Basics section is the Instance details where you need to provide Instance Name and Region. I am providing Instance name as SampleWorkspace and region will be East US as you can see below. Similarly, you can also provide all these details as per your need. Then Click on Next: Pricing tier >
b) Pricing Tier
The next section is all important Pricing Tier section where you need to select your pricing plan. I have selected Pay-as-you-go plan as you can see below. Then Click on Next : Tags

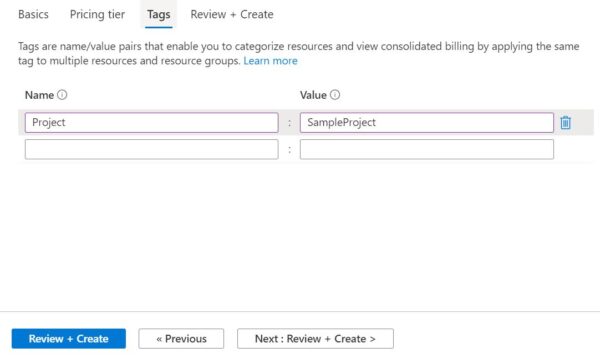
c) Tags
If you want to categorize your resources for consolidated billing then you can Tag it using some specific name/value pairs. In my case since I want to track the billing of my resources based on a Project Name so I will provide the project details in the form of name/value pairs as you can see below. Then Click on Next: Review+Create >
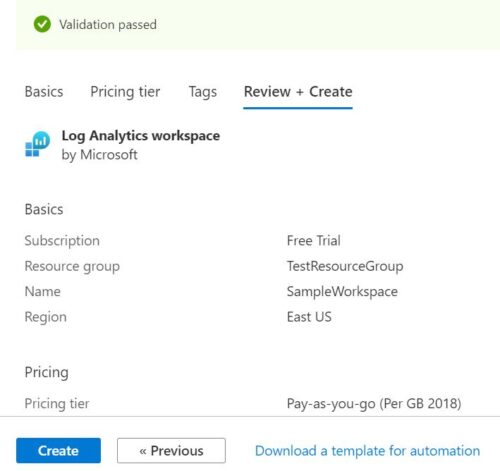
d) Review+Create
Finally you can review all the provided details and then Click on Create to start with the deployment.
Once you clicked on Create, it will start deploying the resource and after some time you will see deployment completion screen as shown below.
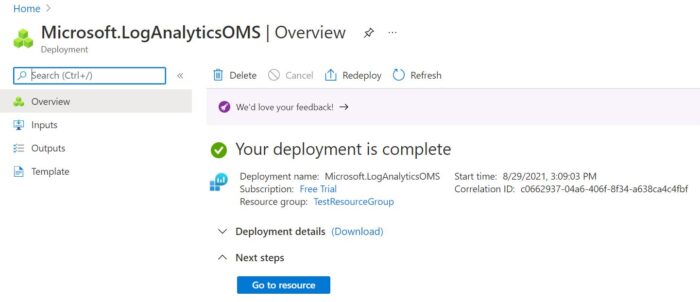
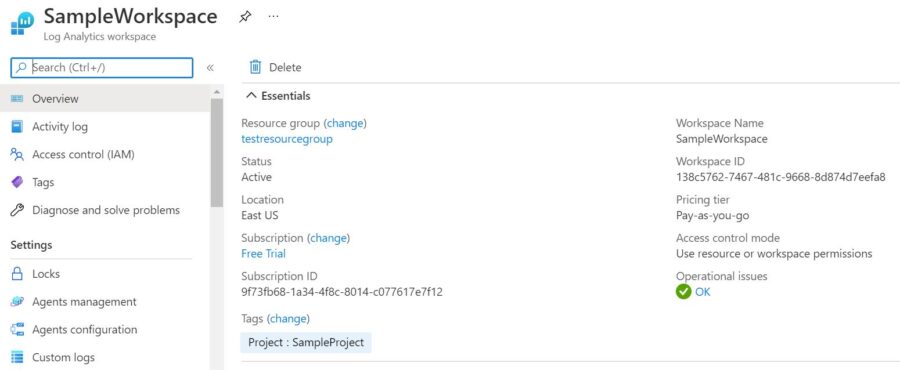
To check more details about this workspace, you can Click on Go to resource . It will show you complete information about the created workspace as you can see below.