Table of Contents
In this article, we will see how to create app services in Azure portal. Web Apps created in the App Services allows you to quickly build, deploy, and scale enterprise-grade web, mobile, and API apps running on any platform. Meet rigorous performance, scalability, security and compliance requirements while using a fully managed platform to perform infrastructure maintenance.
What is Azure App Service
Azure App Service is a fully managed web hosting service for building web applications, services and RESTful APIs.
How to Create App Services in Azure Portal
Also Read: 8 Easy Steps to Create an AKS Cluster using Azure CLI
Step 1: Prerequisites
a) You should have a valid Azure Account.
b) You should have a valid subscription.
c) You should have access to create an App Service.
Step 2: Login to Azure Portal
First you need login to below Azure Portal using your valid user account and password. Upon successful login, you will land into Portal Home Page from where you can create all the required resources.
Step 3: Create a Resource Group
All the resources which you are going to create, it should be created in a Resource Group. So the next step is to create a Resource Group. You can check How to Create a Resource Group in Microsoft Azure Cloud to create a resource group.
Step 4: Open App Services
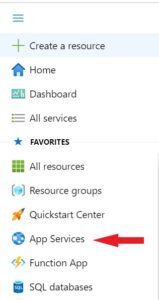
In the next step you need to create an app service from Azure App Services. You can either search App Services from the Home Page search box or go directly to the Service from Portal Menu as you can see below.
Step 5: Create App Service
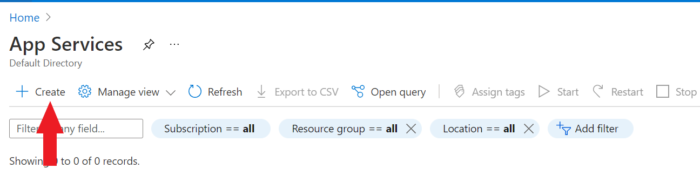
Once App Services opened, you can click on Create as shown below.
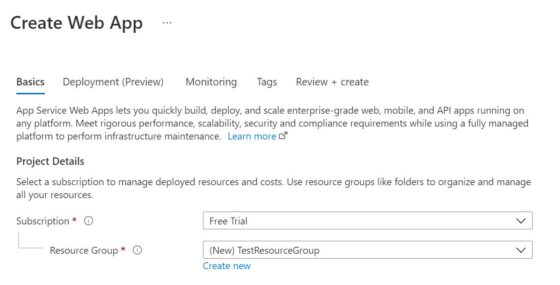
a) Basics
You will see below Create Web App window where you need to first fill the Basics section. You need to select your Subscription and Resource Group which you want to use.
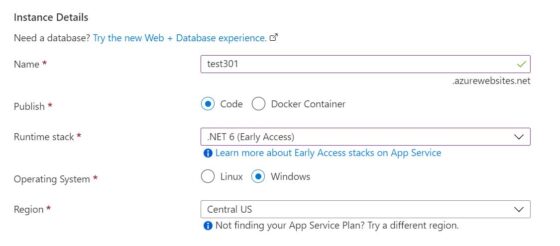
Then you need to provide the Instance details were you need to provide a unique instance name. I am using test301 so the complete name becomes test301.azurewebsites.net as you can see below. Then you have the option to publish it as Code or Docker Container. I will choose to publish as Code. Next you need to choose the Runtime Stack. I am using .NET 6(Early Access) as my runtime stack. You can choose as per your requirement.
Then you need to choose the Operating System you want to use. Currently Azure provides two options - Linux or Windows. I am going to choose Windows for my web app. Finally, you need to choose the Region. By default, Central US will be selected. I will use this default option however you can change it to a suitable location as per your need.
If you further scroll down, you will see App Service Plan details to fill. You can either use any existing App Service Plan or create a new one by Clicking on Create new. You can check How to Create an App Service Plan in Azure{Step by Step Guide} to create an App Service Plan.

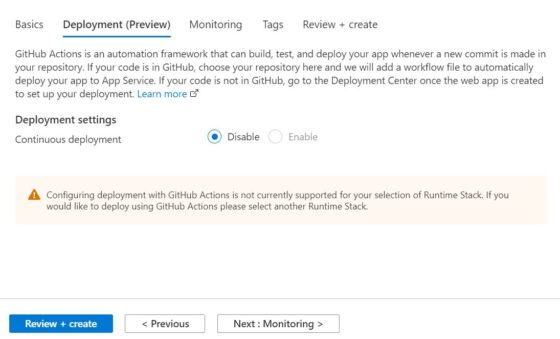
b) Deployment(Preview)
In the next section, you need to select your Deployment settings. This option is pretty handy if you are looking to perform Continuous deployment of your web app in App Service. You can set up GitHub repository to maintain your project source codes and can deploy your web app to App Service based on new commit done on repository.
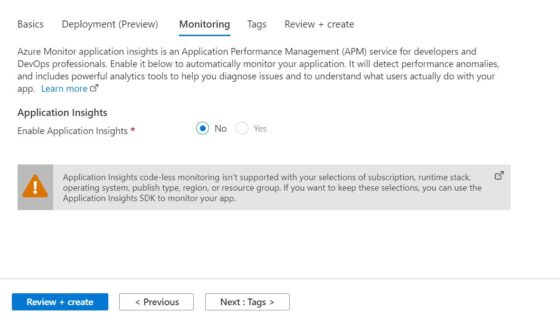
c) Monitoring
Next section is about enabling the monitoring for this app service using Application Insights. Azure has a very powerful Application Performance Management(APM) tool called Application Insights which can be used to monitor Azure resources for any performance anomalies. For the moment, I am keeping it disabled by clicking on No as you can see below. Then Click on Next: Tags to proceed.
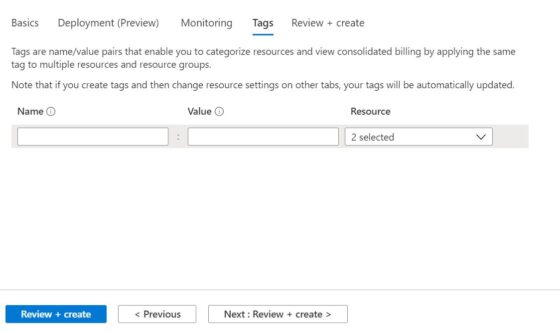
d) Tags
Here you can use the Tags to categorize your resources which further helps you in tracking the billing of those resources. Each of the tags that you create are just name/value pairs. Since here I am not using any tags so I will just click on Next: Review + create> to proceed to the next section.
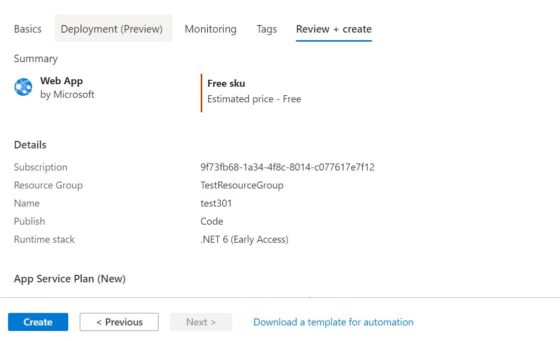
e) Review+Create
Finally, you can review all your configuration and then click on Create once you verified all the details given in each section.
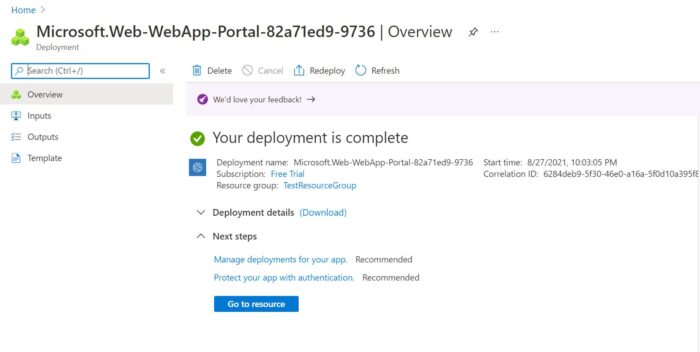
After a while you can see that your deployment is completed and it should look like below. You can get more details about this deployment by clicking on Go to resource . This completes the creation of web app Services.