Table of Contents
In this article, I will take you through the steps to create a Resource Group in Microsoft Azure Cloud. Resource Group Creation is one of the mandatory prerequisite to have before you attempt to use any Azure services. You will always be asked to provide Resource Group details. It is because all the azure resources must reside in a Resource Group. Hence it is very important to understand and know all about Resource Group and its Creation. More on Resource Groups.
What is Resource Group
A Resource Group is basically a container that holds related resources for an Azure solution. The resource group can include all the resources for the solution, or only those resources that you want to manage as a group. You decide how you want to allocate resources to resource groups based on what makes the most sense for your organization.

Create a Resource Group in Microsoft Azure Cloud
Also Read: For Beginners: Create Virtual Machine in Azure with Just 8 Easy Steps
Step 1: Prerequisites
a) You should have a valid Microsoft Azure Account.
b) You should have access to create Resource Group.
c) You should have valid subscription to create Resource Group.
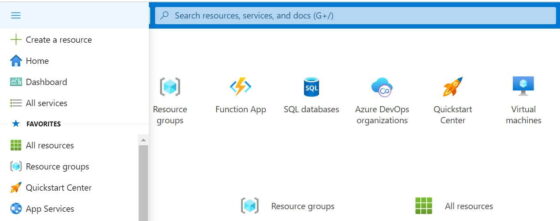
Step 2: Open Resource Groups
There are two ways to open resource groups. You can either Go to Portal Menu->Resource Groups or you can search it in Search Box as shown below.
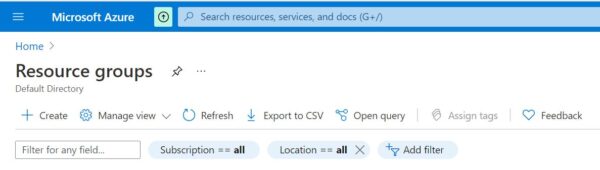
Step 3: Click on Create
Once it is Opened, you can Click on + Create as shown below.
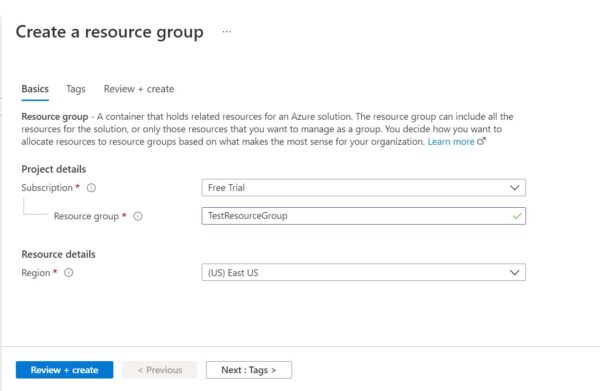
Step 4: Create a Resource Group
a) Basic Details
In the basic details section, you need to provide your Subscription, Resource Group Name and Region. Here I am using below details.
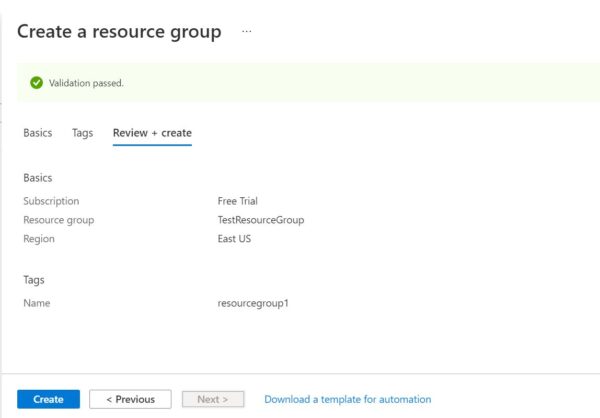
Subscription: Free Trial
Resource Group: TestResourceGroup
Region: (US) East US
Since I have created a Free Trial Account in Microsoft Azure so I am using this subscription here. You can choose whichever subscription you are using. By default, region will be selected as (US) East US. You can also change the region based on your preference. You might have also noticed little red start mark(*) in below details section. This means that the start marked fields needs to be mandatorily filled and hence cannot be moved on from this section without providing those details.
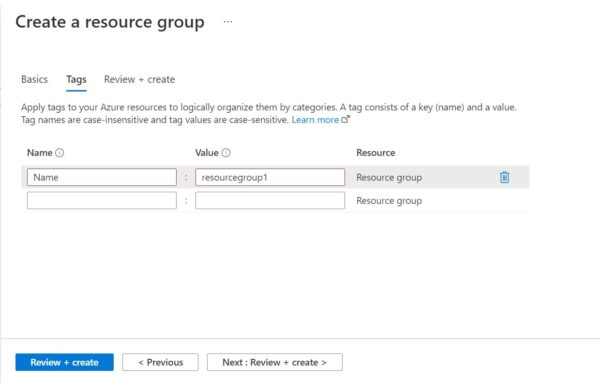
b) Apply Tags
Then the next section is about applying tags to your Resource Group. As you notice this is not a mandatory section so you can either leave this section and directly create your Resource Group or you can tag it using key-value pairs as per your need. Then Click on Next: Review + Create >
c) Review + Create
After passing all the validation checks you can now Click on Create. If everything goes well, resource group will be created within few minutes.
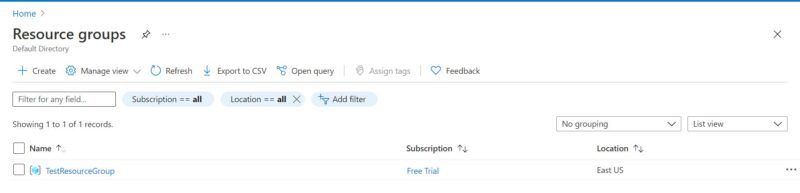
Step 5: List Resource Groups
Once Resource Group is created, you will be able to see it as shown below. You can also click on it to get more details.