
Table of Contents
In this article, we will see how to make a reaction role with Carl Bot. Reaction roles are a feature in Discord that allows users to assign themselves roles by reacting to a message using a specific emoji. This will enable users to quickly join or leave certain groups or teams within a Discord server by simply responding to a message rather than manually assigning themselves a role through the server’s settings.
To set up reaction roles, a server administrator or someone with the appropriate permissions will need to create a message and add specific emojis as reactions. Each emoji can then be linked to a particular role so that when a user reacts to the message with that emoji, they will automatically be given that role. For example, a server administrator might create a message announcing a new tournament and add an emoji of a sword as a reaction. Anyone who reacts to the message with the sword emoji will be given the "Tournament Participants " role, allowing them access to the tournament channels and other relevant information.

How to make a Reaction role with Carl Bot
Also Read: Eunseo Bot Commands Explained with Best Examples
Reaction roles can be helpful for a variety of purposes, such as organizing teams or groups within a server, allowing users to opt into certain notifications or channels, or simply giving users a way to express their interests or preferences within the community. However, it is essential for server administrators to carefully consider the roles and permissions they assign through reaction roles, as they can significantly impact the user experience within the server. In this article, we will show you how to set up reaction roles on Discord using the Carl Bot.
What is Carl Bot
Carl-bot is a fully customizable and modular Discord bot that can be used for a variety of purposes, including moderation and utility. It is named after its creator, Carl, who is a software developer and creator of several popular Discord bots. The bot has been written in JavaScript and runs on the Node.js platform, using the Discord.js library to interact with the Discord API. It is open-source and available for anyone to use, modify, or contribute to.
Carl-bot has a wide range of features, including moderation tools for managing and enforcing rules on a Discord server, fun and utility commands for generating memes or retrieving information, and customizable reaction roles and self-assignable roles. It also supports multiple languages, so users can use it in their preferred language. Moreover, Carl Bot can also be used for a number of utility tasks that other bots do not offer. These tasks include reminders, YouTube alerts, changing text font, and allowing for a powerful level of moderation.
In addition to its built-in features, Carl-bot also has a system for installing and using third-party plugins and modules, which can extend its capabilities even further. This allows users to customize the bot to meet their specific needs and preferences. Overall, Carl-bot is a powerful and versatile Discord bot that can be used to enhance the functionality and community of a Discord server.
Prerequisites
Before we begin, make sure you have the following:-
- A Discord server with the necessary permissions to add and manage roles.
- The Carl Bot has been added to your Discord server.
How to invite Carl Bot to your Discord Server
To invite Carl Bot to your discord server, follow these steps:-
- Visit the following website: https://carl.gg/. The website will ask you to log in with your discord account. Once you have logged in, the "Manage" option will be visible to you. Click on it to proceed.

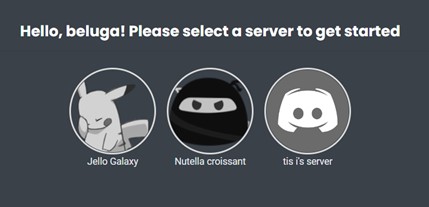
- Next, choose your Server to get started.
- Discord will ask your permission to allow carl-bot to create commands. Since the bot will be making commands for you to run in your server so it is important to provide this permission.
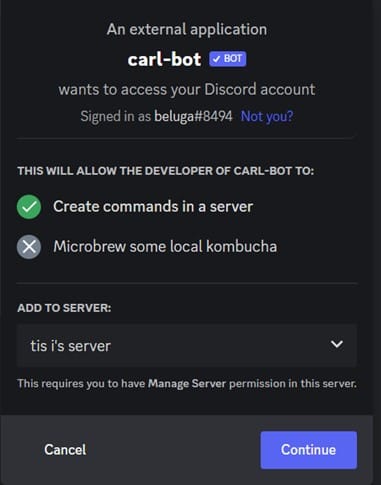
- Click on Continue and Carl Bot will join your Discord server.
How to Create a Role
After completing all of the above steps, you will see that Carl Bot is successfully added to your discord server, and now you need to create a role and assign an emoji to that role. You need to follow below steps to create a role:-
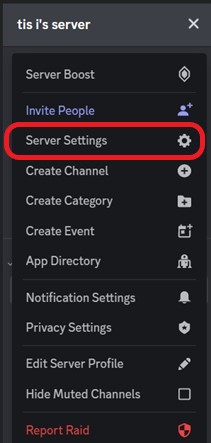
- Click on the downward facing arrow at the top left of the screen. The arrow will be next to your server’s name as highlighted below.
![]()
![]()
- This will present you with a list of multiple options that you can choose from. However, we are only concerned with “server settings” from the list. So you need to click on that to proceed.
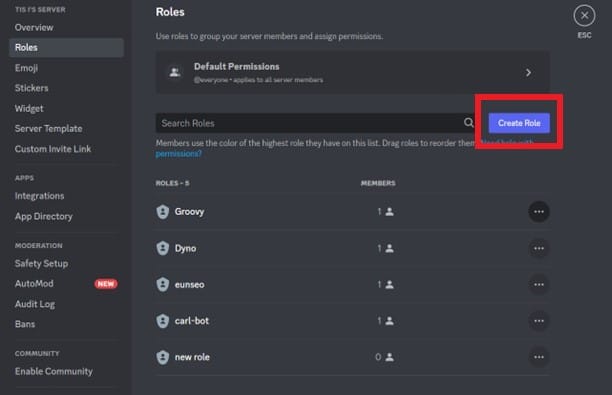
- Next, click on Roles, and this is where you will have the option to create and update previously made roles. Click on Create Role (dark blue box as highlighted below) to create a new role for you.
- Hover over the role and then click on the pencil icon. This will allow you to edit the role by changing a variety of functions the role can carry out. Here you can change the role’s name, its color, the permissions it has and can manage which users have been assigned the role.
Make a Reaction role with Carl Bot
Now that you have made the new role that you want to use, you now need to make the reaction role using Carl-bot. To do so, you have to first type out a message in the channel where you want to host your reaction roles.
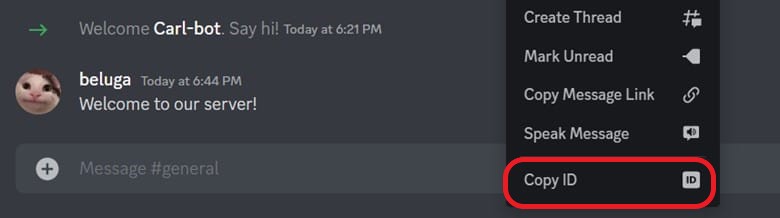
In our case, we decided to type the message in #General. Once we do this, we then need to copy the text message’s ID. For that we will simply right-click on the text message, and we will be presented with a number of functions that we can use. At the bottom of the list, "Copy ID" will be shown. Click on that and now you are ready to move on to the next step!
Now that we have the text message’s ID, the next few steps will be easy to do. Type in /reactionrole add in the message box, and we will be presented with Carl-Bot's command.
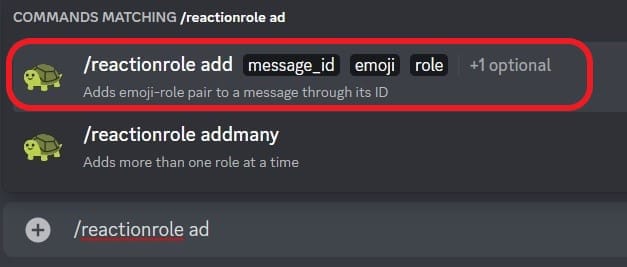
On clicking on the command, it will ask us to enter the message ID, the emoji we want to use, and the role we want to assign when a user clicks on it.

Click enter, and we are done! The reaction role feature has been implemented. Now users just have to click on the emoji to assign the role.
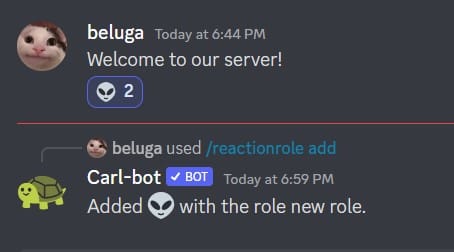
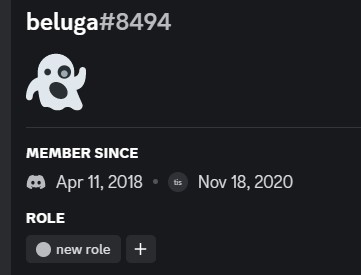
We decided to go with the alien emoji for our purpose so when we clicked on that emoji, we were able to assign ourselves a role.
Summary
All in all, Carl Bot is a powerful bot that can be used for a variety of automation functions. This ensures you spend less time trying to moderate the server, as the bot will do most of the functions. Moreover, another function that Carl bot is helpful for is to ensure that people have read the server’s terms and conditions. This is done by asking users to read a message and then clicking on the emoji to be given the role which allows them to message in the channel.
Moreover, users can also auto assign themselves to specific channels which are related to their preferences. This ensures that the moderator does not have to go through the hassle of individually catering to every new user that joins the channel, and the user can simply assign roles through the bot.