
Table of Contents
In this article, I will take you through the steps to install Ntopng to monitor network traffic on Ubuntu 20.04 LTS. According to Official documentation, ntopng is the next generation version of the original ntop, a network traffic probe that monitors network usage. ntopng is based on libpcap/PF_RING and it has been written in a portable way in order to virtually run on every Unix platform, MacOS and on Windows as well. It is very frequently used for monitoring network traffic and for troubleshooting other network issues. We will see the steps to install Ntopng in great detail in below section.
Main Features of Ntopng
- Sort network traffic according to many criteria including IP address, port, Layer-7 (L7) application protocols, throughput, Autonomous Systems (ASs).
- Show realtime network traffic and active hosts.
- Produce long-term reports for several network metrics including throughput and L7 application protocols.
- Top talkers (senders/receivers), top ASs, top L7 application protocols.
- Monitor and report live throughput, network and application latencies, Round Trip Time (RTT), TCP statistics (retransmissions, out of order packets, packet lost), and bytes and packets transmitted.
- Store on disk persistent traffic statistics to allow future explorations and post-mortem analyses.
- Geolocate and overlay hosts in a geographical map.
- Discover Layer-7 application protocols (Facebook, YouTube, BitTorrent, etc) by leveraging on nDPI, ntop Deep Packet Inspection (DPI) technology
- Analyze IP traffic and sort it according to the source/destination.
- Report IP protocol usage sorted by protocol type.
- Produce HTML5/AJAX network traffic statistics.
- Full support for IPv4 and IPv6.
- Full Layer-2 support (including ARP statistics).
- GTP/GRE detunnelling.
- Support for nIndex, MySQL, ElasticSearch export of monitored data.
- Interactive historical exploration of monitored data exported to nIndex and MySQL.
- Flexible alerts handling.
- SNMP v1/v2c/v3 support and continuous monitoring of SNMP devices.
- Identity Management, including correlation of VPN users to traffic.
- Focused on cybersecurity.
- Behavioral traffic analyses such as lateral movements and periodic traffic detection.
- REST API to ease integrations with third-parties.
How to Install Ntopng to Monitor Network Traffic on Ubuntu 20.04 LTS
Also Read: How to Install Swift Programming Language on Ubuntu 20.04 LTS
Step 1: Prerequisites
a) You should have a running Ubuntu 20.04 LTS Server.
b) You should have sudo or root access to run privileged commands.
c) You should have apt, tar and wget utility installed in your Server.
Step 2: Update Your Server
It is very important to keep the server updated using apt update or apt-get update command. It will ensure the installation of latest version of all the installed packages which will further reduce the chances of any broken dependency problem.
NOTE:
root user to run all the below commands. You can use any user with sudo access to run all these commands. For more information Please check Step by Step: How to Add User to Sudoers to provide sudo access to the User.root@localhost:~# apt update
Hit:1 http://in.archive.ubuntu.com/ubuntu focal InRelease
Get:2 http://in.archive.ubuntu.com/ubuntu focal-updates InRelease [114 kB]
Hit:3 http://ppa.launchpad.net/ansible/ansible/ubuntu focal InRelease
Get:4 https://apt.releases.hashicorp.com focal InRelease [4,419 B]
Get:5 http://in.archive.ubuntu.com/ubuntu focal-backports InRelease [101 kB]
Get:6 https://packages.microsoft.com/repos/edge stable InRelease [7,343 B]
Get:7 http://security.ubuntu.com/ubuntu focal-security InRelease [114 kB]
Hit:8 http://apt.postgresql.org/pub/repos/apt focal-pgdg InRelease
Hit:9 http://ppa.launchpad.net/micahflee/ppa/ubuntu focal InRelease
Hit:10 https://packages.grafana.com/oss/deb stable InRelease
Get:11 https://apt.releases.hashicorp.com focal/main amd64 Packages [34.7 kB]
Get:12 https://packages.microsoft.com/repos/edge stable/main amd64 Packages [8,032 B]
Step 3: Install Ntopng
In the next step, you need to install Ntopng by using apt install ntopng -y command as shown below. This will download and install Ntopng package along with its all required dependencies.
root@localhost:~# apt install ntopng -y
Reading package lists... Done
Building dependency tree
Reading state information... Done
The following additional packages will be installed:
fonts-font-awesome fonts-glyphicons-halflings javascript-common libdbi1 libhiredis0.14 libjs-bootstrap libjs-d3 libjs-jquery libjs-jquery-form
libjs-jquery-metadata libjs-jquery-tablesorter libjs-jquery-ui libjs-rickshaw liblua5.1-0 libndpi2.6 libnorm1 libpgm-5.2-0 librrd8 libwireshark-data
libzmq5 lua-bitop lua-cjson node-html5shiv ntopng-data redis-server redis-tools
Suggested packages:
apache2 | lighttpd | httpd libjs-jquery-ui-docs geoipupdate geoip-database geoip-database-extra libjs-leaflet libjs-leaflet.markercluster
snmp-mibs-downloader nodejs geoip-database-contrib ruby-redis
The following NEW packages will be installed:
fonts-font-awesome fonts-glyphicons-halflings javascript-common libdbi1 libhiredis0.14 libjs-bootstrap libjs-d3 libjs-jquery libjs-jquery-form
libjs-jquery-metadata libjs-jquery-tablesorter libjs-jquery-ui libjs-rickshaw liblua5.1-0 libndpi2.6 libnorm1 libpgm-5.2-0 librrd8 libwireshark-data
libzmq5 lua-bitop lua-cjson node-html5shiv ntopng ntopng-data redis-server redis-tools
0 upgraded, 27 newly installed, 0 to remove and 15 not upgraded.
Need to get 7,660 kB of archives.
After this operation, 32.3 MB of additional disk space will be used.
Step 4: Check Ntopng version
You can check the current Installed version of Ntopng by using ntopng --version command. As you can see below, current installed version is 3.8.
root@localhost:~# ntopng --version
v.3.8.190813 [Community build]
GIT rev: :3.8.190813
Step 5: Configure Ntopng
Then you need to configure Ntopng according to your local system configuration. By default, you will only see Port detail specified in /etc/ntopng.conf. It will be set to Port 3000. So you need to specify the network interface detail using -i option, path of the ntopng pid by using -G option. You can also check if the default Port 3000 is free or not. If not, then you can choose any free Port and change this detail as well. For example, in my case I have some other service running on Port 3000 so I have used another free Port 3100 here to run ntopng service.
root@localhost:~# nano /etc/ntopng.conf
# This configuration file is similar to the command line, with the exception
# that an equal sign '=' must be used between key and value. Example: -i=p1p2
# or --interface=p1p2 For options with no value (e.g. -v) the equal is also
# necessary. Example: "-v=" must be used.
#
# DO NOT REMOVE the following option, required for daemonization.
-e=

# * Interfaces to sniff on: one interface per line, prefix with -i=
# E.g.
#-i=eth0
#-i=wlan0
# If none is specified, ntopng will try to auto-detect the best interface.
#
# * Port on which ntopng will listen for the web-UI.
-G=/var/run/ntopng.pid
-i=enp0s3
-w=3100
Step 6: Restart Ntopng Service
After completing the configuration you need to restart the service by using /etc/init.d/ntopng restart command. You can also use /etc/init.d/ntopng start command to start the service.
root@localhost:~# /etc/init.d/ntopng restart
Restarting ntopng (via systemctl): ntopng.service.
Then check the status using /etc/init.d/ntopng status command.
root@localhost:~# /etc/init.d/ntopng status
● ntopng.service - ntopng - High-Speed Web-based Traffic Analysis and Flow Collection Tool
Loaded: loaded (/lib/systemd/system/ntopng.service; enabled; vendor preset: enabled)
Active: active (running) since Thu 2021-10-28 22:42:07 IST; 7s ago
Docs: man:ntopng(8)
file:/usr/share/doc/ntopng/README.Debian
file:/usr/share/doc/ntopng/UserGuide.pdf.gz
Process: 5327 ExecStart=/usr/sbin/ntopng /etc/ntopng.conf (code=exited, status=0/SUCCESS)
Main PID: 5328 (ntopng)
Tasks: 24 (limit: 2312)
Memory: 98.1M
CGroup: /system.slice/ntopng.service
└─5328 /usr/sbin/ntopng /etc/ntopng.conf

Oct 28 22:42:07 localhost systemd[1]: ntopng.service: Succeeded.
Step 7: Login to Ntopng
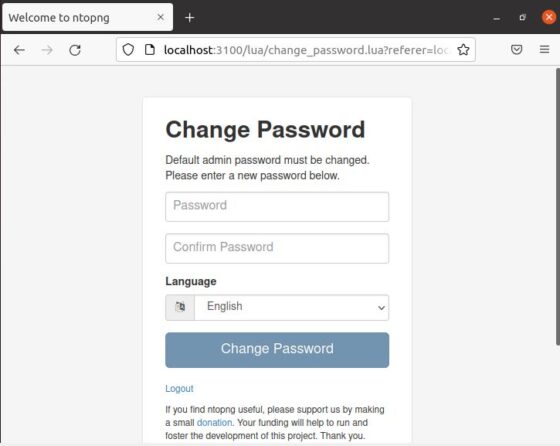
You can open your favorite web browser and use URL http://localhost:3100 to access Ntopng UI as you can see below. By default, you username and password will be admin.

Once you put your username and password and click on Login, it will ask you to change your password. You can give new password and confirm the same by giving it the second time. Then Click on Change Password.
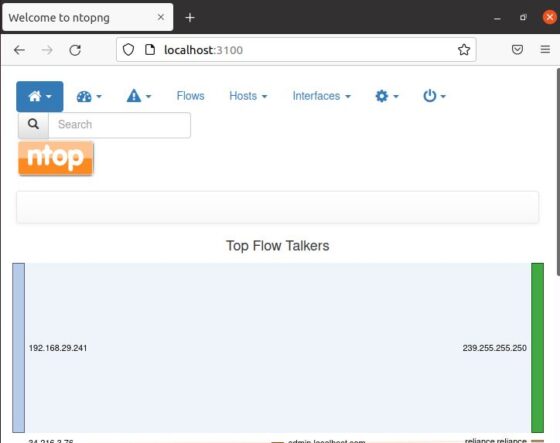
Once you logged in, you will be able to see the below Home Page where you will have different options available to check.
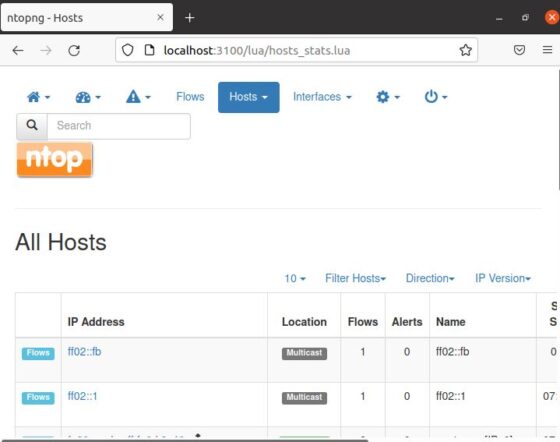
Step 8: Check Hosts and Interfaces
You can go to Hosts->Hosts and check all the hosts details.
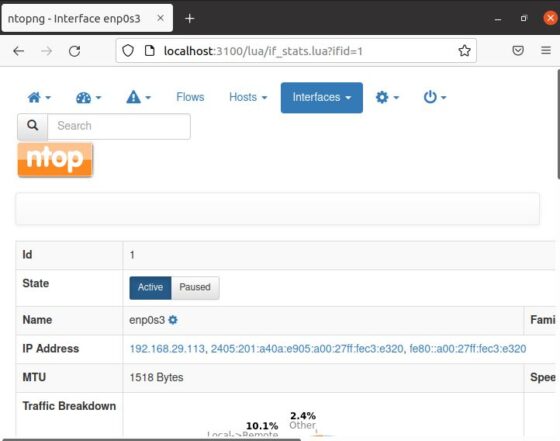
You can go to Interfaces->enp0s3 and check your Interface details. Please note that here interface name could be different for you. So you can check and click on your network interface accordingly.
Step 9: Uninstall Ntopng
Once you are done using Ntopng, you can remove it from your Server using apt remove ntopng -y command as shown below.
root@localhost:~# apt remove ntopng -y
Reading package lists... Done
Building dependency tree
Reading state information... Done
The following packages were automatically installed and are no longer required:
fonts-font-awesome fonts-glyphicons-halflings javascript-common libdbi1 libhiredis0.14 libjs-bootstrap libjs-d3 libjs-jquery libjs-jquery-form
libjs-jquery-metadata libjs-jquery-tablesorter libjs-jquery-ui libjs-rickshaw liblua5.1-0 libndpi2.6 libnorm1 libpgm-5.2-0 librrd8 libwireshark-data
libzmq5 lua-bitop lua-cjson node-html5shiv ntopng-data redis-server redis-tools
Use 'apt autoremove' to remove them.
The following packages will be REMOVED:
ntopng
0 upgraded, 0 newly installed, 1 to remove and 15 not upgraded.
After this operation, 991 kB disk space will be freed.
(Reading database ... 230705 files and directories currently installed.)
Removing ntopng (3.8+dfsg1-2.1build3) ...
Processing triggers for man-db (2.9.1-1) ...