
Table of Contents
In this article, I will take you through the steps to install Ajenti control panel on RHEL/CentOS/Rocky Linux. Ajenti is a free and open source lightweight web-based control panel which is used to manage remote Linux Servers using everyday tools like a web terminal, text editor, file manager and others. It consists of Ajenti Core itself and a set of stock plugins forming the Ajenti Panel.
According to Official Documentation, Ajenti Core is a web interface development framework which includes a web server, IoC container, a simplistic web framework and set of core components aiding in client-server communications.
Ajenti Panel consists of plugins developed for the Ajenti Core and a startup script, together providing a server administration panel experience. The Panel’s plugins include: file manager, terminal, notepad, etc.

How to Install Ajenti Control Panel on RHEL/CentOS/Rocky Linux
Also Read: How to Install GNOME Desktop(GUI) on Rocky Linux 8
Step 1: Prerequisites
a) You should have a running RHEL/CentOS/Rocky Linux System.
b) You should have sudo or root access to run privileged commands.
c) You should have dnf and curl utility available in your System.
Step 2: Update Your Server
Before going through the steps to install Ajenti Control Panel, it is always recommended first update your server by using dnf update command. If any package requires upgradation then upgrade it by using dnf upgrade command.
[root@cyberithub ~]# dnf update
Last metadata expiration check: 0:15:03 ago on Sun 23 Jan 2022 01:36:43 AM EST.
Dependencies resolved.
=============================================================================================================================================================
Package Architecture Version Repository Size
=============================================================================================================================================================
Installing:
kernel x86_64 4.18.0-348.12.2.el8_5 baseos 7.0 M
kernel-core x86_64 4.18.0-348.12.2.el8_5 baseos 38 M
kernel-modules x86_64 4.18.0-348.12.2.el8_5 baseos 30 M
Upgrading:
NetworkManager x86_64 1:1.32.10-4.el8 baseos 2.6 M
NetworkManager-config-server noarch 1:1.32.10-4.el8 baseos 130 k
NetworkManager-libnm x86_64 1:1.32.10-4.el8 baseos 1.8 M
NetworkManager-team x86_64 1:1.32.10-4.el8 baseos 147 k
...................................................
Step 3: Enable EPEL Repository
If you don't have EPEL repository already enabled then enable it by installing epel-release package using dnf install epel-release command as shown below.
[root@cyberithub ~]# dnf install epel-release
Rocky Linux 8 - AppStream 2.0 MB/s | 8.8 MB 00:04
Rocky Linux 8 - BaseOS 1.5 MB/s | 5.6 MB 00:03
Rocky Linux 8 - Extras 4.4 kB/s | 10 kB 00:02
Dependencies resolved.
=============================================================================================================================================================
Package Architecture Version Repository Size
=============================================================================================================================================================
Installing:
epel-release noarch 8-13.el8 extras 23 k

Transaction Summary
=============================================================================================================================================================
Install 1 Package

Total download size: 23 k
Installed size: 35 k
Is this ok [y/N]: y
Downloading Packages:
epel-release-8-13.el8.noarch.rpm 26 kB/s | 23 kB 00:00
-------------------------------------------------------------------------------------------------------------------------------------------------------------
Total 14 kB/s | 23 kB 00:01
warning: /var/cache/dnf/extras-b5feef55fd8cf39e/packages/epel-release-8-13.el8.noarch.rpm: Header V4 RSA/SHA256 Signature, key ID 6d745a60: NOKEY
Rocky Linux 8 - Extras 1.1 MB/s | 1.6 kB 00:00
Importing GPG key 0x6D745A60:
Userid : "Release Engineering <infrastructure@rockylinux.org>"
Fingerprint: 7051 C470 A929 F454 CEBE 37B7 15AF 5DAC 6D74 5A60
From : /etc/pki/rpm-gpg/RPM-GPG-KEY-rockyofficial
Is this ok [y/N]: y
Key imported successfully
Running transaction check
Transaction check succeeded.
Running transaction test
Transaction test succeeded.
Running transaction
Preparing : 1/1
Installing : epel-release-8-13.el8.noarch 1/1
Running scriptlet: epel-release-8-13.el8.noarch 1/1
Verifying : epel-release-8-13.el8.noarch 1/1

Installed:
epel-release-8-13.el8.noarch

Complete!
Step 4: Install Dependencies
There are certain dependencies which needs to be installed before you try to install Ajenti package. You can go to Official Installation page and get the below command to install all the required dependencies.
[root@cyberithub ~]# dnf install -y gcc python3-devel python3-pip python3-pillow python3-augeas python3-dbus chrony openssl-devel redhat-lsb-core
Extra Packages for Enterprise Linux Modular 8 - x86_64 318 kB/s | 979 kB 00:03
Extra Packages for Enterprise Linux 8 - x86_64 1.9 MB/s | 11 MB 00:05
Package python3-dbus-1.2.4-15.el8.x86_64 is already installed.
Package chrony-3.5-2.el8.x86_64 is already installed.
Dependencies resolved.
=============================================================================================================================================================
Package Architecture Version Repository Size
=============================================================================================================================================================
Installing:
gcc x86_64 8.5.0-4.el8_5 appstream 23 M
openssl-devel x86_64 1:1.1.1k-5.el8_5 baseos 2.3 M
python3-augeas noarch 0.5.0-12.el8 appstream 30 k
python3-pillow x86_64 5.1.1-16.el8 appstream 631 k
python3-pip noarch 9.0.3-20.el8.rocky.0 appstream 19 k
...........................................
Step 5: Install Ajenti
Then the next step is to install Ajenti package by using below installation script.
[root@cyberithub ~]# curl https://raw.githubusercontent.com/ajenti/ajenti/master/scripts/install.sh | sudo bash -s -
% Total % Received % Xferd Average Speed Time Time Time Current
Dload Upload Total Spent Left Speed
100 4987 100 4987 0 0 11181 0 --:--:-- --:--:-- --:--:-- 11181

:: Could not detect OS
:: Press Enter to continue


:: OS:
:: Distro:


:: Upgrading PIP

.........................................................

:: Installing initscript

/bin/systemctl
Created symlink /etc/systemd/system/multi-user.target.wants/ajenti.service → /usr/lib/systemd/system/ajenti.service.

:: Complete


Ajenti will be listening at https://192.168.29.125:8000
Log in with your root password or another OS user
Step 6: Check Service Status
By default Ajenti service will be started after successful installation.
[root@cyberithub ~]# systemctl status ajenti
● ajenti.service - Ajenti panel
Loaded: loaded (/usr/lib/systemd/system/ajenti.service; enabled; vendor preset: disabled)
Active: active (running) since Sun 2022-01-23 02:42:55 EST; 40min ago
Process: 1303 ExecStartPost=/bin/sleep 5 (code=exited, status=0/SUCCESS)
Process: 1045 ExecStart=/bin/python3 /usr/local/bin/ajenti-panel -d (code=exited, status=0/SUCCESS)
Main PID: 1304 (python3)
Tasks: 14 (limit: 11264)
Memory: 371.2M
CGroup: /system.slice/ajenti.service
├─1304 /bin/python3 /usr/local/bin/ajenti-panel -d
├─5289 /usr/local/bin/ajenti-panel worker [restricted session]
└─9701 /usr/local/bin/ajenti-panel worker [session 2]
Step 7: Configure Firewall
If you have firewall enabled and TCP Port 8000 not allowed then before accessing web interface you need to allow the port using firewall-cmd --permanent --zone=public --add-port=8000/tcp command as shown below. Then reload the firewall using firewall-cmd reload command to update the changes.
[root@cyberithub ~]# firewall-cmd --permanent --zone=public --add-port=8000/tcp
success
[root@cyberithub ~]# firewall-cmd --reload
success
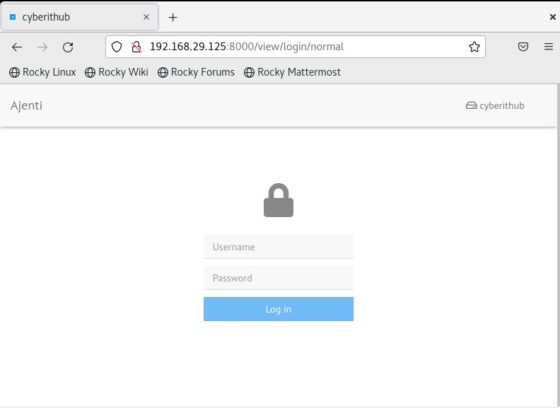
Step 8: Open Ajenti Web Interface
Once port is allowed, you are now ready to access the Ajenti Web URL from your favorite web browser. You need to use URL address https://<your_ip_address>:8000 in your browser to open the Login page as shown like below.
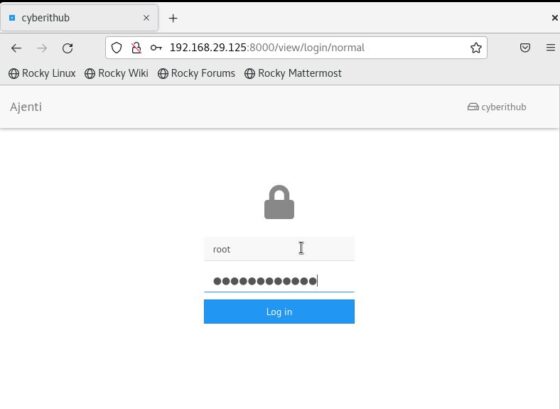
Here you need to provide your System account credentials to login. Once provided, click on Log In.
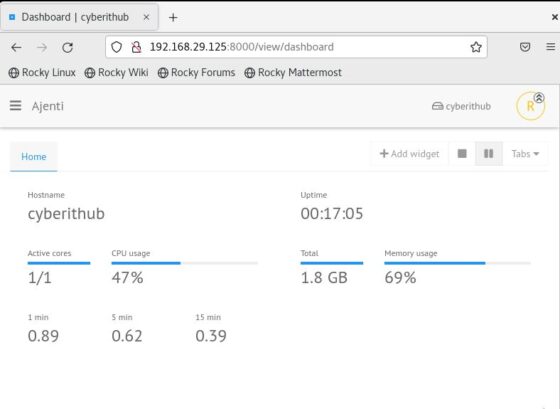
After successful authentication, you will be redirected to below Dashboard. Here you can see your default Server utilization metrics. This includes CPU Usage, Active Cores, Total Memory, current memory usage, uptime etc.
Step 9: Check Settings
If you want to check the current settings then you can go to General->Settings Page.
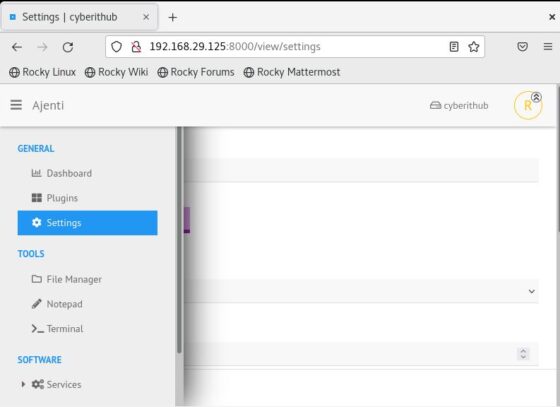
Here you can see all the default settings.

Step 10: Check Plugins
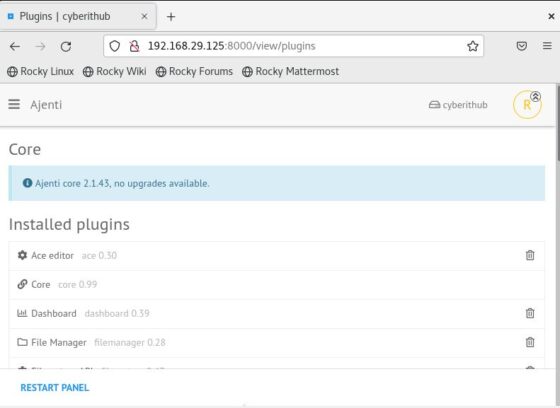
Similarly you can also check the list of installed plugins by going to General->Plugins page.
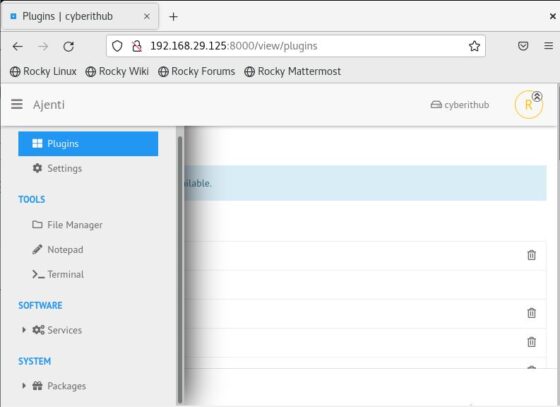
Here you can see all the currently installed plugins.
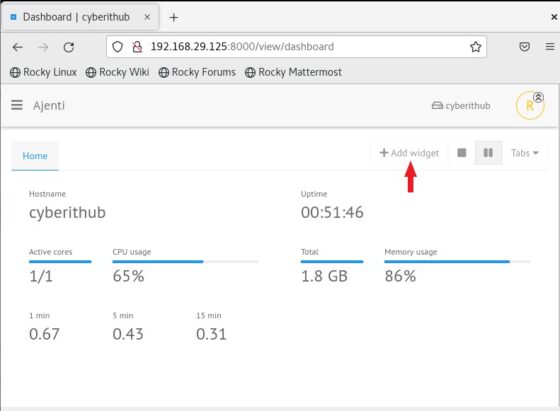
Step 11: Add Widget
In case if you want to add a widget then you can do that by clicking on Add widget on the Dashboard Page.
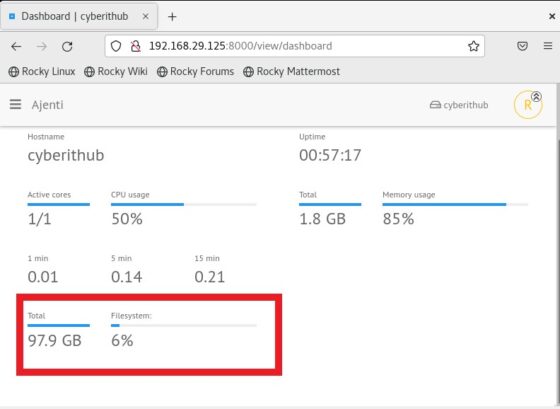
Here you can see list of widget that can be added to the Dashboard. For the demonstration purpose, I am going to choose Disk space widget.

Once I click on Disk space widget, it will get added and start showing the metrics as shown below. This metrics include total disk space and Filesystem usage.
Step 12: Uninstall Ajenti
Once you are done using Ajenti and by chance if you decided to remove this application completely from your System then you need to follow below simple steps.
a) Stop Ajenti Service
First stop the service by using systemctl stop ajenti command and then verify the status using systemctl status ajenti command as shown below.
[root@cyberithub ~]# systemctl stop ajenti
[root@cyberithub ~]# systemctl status ajenti
● ajenti.service - Ajenti panel
Loaded: loaded (/usr/lib/systemd/system/ajenti.service; enabled; vendor preset: disabled)
Active: inactive (dead) since Sun 2022-01-23 03:43:18 EST; 4s ago
Process: 1303 ExecStartPost=/bin/sleep 5 (code=exited, status=0/SUCCESS)
Process: 1045 ExecStart=/bin/python3 /usr/local/bin/ajenti-panel -d (code=exited, status=0/SUCCESS)
Main PID: 1304 (code=exited, status=0/SUCCESS)
b) Disable Ajenti Service
Once the service is stopped, you can disable it by using systemctl disable ajenti command.
[root@cyberithub ~]# systemctl disable ajenti
Removed /etc/systemd/system/multi-user.target.wants/ajenti.service.
c) Reload Daemon
Then reload the daemon using systemctl daemon-reload command to update the recent changes.
[root@cyberithub ~]# systemctl daemon-reload
d) Uninstall Ajenti
Finally uninstall all ajenti packages by using below pip command.
[root@cyberithub ~]# pip uninstall ajenti-panel ajenti.plugin.dashboard ajenti.plugin.settings ajenti.plugin.plugins ajenti.plugin.notepad ajenti.plugin.terminal ajenti.plugin.filemanager ajenti.plugin.packages ajenti.plugin.services -y
Found existing installation: ajenti-panel 2.1.43
Uninstalling ajenti-panel-2.1.43
Found existing installation: ajenti.plugin.dashboard 0.39
Uninstalling ajenti.plugin.dashboard-0.39:
Successfully uninstalled ajenti.plugin.dashboard-0.39
Found existing installation: ajenti.plugin.settings 0.30
Uninstalling ajenti.plugin.settings-0.30:
Successfully uninstalled ajenti.plugin.settings-0.30
Found existing installation: ajenti.plugin.plugins 0.47
Uninstalling ajenti.plugin.plugins-0.47:
Successfully uninstalled ajenti.plugin.plugins-0.47
Found existing installation: ajenti.plugin.notepad 0.28
................................................
e) Remove Dependencies
If you remember during installation we have installed some of the dependencies, so to uninstall all those you need to use below dnf remove command. Here you need to ensure that you don't end up in uninstalling any package that is required by any other existing application. So be sure before running this step.
NOTE:
[root@cyberithub ~]# dnf remove gcc python3-devel python3-pip python3-pillow python3-augeas python3-dbus chrony openssl-devel redhat-lsb-core
Dependencies resolved.
=============================================================================================================================================================
Package Architecture Version Repository Size
=============================================================================================================================================================
Removing:
chrony x86_64 4.1-1.el8 @baseos 656 k
gcc x86_64 8.5.0-4.el8_5 @appstream 59 M
openssl-devel x86_64 1:1.1.1k-5.el8_5 @baseos 3.4 M
python3-augeas noarch 0.5.0-12.el8 @appstream 87 k
python3-dbus x86_64 1.2.4-15.el8 @anaconda 469 k
python3-pillow x86_64 5.1.1-16.el8 @appstream 2.0 M
python3-pip noarch 9.0.3-20.el8.rocky.0 @appstream 2.8 k
python36-devel x86_64 3.6.8-38.module+el8.5.0+671+195e4563 @appstream 13 k
................................................