Table of Contents
In this article, we will see the steps to deploy application war file to tomcat Server using Jenkins. You might have deployed the application war file to tomcat server manually in your professional career but when you have the requirement to automate the entire deployment process then it might pose a little bit challenge for you. So to overcome this difficulty you can use a deployment software like Jenkins to auto deploy the application. We will see the steps to deploy application war file in detail in below section.
What is Tomcat
Apache tomcat is a free and open source Java based web server which provides an environment to run Java applications, Servlet and JSP Pages. Resources in tomcat web server can accessed through http or https based requests.
What is Jenkins
Jenkins is an open source automation server used for building, testing and deploying software in multiple environments with the help of supported frameworks and Libraries. It is a server based system that runs in servlet containers such as Apache Tomcat.
Step by Step Guide to Deploy Application war file to Tomcat Using Jenkins
Below are the steps to deploy a war file on tomcat server. war file can be stored on any repository or can be generated when building the application. The most easy way to demonstrate this is to download an existing sample war file and do the deployment. We have already done the tomcat and Jenkins setup on our windows machine. This machine is hosted in Microsoft Azure environment.
Step 1: Prerequisites
a) You should have a running Windows Server.
b) You should have Jenkins Installed on your Windows machine.
c) You should have access to deploy the application war file to tomcat server.
Step 2: Start Jenkins
Since the tomcat and Jenkins setup exist on same machine, we will use different ports to run each application. Let’s launch Jenkins on Port 9090.
- Switch to the directory where
Jenkins.warfile is placed. In our case we have kept our files in“C:\Users\cyberithub\Desktop\jenkins>”directory.
05/05/2021  07:46 PM    <DIR>          .
05/05/2021  07:46 PM    <DIR>          ..
05/05/2021  07:43 PM        70,887,043 jenkins.war
- In CMD, type command
"java -jar jenkins.war --httpPort=9090"to launch Jenkins onPort 9090 - Once started you should be able to see the Jenkins Login page as shown below.
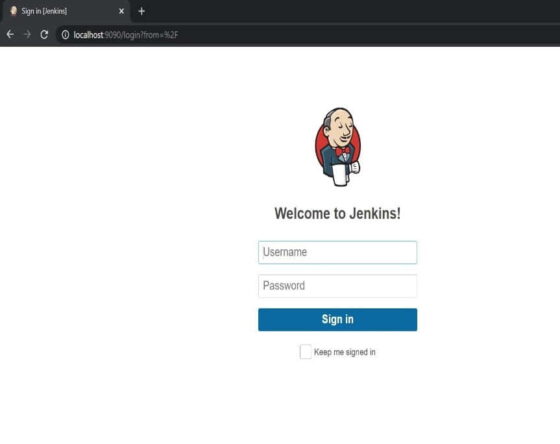
Here you need to Login using your credential.
Step 3: Start Tomcat
Let’s start the tomcat on default port which is 8080. Though it can be launched on any port.
- In CMD, switch to the directory where tomcat is installed and then go to
bindirectory.
"C:\Users\cyberithub\Desktop\tomcat\apache-tomcat-8.5.61\bin"
- execute command
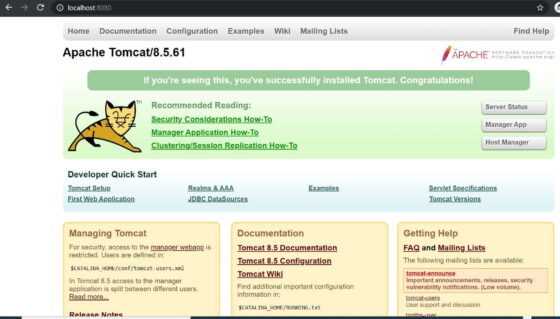
"bat"to startTomcat Server. - Once started you should be able to see the Tomcat
Home Pageas shown below.
Now that both the application is up and running, Let’s move in to next step.
Step 4: Install Deploy plugin in Jenkins
- Go to Manage
Jenkins -> Manage Plugins -> Available - Search for Deploy Container plugin and download
- Create new item
“DeployJob”as free style project.
Step 6: Add User In tomcat-users.xml
- Go to the Tomcat
confdirectory.
C:\Users\cyberithub\Desktop\tomcat\apache-tomcat-8.5.61\conf
- Inside it edit the file
tomcat-users.xmland add a user namedeploywith passworddeployas shown below.
<user username="deploy" password="deploy" roles="manager-script"/>
Do not forget to specify role as "manager-script" so that user has the deployment rights.
Step 7: Download war File
- Download sample war file from
https://tomcat.apache.org/tomcat-7.0-doc/appdev/sample/ - Place it in your Jenkins's workspace of above created project .
Step 8: Configure Project
- Go to
DeployJob -> Configure -> Build - Click on
“Add post-build action”and select Deploy war/ear to a container from dropdown - Click on
“Add Container”and selectTomcat 7.xRemote.(select based on your setup and requirement) - Add credential same as what has been added in
tomcat-users.xml. Add other details as shown below and save the file.
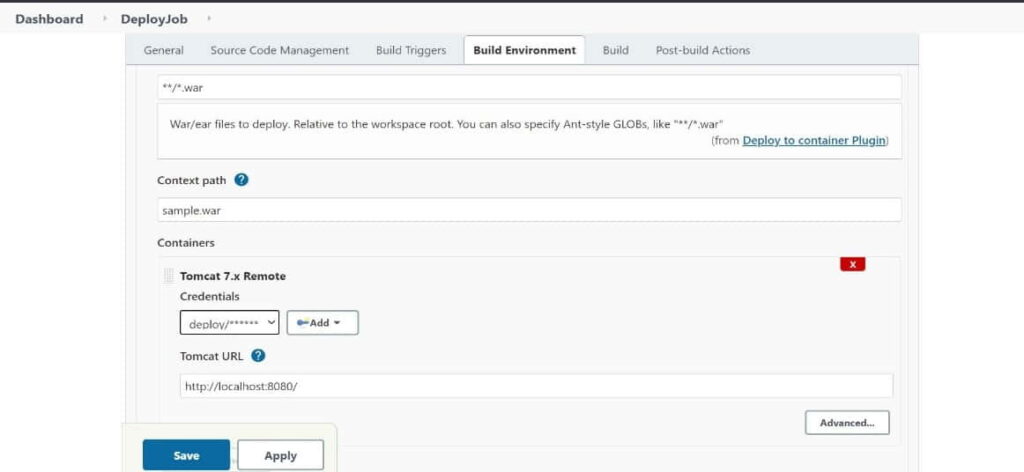
**/*.warwill pick the war file from our current workspace. click on?to know more about this options.- Once configuration is done,
Buildthe project. If configuration is done properly, build will pass and it will deploy the war file on tomcat. - Check the build status under
"console output"option.
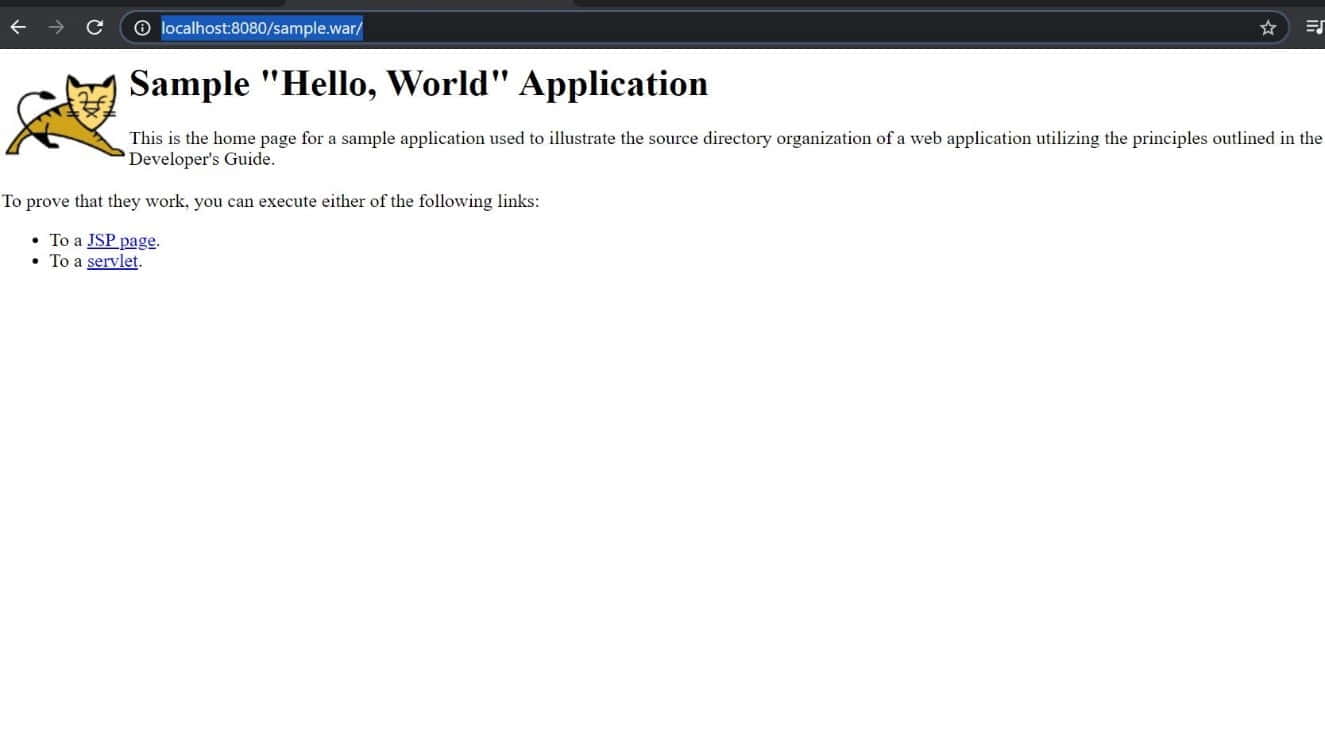
Step 9: Check The Deployment
- Now check the deployment on tomcat using URL http://localhost:8080/sample.war/