
Table of Contents
In this tutorial, we will focus on how to install and setup Django project in PyCharm IDE for application development. There are so many other IDEs available to do the same job like ATOM, Spyder, VC studio etc. Django is one the most demanded open source python web framework. It basically contains collection of python libraries which can be directly imported and used for developing web applications. It can be used to develop both front end and back end applications. It is one of the most in-demand python framework because of its ease to use and pragmatic design. More on Django Docs.

Step by Step Guide to Install and Setup Django Project in PyCharm
Also Read: 9 Effective Ways to Pass Parameters to Python Functions
Step 1: Prerequisites
a) You should have a running Windows 10 machine.
b) You should have access to Install New Software.
c) You should have access to Microsoft Store.
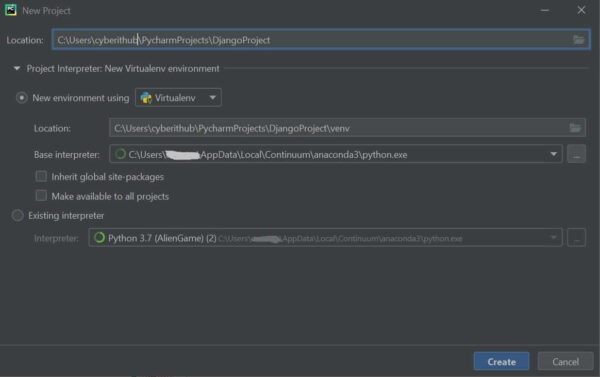
Step 2: Create Normal Project
Open the IDE and create a normal project by selecting File -> New Project . Here name the project as “DjangoProject”
Step 3: Install Django
Next we will install Django module from terminal. We will use PyCharm integrated terminal to do this task. One can also use cmd on windows to install the module.
(venv) C:\Users\cyberithub\PycharmProjects\DjangoWork>python -m pip install django
Collecting django
Using cached Django-3.2.3-py3-none-any.whl (7.9 MB)
Collecting asgiref<4,>=3.3.2
Using cached asgiref-3.3.4-py3-none-any.whl (22 kB)
Collecting sqlparse>=0.2.2
Using cached sqlparse-0.4.1-py3-none-any.whl (42 kB)
Collecting pytz
Using cached pytz-2021.1-py2.py3-none-any.whl (510 kB)
Collecting typing-extensions
Using cached typing_extensions-3.10.0.0-py3-none-any.whl (26 kB)
Installing collected packages: typing-extensions, sqlparse, pytz, asgiref, django
Successfully installed asgiref-3.3.4 django-3.2.3 pytz-2021.1 sqlparse-0.4.1 typing-extensions-3.10.0.0
Step 4: Check Installed Django version
To check installed Django version, you can run python -m django -version command as shown below.
(venv) C:\Users\cyberithub\PycharmProjects\DjangoWork>python -m django –version
3.2.3
Step 5: Install mysqlclient(optional)
If you are working on some project which requires MySQL DB connection, then you need to install mysqlclient module to connect to MySQL database during the application development. You can install the module by using pip install mysqlclient command as shown below.
(venv) C:\Users\cyberithub\PycharmProjects\DjangoWork>pip install mysqlclient
Collecting mysqlclient
Downloading mysqlclient-2.0.3-cp37-cp37m-win_amd64.whl (178 kB)
|████████████████████████████████| 178 kB 467 kB/s
Installing collected packages: mysqlclient
Successfully installed mysqlclient
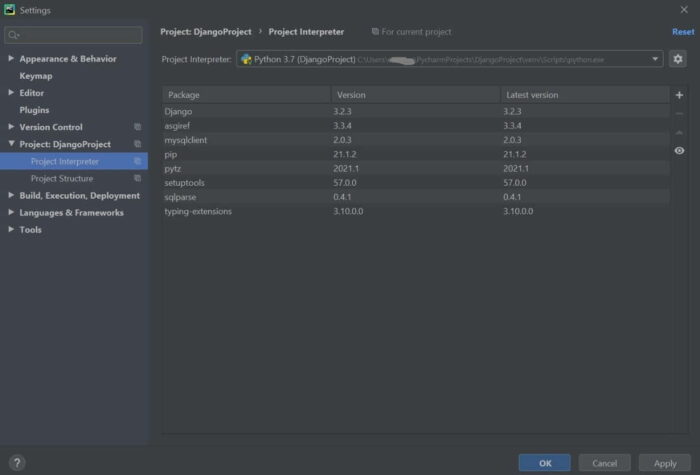
Once Installed, verify the installed modules by selecting File -> Settings -> Project Interpreter.
Step 6: Create Django Project
When you execute django-admin startproject command, then it will create a Django project inside normal project which we already have created here.
(venv) C:\Users\cyberithub\PycharmProjects\DjangoWork>django-admin startproject
FirstDjango .
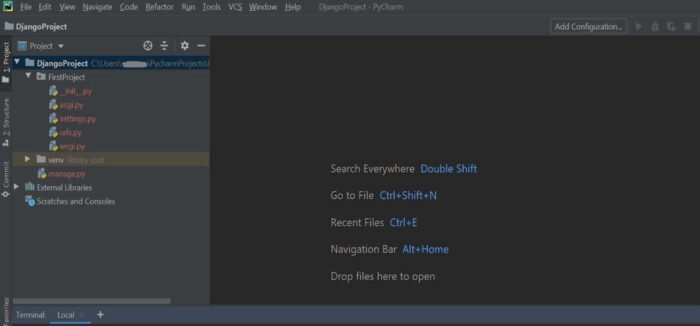
Once created, you should be able to see below folder structure with default files inside it.
NOTE:
Step 7: Check Python3 version
If you are going to use default Django web server, then you need to make sure python3 is installed. To check if it is installed or not, you can quickly run python3 --version command as shown below.
(venv) C:\Users\cyberithub\PycharmProjects\DjangoWork>python3 --version
Python was not found; run without arguments to install from the Microsoft Store,
or disable this shortcut from Settings > Manage App Execution Aliases.
As you can see from above output, currently it is not installed. So to install it, run python3 command and it will redirect you to Microsoft Store from where you can directly install.
(venv) C:\Users\cyberithub\PycharmProjects\DjangoWork>python3
Once python3 is successfully installed, it should give you the right output as shown below.
(venv) C:\Users\cyberithub\PycharmProjects\DjangoWork>python3 --version
Python 3.9.5
Step 8: Run Default Django web server
Django internally provides a default web server where we can launch our applications. By default the server runs on Port 8000. Access the web server on the highlighted URL.
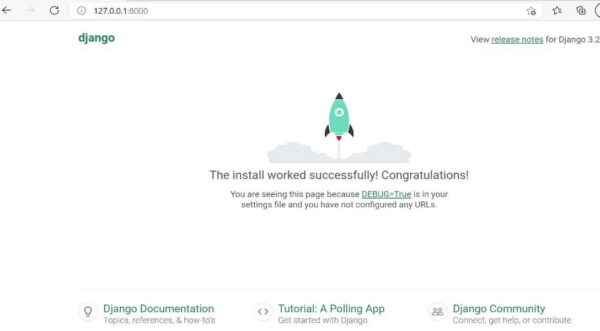
(venv) C:\Users\cyberithub\PycharmProjects\DjangoProject>python manage.py runserver
Watching for file changes with StatReloader
Performing system checks...
System check identified no issues (0 silenced).
You have 18 unapplied migration(s). Your project may not work properly until you apply the migrations for app(s): admin, auth, contenttypes, sessions.
Run 'python manage.py migrate' to apply them.
May 27, 2021 - 22:01:52
Django version 3.2.3, using settings 'FirstDjango.settings'
Starting development server at http://127.0.0.1:8000/
Quit the server with CTRL-BREAK.
If everything goes well, hit the above highlighted URL which will redirect you to below Django Home page.
Step 9: Run web server on different port
In case you don't want to run your server on default Port 8000, then you have the option to run on different port as well. Let's say you want to use Port 9999, so in that case you need to use python manage.py runserver 9999 command as shown below.
(venv) C:\Users\cyberithub\PycharmProjects\DjangoProject>python manage.py runserver 9999
Watching for file changes with StatReloader
Performing system checks...
System check identified no issues (0 silenced).
You have 18 unapplied migration(s). Your project may not work properly until you apply the migrations for app(s): admin, auth, contenttypes, sessions.
Run 'python manage.py migrate' to apply them.
May 27, 2021 - 23:22:16
Django version 3.2.3, using settings 'FirstDjango.settings'
Starting development server at http://127.0.0.1:9999/
Quit the server with CTRL-BREAK.
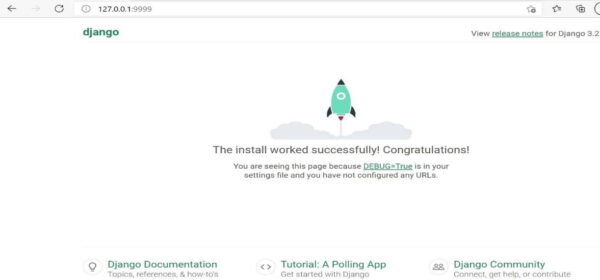
We have successfully done the set up !!
Your step-by-step guidance for dango project is very easy and clear. I followed these stpes and
successfully created my first project and run the server. I thank you much for instructions..
Thanks