
Table of Contents
In this article, I will take you through the steps to install Oracle Database 12c. Oracle database is the most widely used database across the world due to its multiple features capability. Some of its features are:-
a)Cluster Creation: Provides Real Application Cluster(RAC) Performance.
b)Performance and Scalability: Provides LOB(Large Object) Performance.
c)Database Security: Uses standard encryption algorithm like AES and 3DES to encrypt columns.
d)Availability: Provides fast start failover to standby database
e)Grid Management: Provides Automatic Storage Management and Standalone Disk Group Management.
f)Grid Computation: Simplify data provisioning within Grid environment.
g)Content Management: Provides new set of document filters.
Install Oracle Database
Before going through the steps to install Oracle Database you need to download the database software and keep it ready.

Step 1: Download Oracle Database 12c Release 2
You first need to go to Download Oracle Database 12c and download Oracle Database 12c in your local system to install Oracle database.
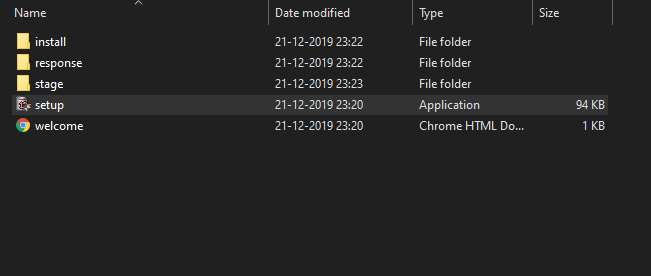
Step 2: Extract Zip file
Now you need to extract Oracle 12c Zip file in your local folder which will provide you with the below files:-
Also Read: How to create Network Bonding in RedHat/CentOS 7
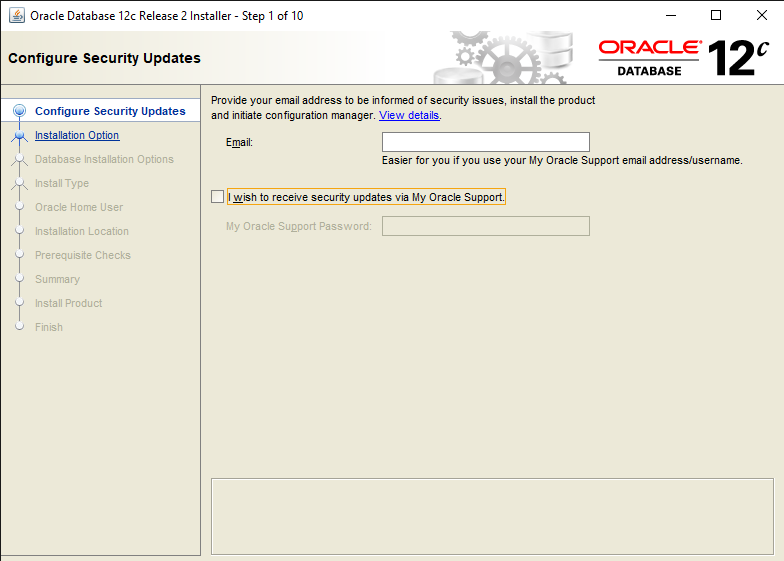
Step 3: Run Setup.exe as Administrator
You need to right click on setup.exe and select Run as Administrator. After validating and passing the prerequisites it will display you the below screen. If you want you can let "I wish to receive security updates" checked to receive the latest security updates. In our case I will uncheck this option. Then click on Next.
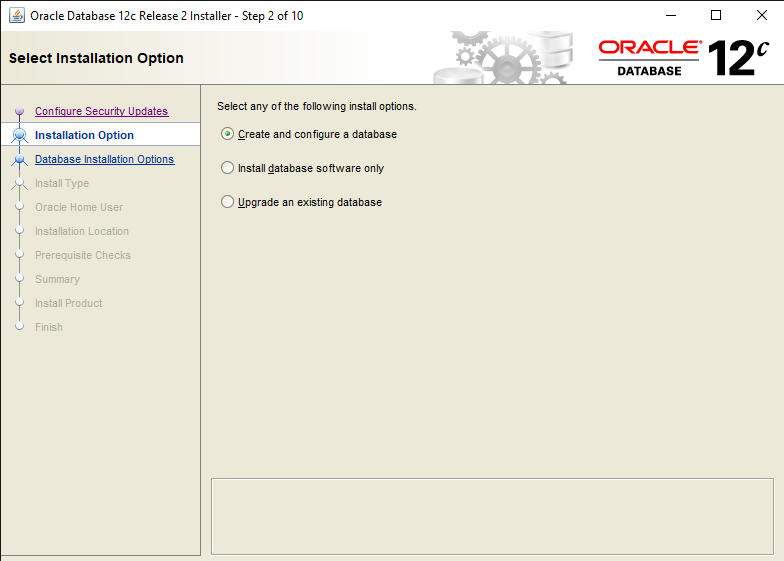
Step 4: Create and Configure Database
Now we need to configure a database here, so I will select Create and Configure Database option and click on Next.
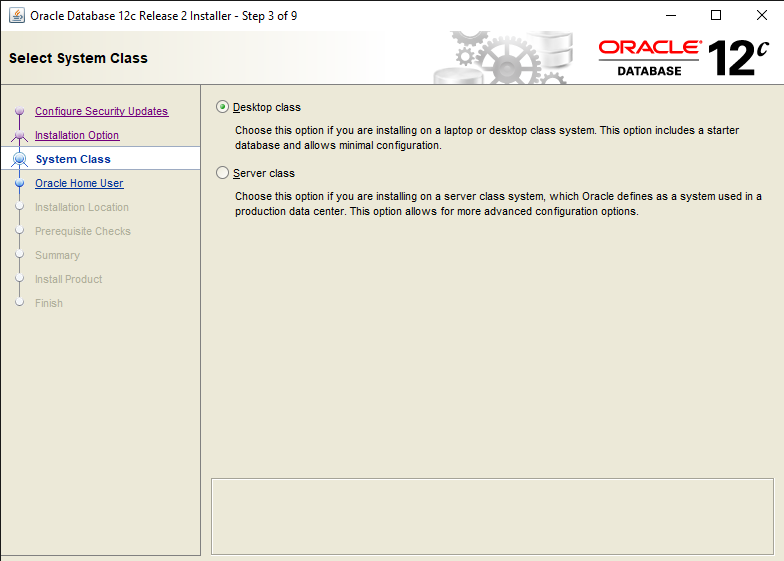
Step 5: Select the Server Class
Here you need to select either Desktop Class Installation or Server Class Installation.
Desktop Class: You need to select this option when you are installing on a local system or on Desktop System. This will provide you a started database and involves less configuration overhead.
Server Class: You need to select this option when you are installing on a Server Class Systems, which basically means a system you are going to use on Production with more advanced features.
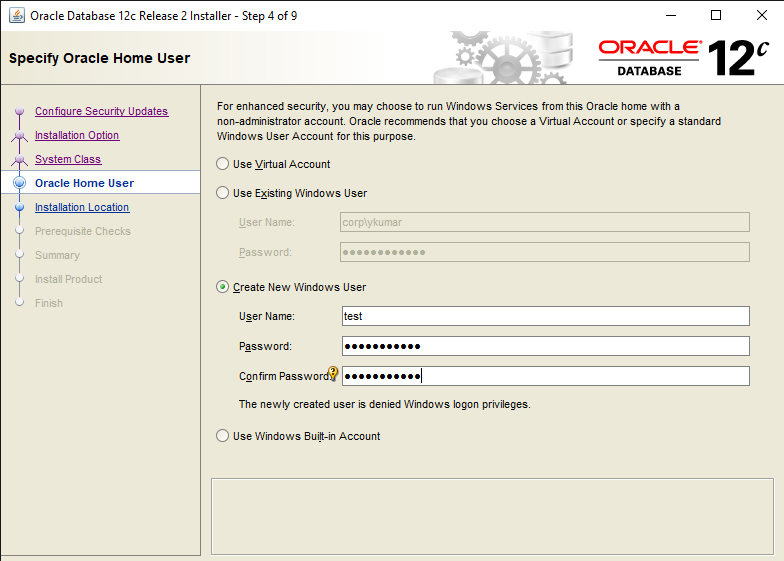
Step 6: Choose Oracle Home User Account
Here you have three options:-
a)Use Virtual Account
b)Use Existing Windows User
c)Create new Windows User
d)Use Windows Built-in Account
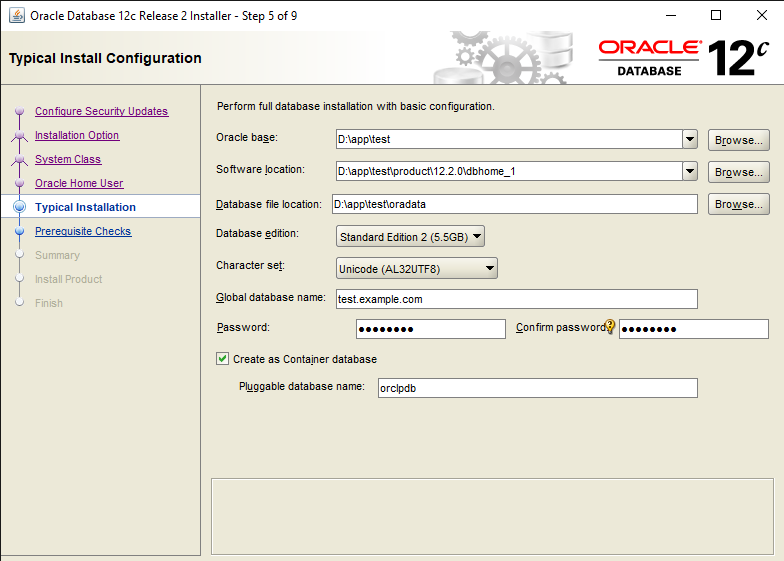
Step 7: Select Installation Configuration
Here you need to provide below configuration:-
Oracle Base: D:\app\test
Software location: D:\app\test\product\12.2.0\dbhome_1
Database File Location: D:\app\test\oradata
Global Database Name: test.example.com
Password: Test@12345
Pluggable Database Name: orclpdb
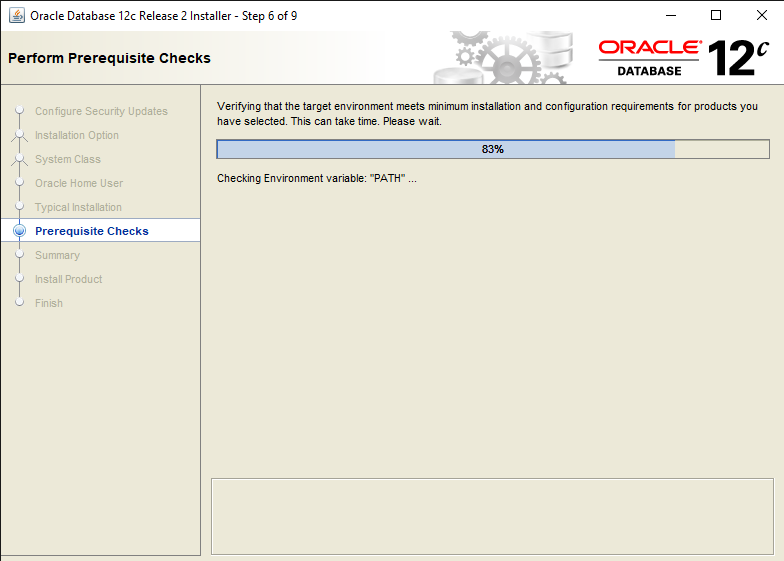
Step 8: Prerequisite Checks
After giving the database configuration, it will check if all the prerequisites are met or not. If any of the prerequisites fail, it will show you here.
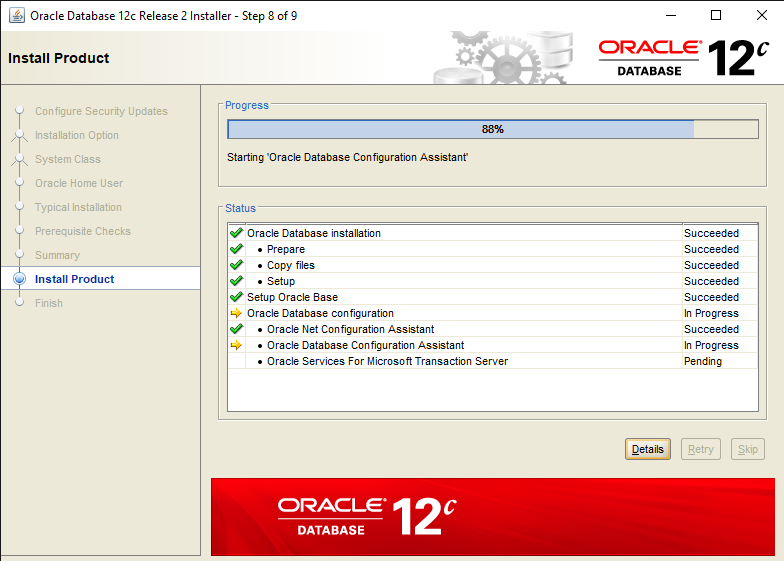
Step 9: Install Product
Once all the prerequisites are in place, installation will get started as you can see below. You can see the progress of installation as well as the status of installation.
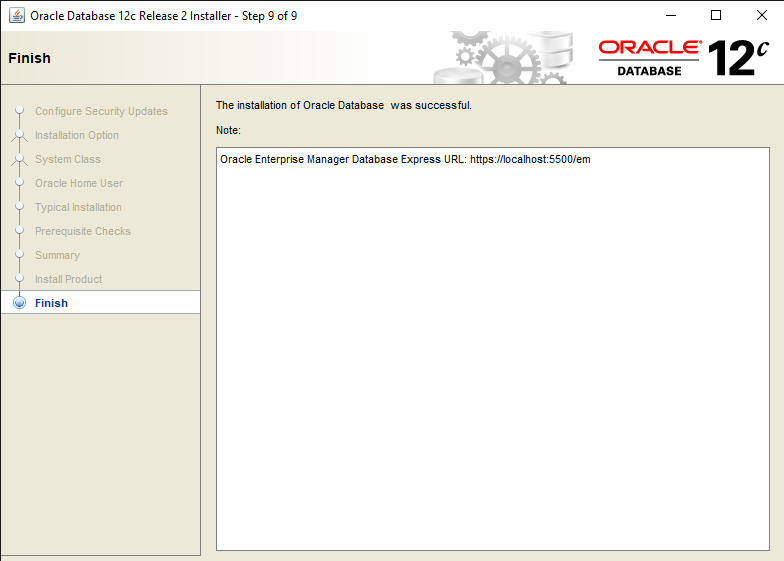
Step 10: Installation Completion
Once installation is completed without any error, you will get below screen with the URL to login.
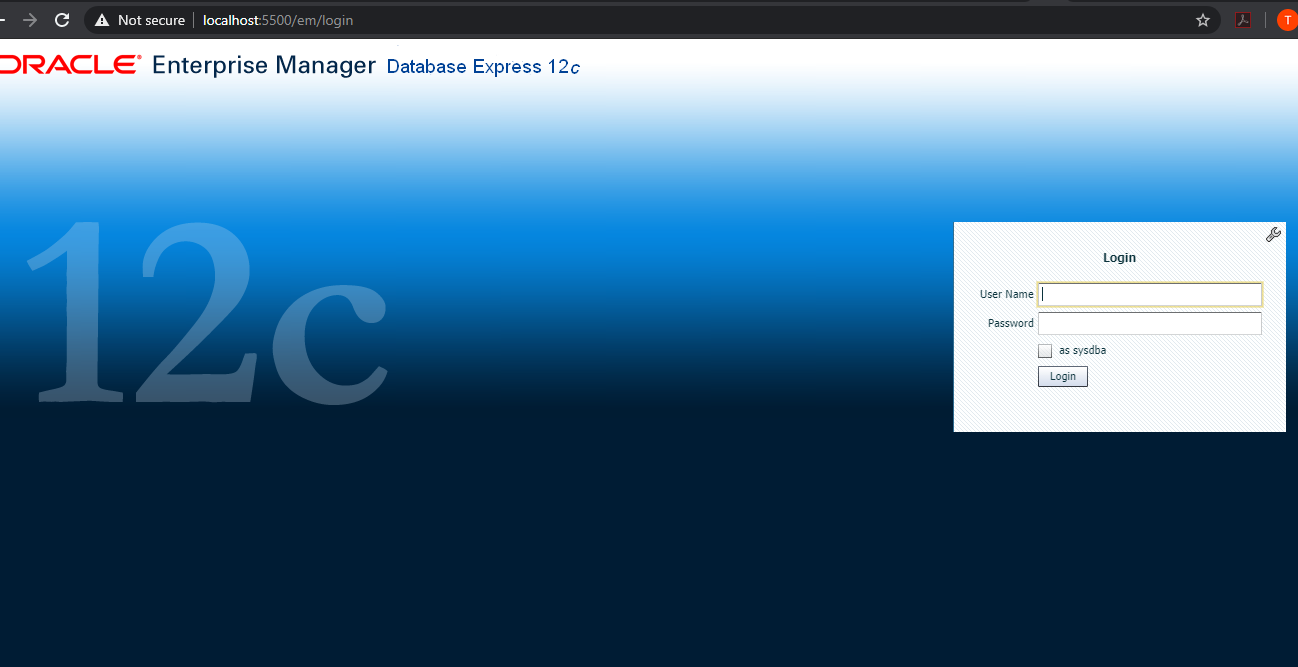
Step 11: Login to the Database
Now you can access the Database Page at https://localhost:5500/em.
Congratulations!! You have now successfully installed the Oracle Database 12c !!
Its very detail and help full. Thanks
Very fine, I like it.
Hi,
If I am stuck at 91% without any error details...what would that be...
Thanks
Hi Jins,
Could you please share below information to help you with this issue ?
a) Memory
b) CPU Core
c) Window OS Version
d) Screenshot of the Installation
Thanks & Regards
CyberITHub
https://localhost:5500/em. does not work... why ?