Table of Contents
In this article, I will take you through Step by Step Guide to Install AlmaLinux 8.4. With the recent announcement from Redhat to end the life of CentOS 8 by Dec 2021, it has now become clear that we will be needing the CentOS 8 replacement sooner and quicker to ease down the nervousness within the Linux community. By this time, we already have some of the viable replacement like Rocky Linux which we have covered in the earlier article. The next probable replacement could be the AlmaLinux which we are going to cover in this article.
Step by Step Guide to Install AlmaLinux 8.4
Also Read: How to Install and Use Speedtest CLI to Test Internet Speed on Linux
Step 1: Prerequisites
a) You need to download AlmaLinux 8.4 Minimal ISO Image from Download Page.
b) You need to have a USB Drive in case you are going to install from that. Since here we are attaching ISO Image to a Virtualbox instance so we won't be needing the USB Drive.
c) You should have sufficient access to install AlmaLinux 8.4 in your System.
Step 2: Booting Using ISO Image
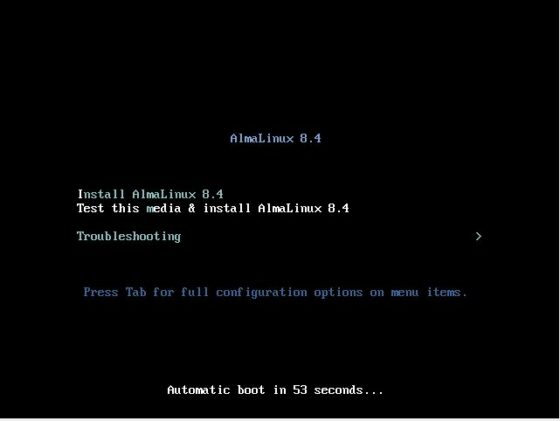
First step we have is to boot the System from ISO Image. Once booted it will show below screen with an option to select Install AlmaLinux 8.4 line. You need to press enter here or it will automatically start the booting process after 60 seconds.
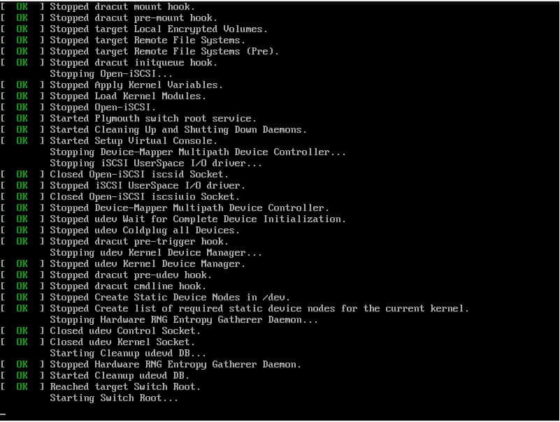
Once the booting process started it will show screen like below. You need to wait for 2-3 minutes till you get a screen to choose your Language.
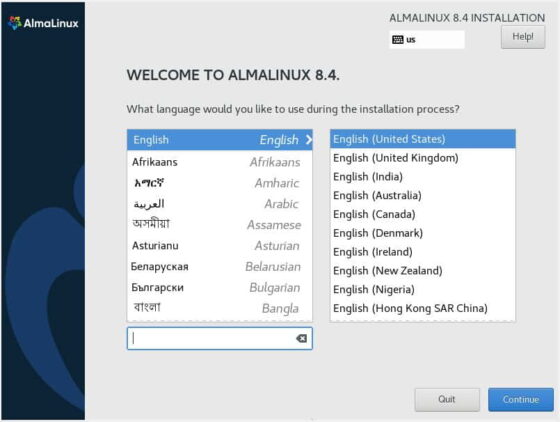
Step 3: Choose Your Language
Next you need to choose your Language for the Installation process. By default English(United States) language will be selected. You can change it to some other language as per your convenience.
Step 4: Keyboard Layout
You can also select the Keyboard Layout which you would like to use on your System. By default US Keyboard Layout will be selected. To test the Keyboard Layout you can write few lines in textbox area and check.

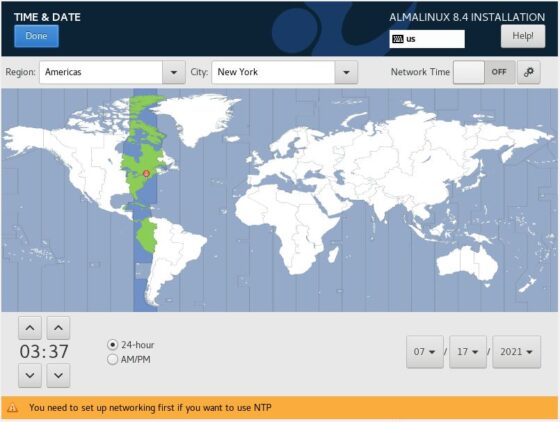
Step 5: Set Time & Date
Next important setup that you need to do is to set the time and date. This includes setting your local Region and City. Here we are setting region as Americas and City as New York. We are also using time in 24 hour format and then setting the local time accordingly.
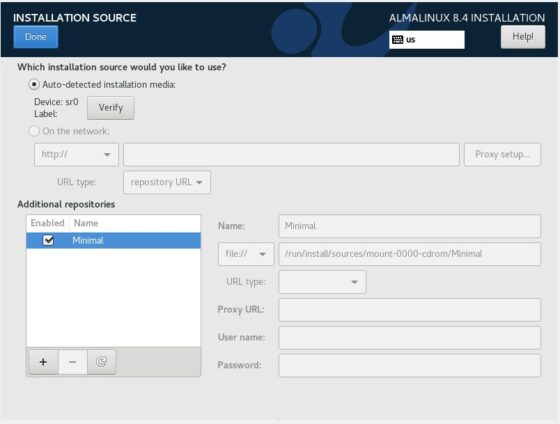
Step 6: Check Installation Source
Since here we are using Local Minimal ISO Image for the installation so we don't have to change the Installation source as it is getting auto-detected but in case if you are going to use any other installation source like installing through network then you need to specify the source URL as shown below.
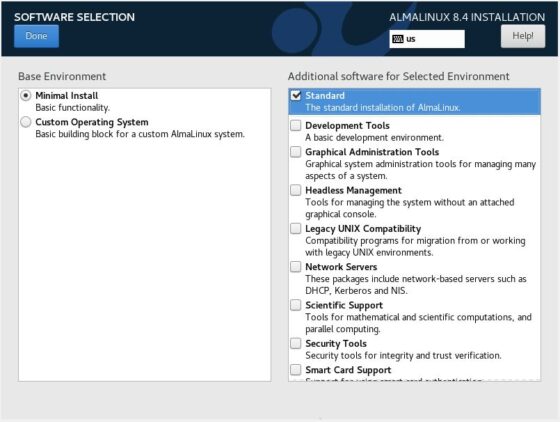
Step 7: Software Selection
If you want you can select additional softwares in the beginning itself or else you can install it later as well. For the moment we are going to use standard software installation of AlmaLinux. Then Click on Done.
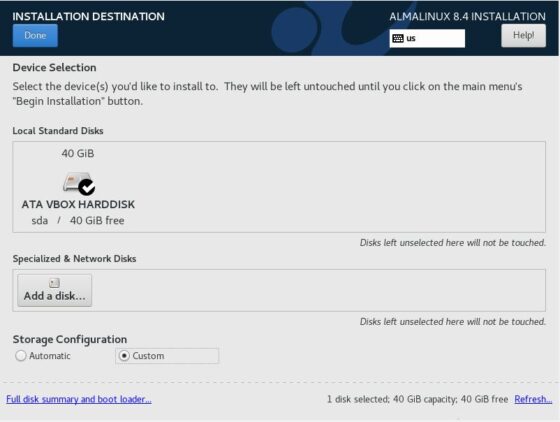
Step 8: Installation Destination
Next important setup is to choose the installation destination and the Storage Configuration you are going to use. You have the option to choose from two Storage Configurations - Automatic and Custom. Since here we are going to manually create all the partitions so we will select Custom Option. But in case if you want to save yourself from the headache of creating partition then you can select Automatic option. This option will create default partitions for you.
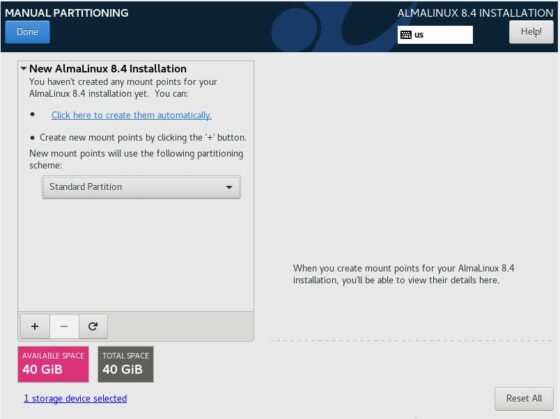
Step 9: Manual Partitioning
Once you select the Custom Storage Configuration and click on Done, next screen will take you to Manual Partitioning where you need to select a partitioning scheme and create your partitions. Here you will see three types of partitioning schemes - Standard Partition, LVM and LVM Thin Provisioning. We will be using the Standard Partition Scheme for creating all our partitions.
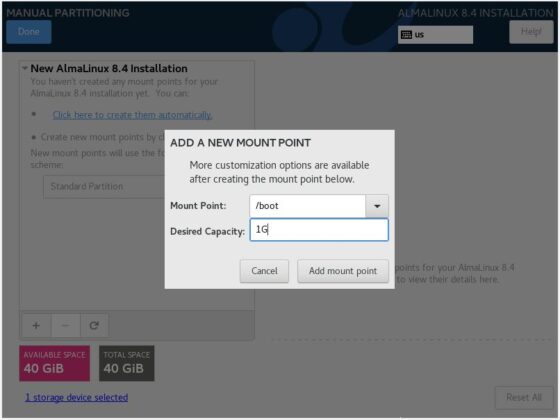
a) Create /boot partition
First partition that needs to be created is the /boot partition. Here we are going to align 1GB of memory as shown below. Select (+) to create a partition. After specifying the mount point and Desired Capacity, Click on Add mount point.
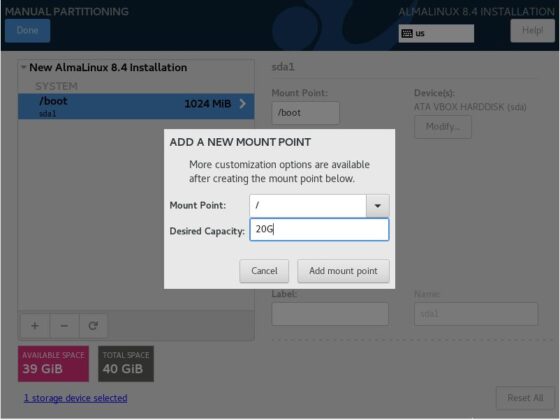
b) Create root(/) partition
Second important partition is the root(/) partition where we need to align atleast 20GB of space. Then Click on Add mount point.
c) Create swap partition
And the third partition that we need to create is the swap partition where we are aligning 4GB of space. Usually swap partition size would depend on the main memory. It should be atleast two times the size of the RAM. Since our RAM size is 2GB so our swap partition size would become 4GB. After specifying the details, click on Add Mount Point.
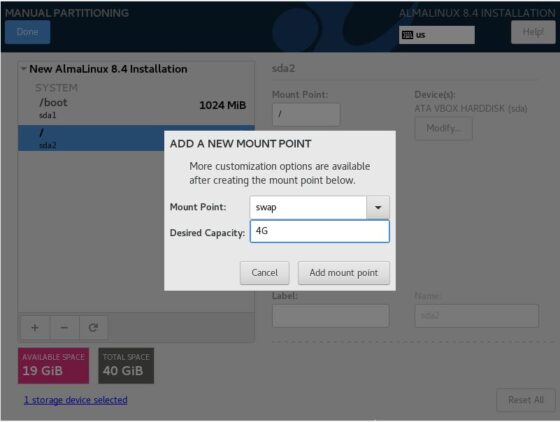
You can also create extra partitions like /home and /var as per your requirement. But from the functionality perspective you will only need /boot, root(/) and swap partition as of now. After adding all the partition, click on Done.

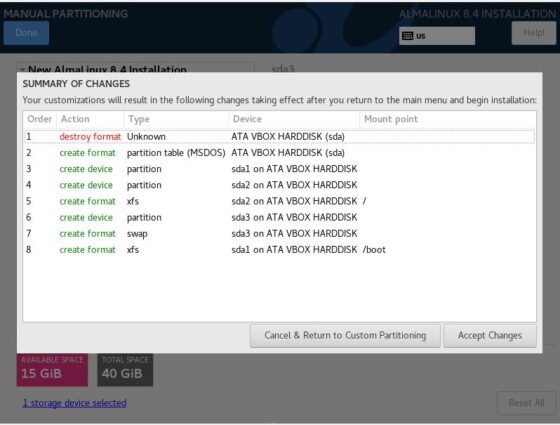
After that you will see below screen with all the summary of changes you have done. If everything looks fine then you can click on Accept Changes to do all the necessary changes.
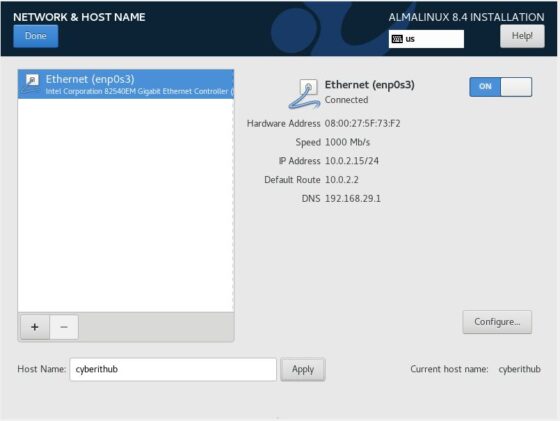
Step 10: Network and Host Name
Next you need to setup your Network where you need to select the Network Interface and switch it ON. Then you need to provide the hostname you want to set and Click on Apply.
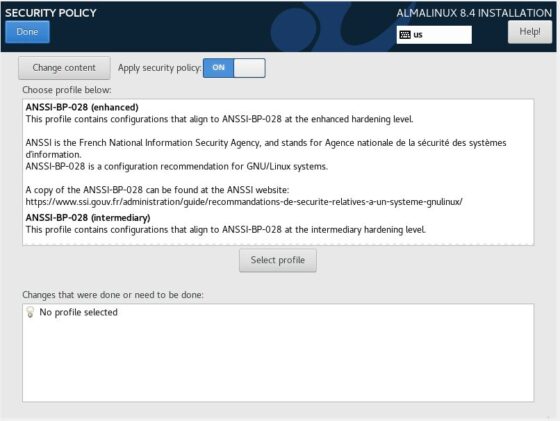
Step 11: Security Policy
By default no security policy will be selected. If you want you can select a security profile. Since here we are not going to use any security profile so we will just click on Done.
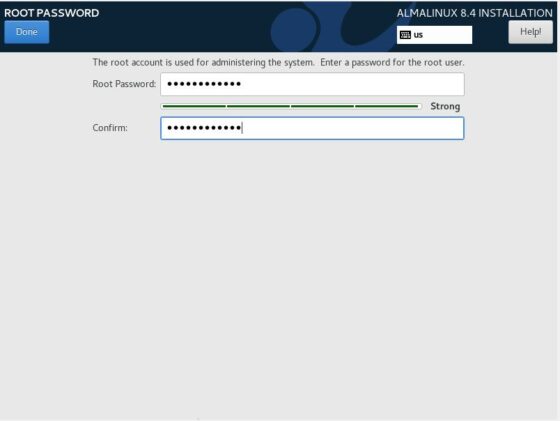
Step 12: Set Root Password
By default root account will be disabled so you need to click on Root Password on Main Menu and the provide a strong password to enable the account. This is one of the mandatory step which needs to be completed before starting the Installation process.
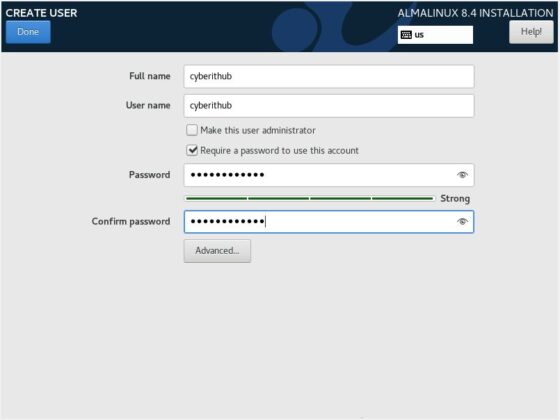
Step 13: Create User
If you want you can create an user by clicking on Create User from the Main Menu. Here we are creating a user cyberithub and giving a strong password.
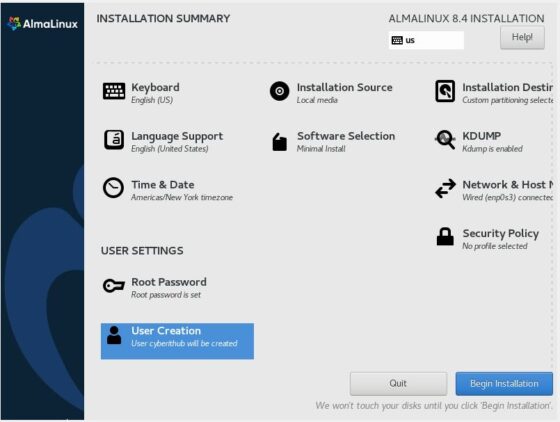
Step 14: Begin Installation
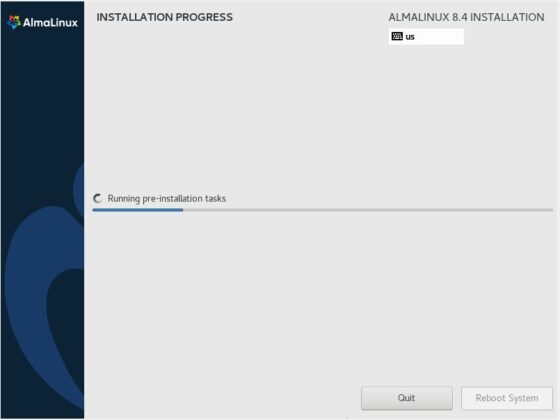
Once all the setup are completed, you can click on Begin Installation to start the installation process.
Once started you will see a screen like below which will show the progress of all the installation tasks. You need to wait here till all the installation tasks gets completed.
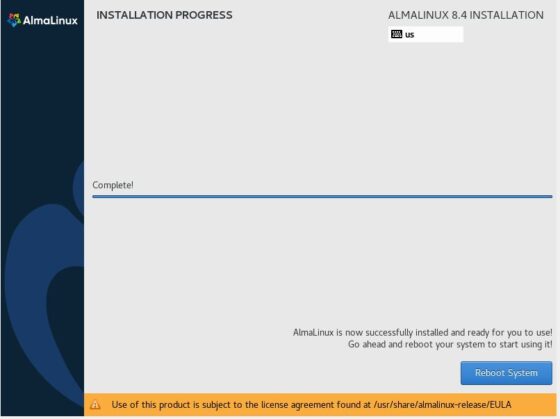
Step 15: Reboot System
After successful installation of all the software packages, you will get a screen like below where you would need to finally reboot the System by clicking on Reboot System.
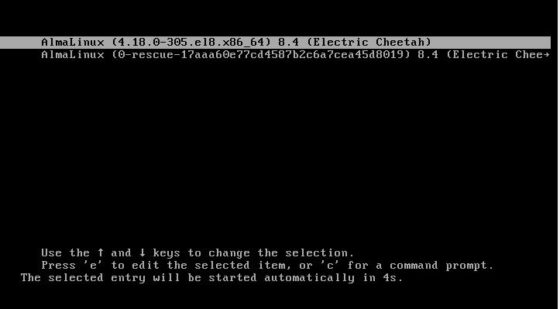
Step 16: Boot Your System
Once rebooted you will see below GRUB boot loader screen to load the kernel and start initializing the System. Here you can either press enter or it will automatically boot after 10 secs from the default kernel.
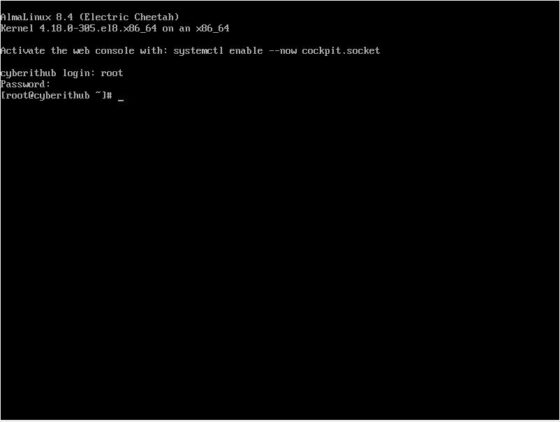
Step 17: Login to Your System
Once kernel loaded into the memory and all the system initialization completes, you will see a login screen like below where you can provide login user and password to authenticate and finally login to your System.