
Table of Contents
In this article, we will go through Step by Step Guide to Install Rocky Linux 8.4. After the recent announcement by CentOS to end the life of CentOS 8 by 31st Dec, 2021, there are plenty of Linux version available now to replace the CentOS Linux. On all those versions, Rocky Linux is the front runner which is almost same as the current CentOS. It also provides all the features like current CentOS version. We will see the installation steps in great detail in below section.
Step by Step Guide to Install Rocky Linux 8.4
Also Read: 6 Best Steps to Install Cockpit on CentOS 8
Step 1: Prerequisites
a) You should have Rocky Linux 8.4 Minimal ISO Image downloaded from Rocky Linux official Download Page.
b) You should have atleast 2GB of Memory and 20GB of Hard Disk in your Server.
Step 2: Booting Image
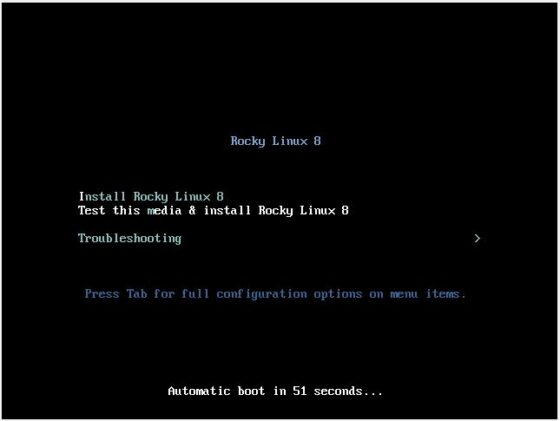
You can install using USB device by making it bootable with Rocky Linux 8.4. Since here I am installing it in a Virtual box so I am booting the image by attaching it to the newly created Instance. Once started you will see below screen where you need to click Enter on Install Rocky Linux 8 line, which will also be the default selected line. If you do not click enter then it will start the automatic boot after 60 seconds.
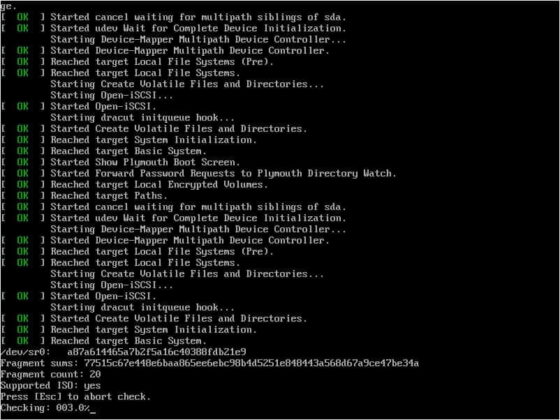
Once clicked enter you will see System started initializing like below. You might also encounter System checks like below which can be cancelled after pressing Esc or you can let the checks continue till the end.
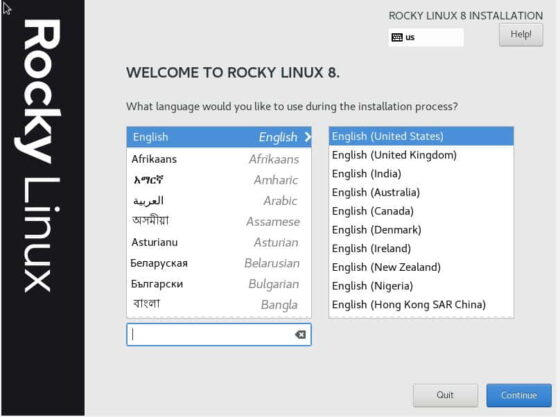
Step 3: Choose Your Language
Next screen will ask you to select language for the installation process. Here we are going to select English(United States). Then click on Continue.
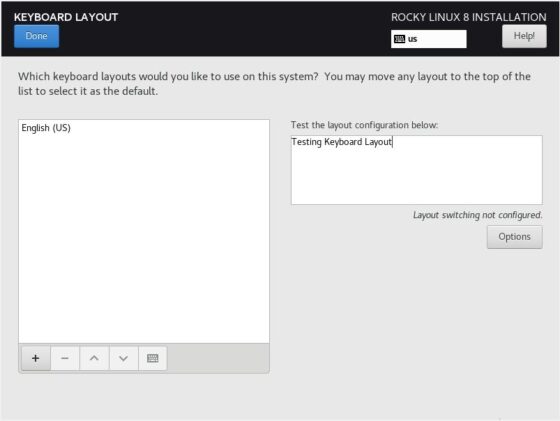
Step 4: Keyboard Layout
Then in the next screen you will get different options to set before you can begin the Installation process.

In the list of settings, first you need to check the Keyboard Layout. By default it will be set to US. You can change it as per your convenience and once changed make sure to test it by writing something in below box.
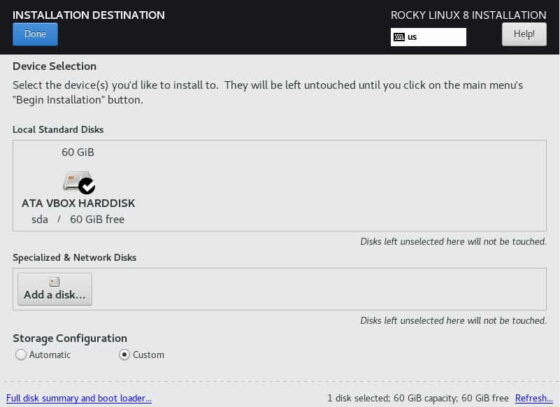
Step 5: Installation Destination
You will also have the option to choose your destination device where you want to install. It could be either any local hard disks or any specialized network disks. In our case we are going to choose Local Standard Disks of 60 GB as shown below.
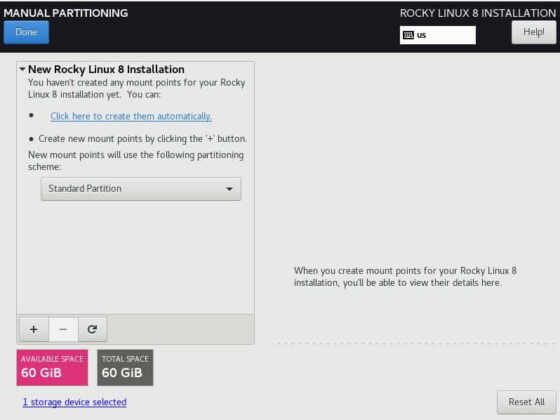
Step 6: Manual Partitioning
Storage Configuration can be done in two ways: Automatic and Custom. If you don't want to take the headache of creating partitions then you can go with Automatic Storage Configuration but in case you want to manually create all the partitions then you need to go with Custom Storage Configuration. We are going to select Custom Configuration here.
After selecting Custom configuration, you will get Manual Partitioning screen. Under Manual Partitioning, you will see three types of partition options - Standard Partition, LVM and LVM Thin Provisioning. We are going to use Standard Partition scheme to create our system partition. You can choose the best suitable option as per your need.
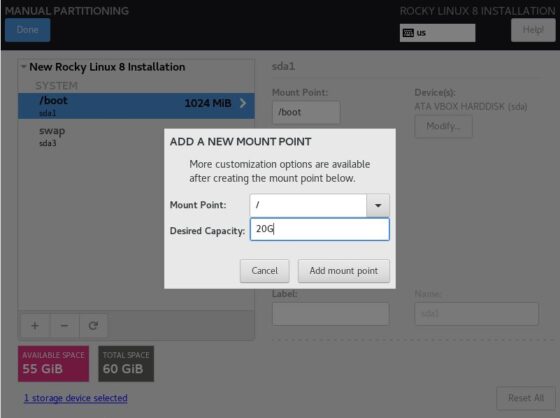
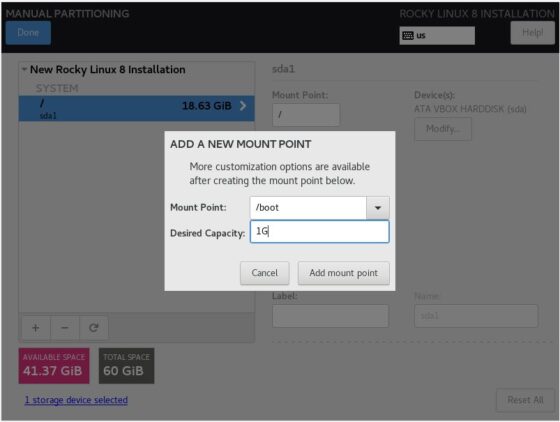
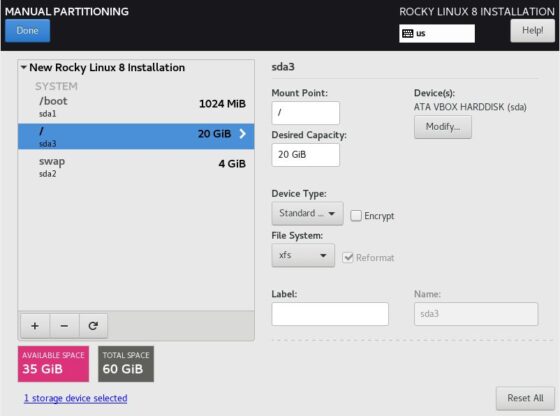
Step 7: Create Mount Point
Ideally for the system to work properly, we need three partition: root(/), boot(/boot) and swap. You can also create extra partition like /home and /var as per your requirement.
a) Create root partition
We are going to use 20GB capacity for our root(/) partition.
b) Create boot partition
We will use 1GB capacity for /boot partition.
c) Create Swap partition
We will use 4GB for swap partition.

Once all partitions are created, Click on Done.
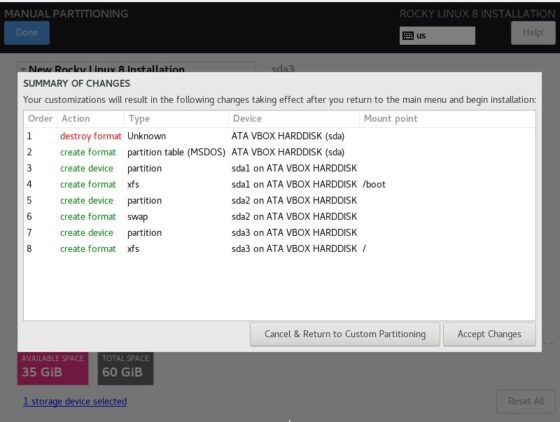
Then Click on Accept changes to implement all the changes on the Hard Drive.
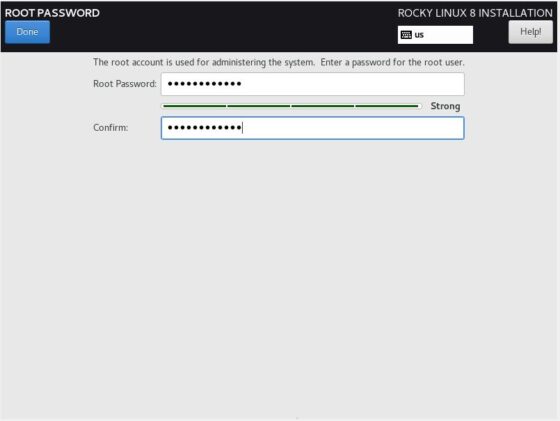
Step 8: Set Root Password
You need to set root password to begin the Installation process. Without this you won't be able to start the Installation. Click on Root Password setting.

You will see a screen to set the root password. Here you need to give the strong alpha numeric password and confirm it again. Then click on Done.
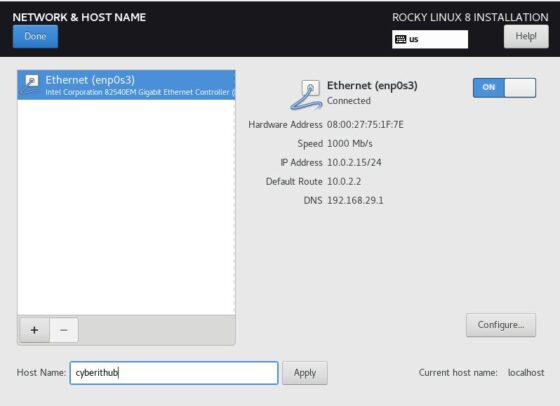
Step 9: Check Network and Host Name
Next you need to check the network connection and provide a hostname of your choice. We are enabling network interface enp0s3 and setting hostname as cyberithub as you can see below. Then Click on Done.
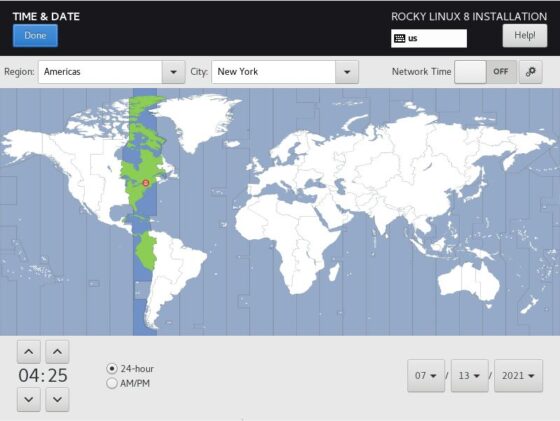
Step 10: Check Time & Date
If you are preparing your Server for Cluster setup then setting correct time and date is very important for the cluster to work as nodes in cluster should always be in sync. Here we are setting Region as Americas and City as New York.
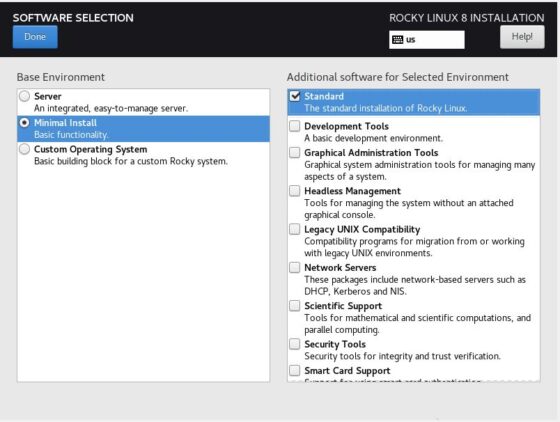
Step 11: Software Selection
Coming to Software selection, you will see three different options to choose - Server, Minimal Install and Custom Operating System. In that we are going to choose Minimal Install method where we will only install the minimum required packages by selecting Standard installation as shown in below screenshot. Then Click on Done.
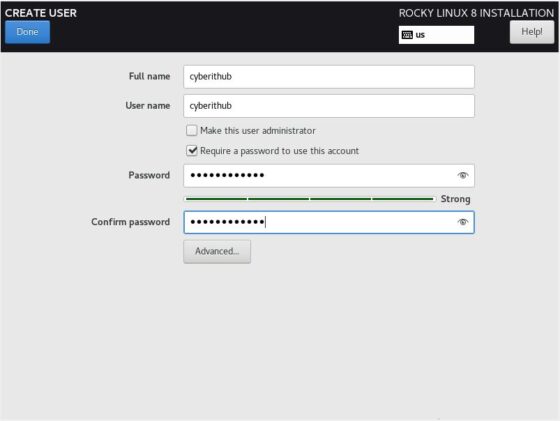
Step 12: Create User
If you want you can also create a user during installation or you can create it later as per your requirement. Here we are creating a user cyberithub and providing its password as shown below.
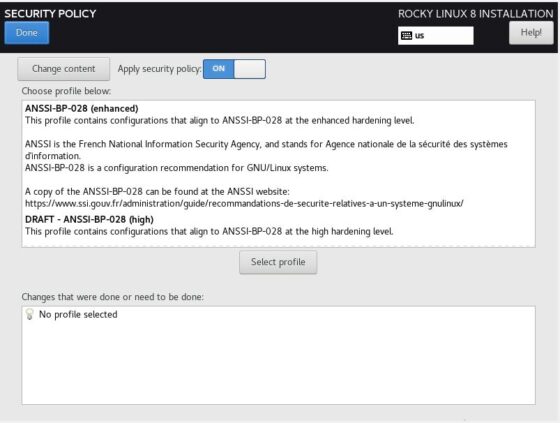
Step 13: Security Policy
You also have the option to set the Security Policy to harden your System security. In our Installation, we are not going to use any Security profile but if you are doing Installation in a Critical Production Server then security is must. You must harden your Server with the best security profile.
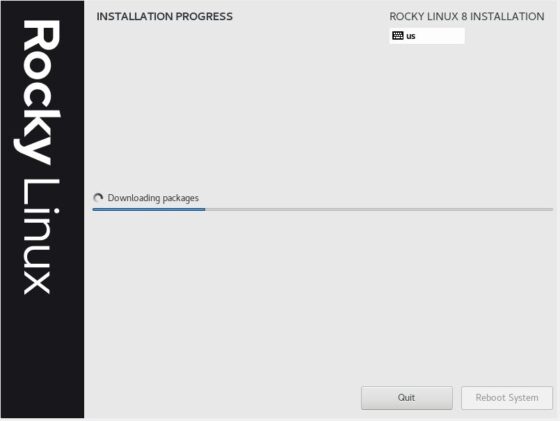
Step 14: Begin Installation
After providing all the required information, you can click on Begin Installation. It will start the Installation process where it will download and install all the required packages. Please keep patience if you have selected lots of packages to install as it might take some time to complete the Installation.
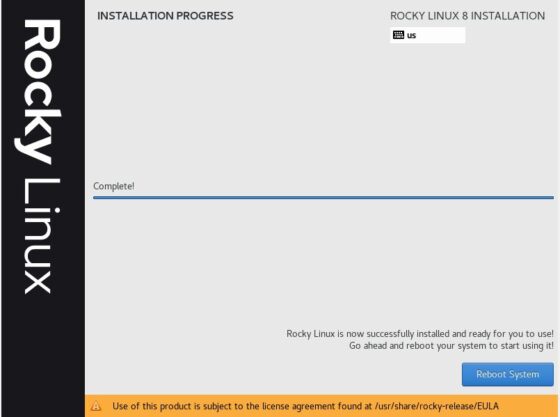
Step 15: Reboot System
If everything goes well you will see Rocky Linux successfully installed and then an option to reboot the system. Click on Reboot System.
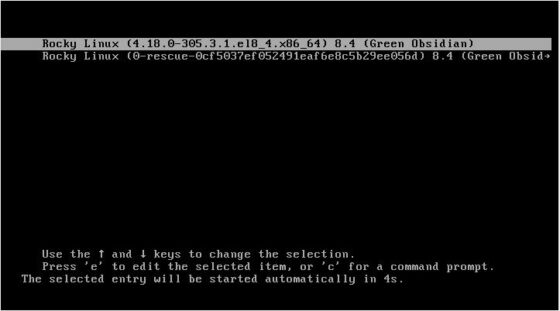
Step 16: Booting System
After clicking on Reboot System, you will get below GRUB screen where you can select to boot the system either in normal mode or in rescue mode. You can simply press Enter here and System will start booting in normal mode.
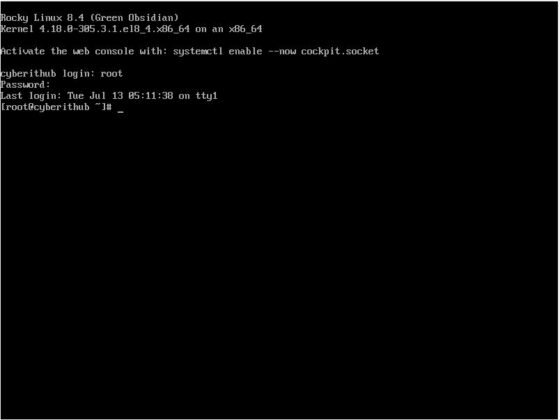
Step 17: Login to the System
Finally, you will get below Login screen where you need to provide login user and password to authenticate. This completes your Rocky Linux Installation successfully.
Hi There
Thank you so much for your guide. I've installed Rocky Linux and by mistake I've set 17GB /tmp file is it possible to change it to 20 Gb or more?
Thank you in advance
Best regards
Kugan
Hi Kugan,
If you are using Standard disk partitions then it will be difficult to resize /tmp without reformatting again but if you are using LVM then you can resize this partition.
Thanks
CyberITHub
Hi. Thanks fir the explanation. But I try it, when I get to the last part, the screen is not showing the BEGINNING EXPLANATION area in order to click on it.? Do u have any idea