Table of Contents
In this article, I will take you through the steps to install OpenSSH Server on Linux Mint 21. If you would like to remotely connect your Linux Mint Server then you need to open Port 22 by installing OpenSSH package in your System. OpenSSH Server is a freely and easily available version of the Secure Shell (SSH) protocol family of tools for remotely controlling, or transferring files between computers. It provides a server daemon and client tools to facilitate secure, encrypted remote control and file transfer operations, effectively replacing the legacy tools. More on Ubuntu website. While it can be easily installed on any Linux distributions, here we will see the steps to install on Linux Mint 21 Server.

How to Install OpenSSH Server on Linux Mint 21
Also Read: How to Install WSJT-X on Linux Mint 21 in 6 Easy Steps
Step 1: Prerequisites
a) You should have a running Linux Mint 21 Server.
b) You should have sudo or root access to run privileged commands.
c) You should have apt or apt-get utility available in your Server.
Step 2: Update Your Server
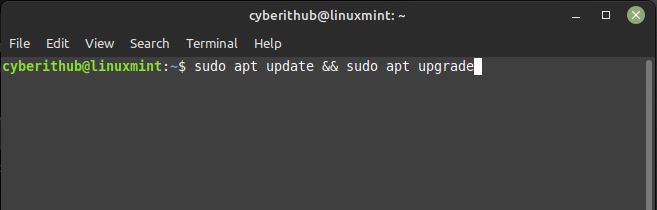
Before going through the steps to install openssh server package on your Server, it is always recommended to first sync your installed packages with the latest available versions from default repo using sudo apt update && sudo apt upgrade command as shown below.
Step 3: Install OpenSSH Server
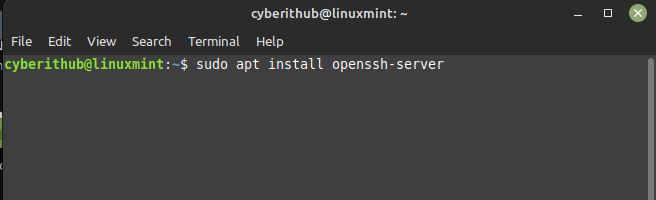
In the next step, you can install OpenSSH Server from default repo by using sudo apt install openssh-server command as shown below. This will download and install the package along with all its dependencies.
Step 4: Verify Installation
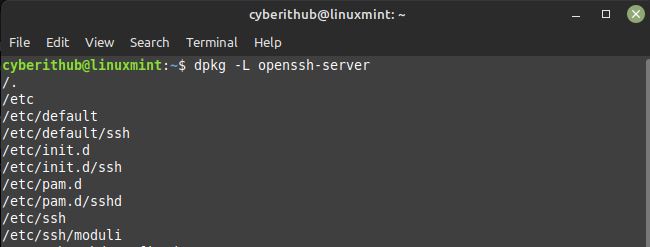
To verify the installed files, you need to use dpkg -L openssh-server command as shown below.
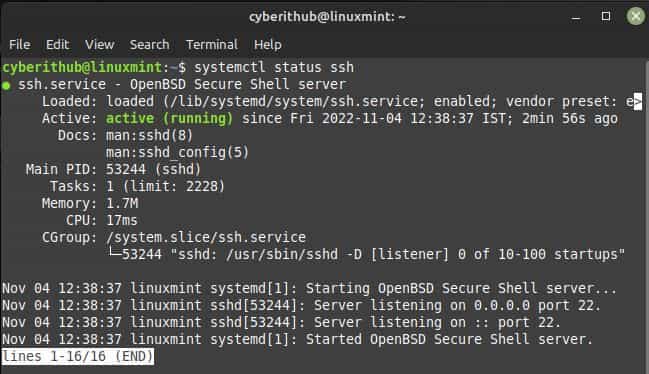
Step 5: Check Status
You can check the ssh status by running systemctl status ssh command as shown below. It should show active and in running state. If needed, you can also start or restart ssh service by using sudo systemctl start ssh or sudo systemctl restart ssh command.
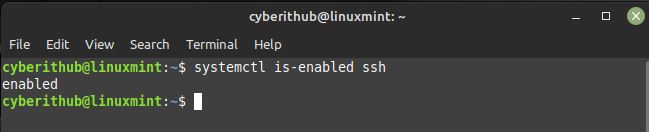
Step 6: Enable or Disable
You can also check the SSH enable status by using systemctl is-enabled ssh command as shown below. In case, if it's not enabled then you can enable it by running sudo systemctl enable ssh command. Similarly, to disable the service you can use sudo systemctl disable ssh command.
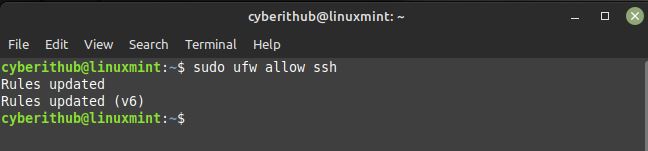
Step 7: Allow through Firewall
In case, you are running ufw firewall in your System then you need to allow SSH Service from the firewall by using sudo ufw allow ssh command as shown below.
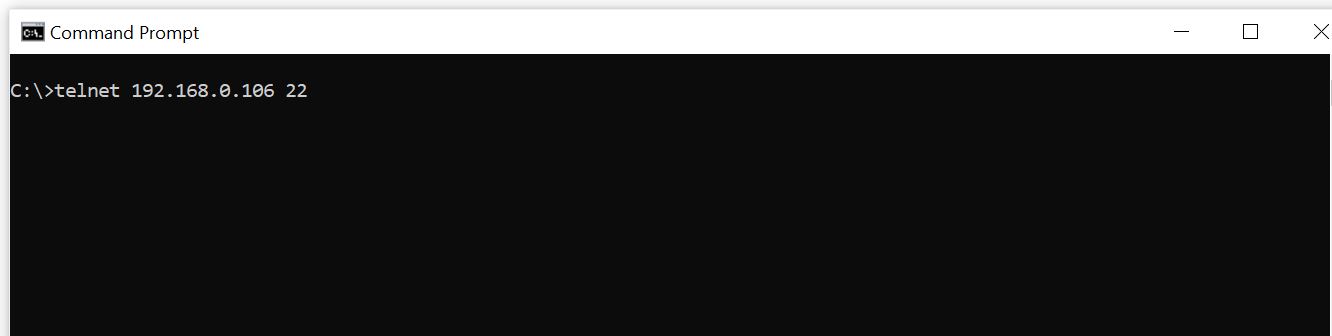
Step 8: Test Connection
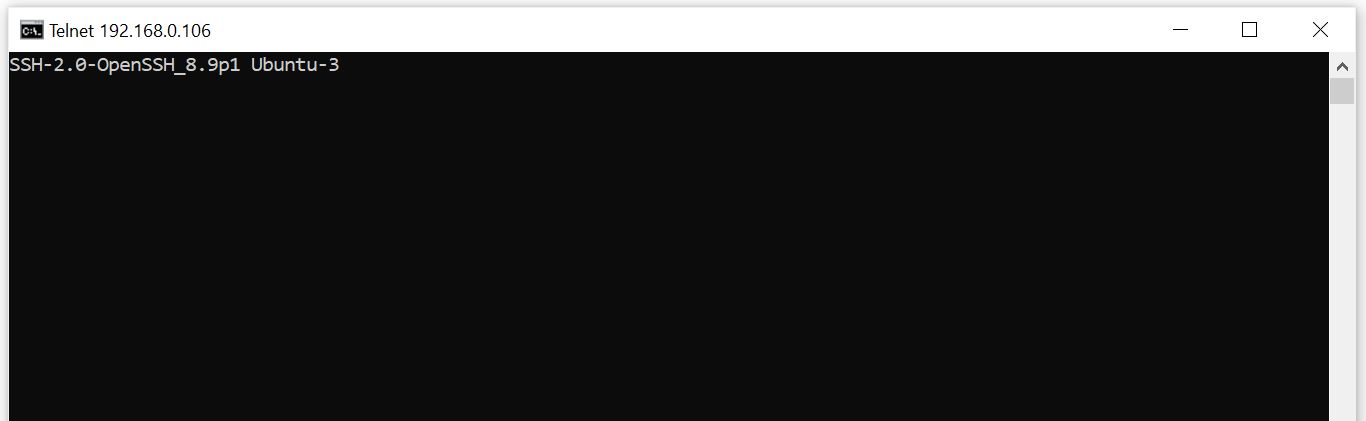
You can test the openssh connection from another system in the network by running telnet <host_ip_address> <Port> command. Since in our case, Linux Mint Host IP Address is 192.168.0.106 so we will use telnet 192.168.0.106 22 command as shown below.
After successful connection, you will see below displayed message on the command prompt. This confirms that our connection is successful and SSH Port is open on the remote server.