Table of Contents
In this article, we will see how to install Kali Linux on VirtualBox using Prebuilt Virtual machines Image. The first and foremost benefit of using Prebuilt VM Image is that you don't have to install Kali Linux from scratch hence saves lot of time. You can just create a new Virtual machine and use the Prebuilt image to bring up the System in no time. All the prebuilt vm image are quality tested so most likely you won't be facing any problem. The other benefit is that it won't alter host OS in order to install and run on Virtualbox or VMware application. Prebuilt VM image comes with scale of additional features like ability to take snapshots and many others.
How to Install Kali Linux on VirtualBox Using Prebuilt VM Image
Also Read: How to Install SDKMAN on Linux Using 7 Easy Steps
Step 1: Prerequisites
a) You should have Virtualbox installed in your host(in our case it is Windows 10) system.
b) You should have access to install Kali Linux in Virtualbox.
c) You should have an active Internet connection to download Kali Linux Prebuilt VM.
Step 2: Download Kali Linux Prebuilt VM Image
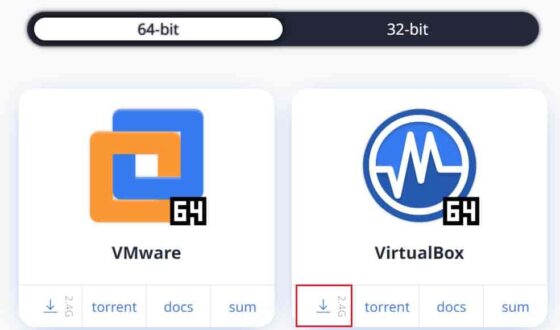
Although there are multiple ways to install Kali Linux on a Virtualbox but here we will see the steps to install Kali Linux on Virtualbox using Virtual Machine Image. For that, you need to visit official website and download the latest 64-bit Virtualbox image as shown below.
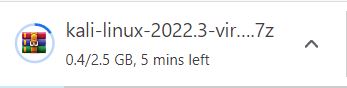
Once you click on above shown download link, it will start downloading to your local system as shown below.
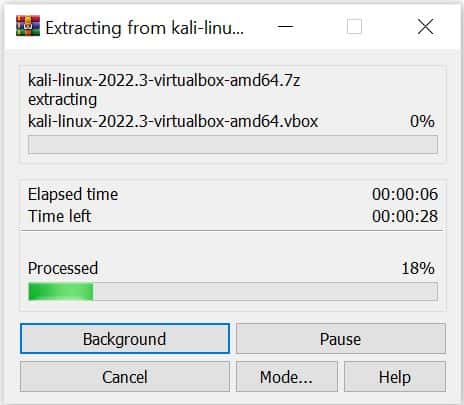
Step 3: Extract 7z file
Once the 7z file is successfully downloaded, you need to extract the file by using any 7z file extraction utilities like WinRAR in our case as shown below. You can also use any other extraction utility you have in your system to extract the vm files.
Once extraction is completed, you will see below two VM files gets extracted into a folder where the VDI image is the one you need to use create VM in Virtualbox.

Step 4: Install Kali Linux
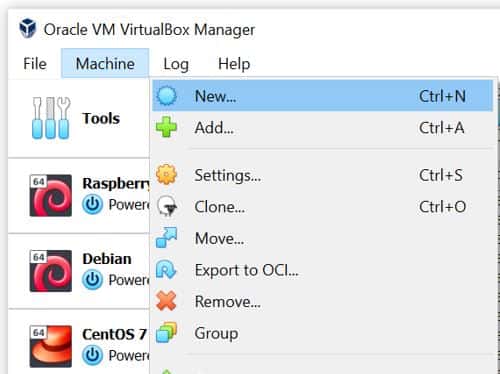
Now that we have VM files downloaded and extracted, let's install Kali Linux on Virtualbox by selecting Machine->New option as shown below.
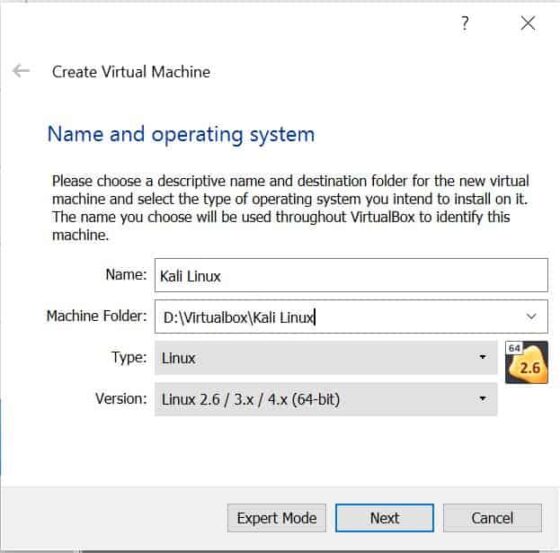
Here you need to provide a meaningful name of your Virtual machine and select destination folder location for new virtual machine. Then select the type of operating system as Linux and version as Linux 2.6/3.x/4.x (64-bit) as shown below. Once done, click on Next.
Next you need to allocate the memory size as per your available resources but it has to be atleast 2048 MB as we have selected below. Then click on Next.

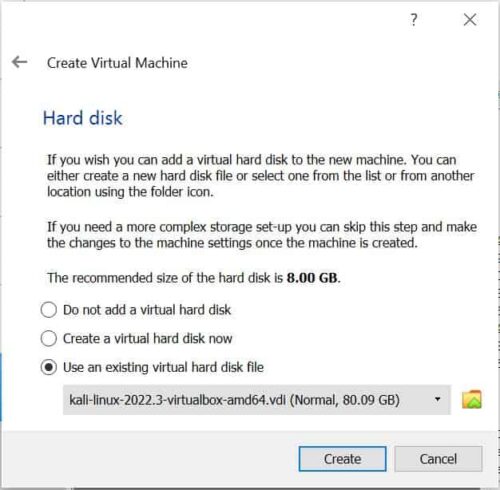
Since we are not creating any Virtual hard disk and using the downloaded Virtual machine Image so here we need to select Use an existing virtual hard disk file and then browse to the location where you kept the downloaded Kali Linux VDI file. Once selected, Click on Create to finally create the Virtual machine.
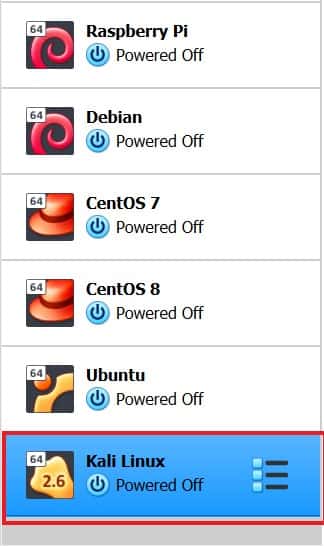
After successful creation, it should look like below on the Virtualbox.
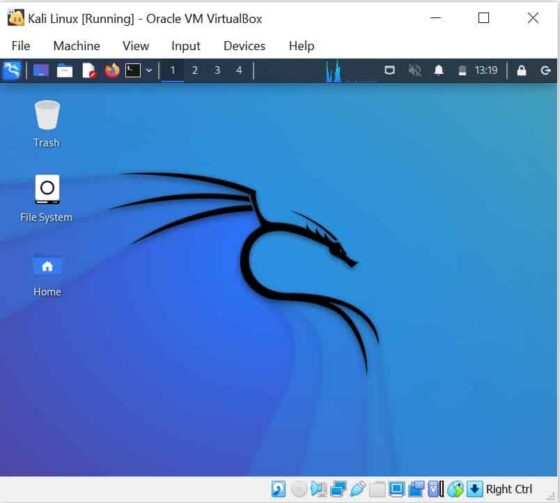
After then you need to start the Virtual machine by clicking on Start. You will see Kali Linux will start booting and finally it will show below screen after successful startup where it will ask for user and password to login.

As you might have seen in the official website, by default user and password would be kali/kali for Kali Linux. So you need to enter the same to authenticate. It should be successfully authenticated as shown below. That's all you needed to do. Your Kali Linux is now ready for the usage !!