Table of Contents
In this article, we will look into the steps to create Azure Cosmos DB Account from Azure Portal. I am sure you must be aware of NoSQL database but when it comes on using NoSQL database on Cloud then what would be more better than Azure Cosmos DB in Azure. It is basically a fully managed NoSQL database with faster response time and instant scalability features. It also guarantees speed at any scale and provides enterprise grade security. As Azure Cosmos DB is a fully managed database service so it takes care of automatic management, updates and patching. More on Cosmos DB.
How to Create Azure Cosmos DB Account from Azure Portal
Also Read: 8 Easy Steps to Create an AKS Cluster Using Azure CLI
Step 1: Prerequisites
a) You should have a valid Azure Account.
b) You should have a valid subscription.
c) You should have access to create Resources from Azure Portal.
Step 2: Login to Azure Portal
First you need login to below Azure Portal using your valid user account and password. Upon successful login, you will land into Portal Home Page from where you can create all the required resources.
Step 3: Create a Resource Group
All the resources which you are going to create, it should be created in a Resource Group. So the next step is to create a Resource Group. You can check How to Create a Resource Group in Microsoft Azure Cloud to create a resource group.
Step 4: Open Azure Cosmos DB
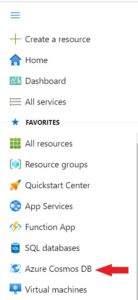
Go to Portal menu on Azure Home Page and Click on Azure Cosmos DB as shown below.
Step 5: Click on Create
You will be redirected to below page where you need to Click on Create.

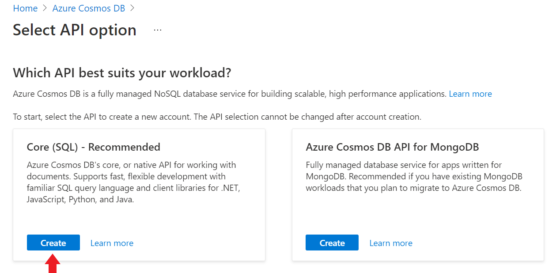
Step 6: Select API Option
Here you will see multiple API option to select. Since I am using Core(SQL) native API for this example so I will click on Create as shown below.
Step 7: Create Azure Cosmos DB Account
It will take you to Create Azure Cosmos DB Account page where you will have multiple sections to fill before you can create an Account.
a) Basics
The first section will be the Basics section where you need to specify Subscription and Resource Group details. In my case, it will be Free Trial subscription and Resource Group will be TestResourceGroup which I created earlier. You can check How to Create a Resource Group in Microsoft Azure Cloud to know more about creating Resource Groups.

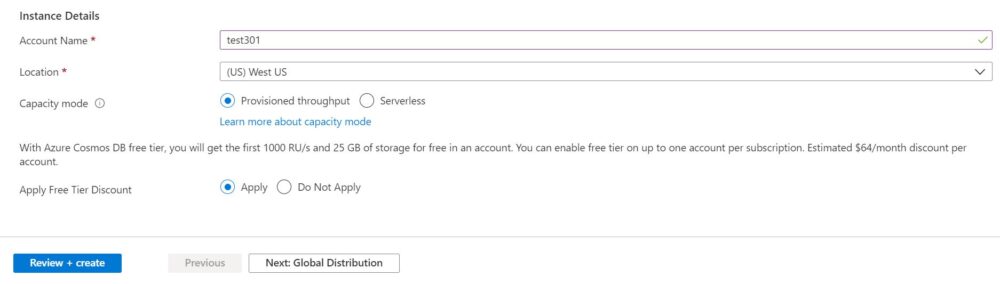
If you scroll down a bit, you will see Instance Details to fill. For example sake, I am choosing account name as test301 and location will be West US. Also I am choosing Provisioned throughput capacity mode and applying free tier discount as you can see below. You can also choose below option as per your requirements. Then Click on Next: Global Distribution.
b) Global Distribution
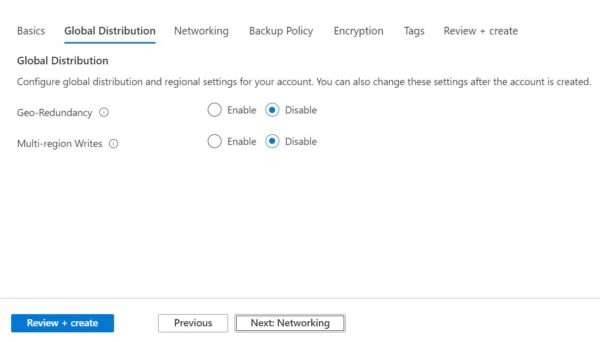
Here you need to configure global distribution and regional settings for your Cosmos DB account. For the moment I am keeping both the options disabled but you can enable and use below options as per your requirements. Then Click on Next: Networking.
c) Networking
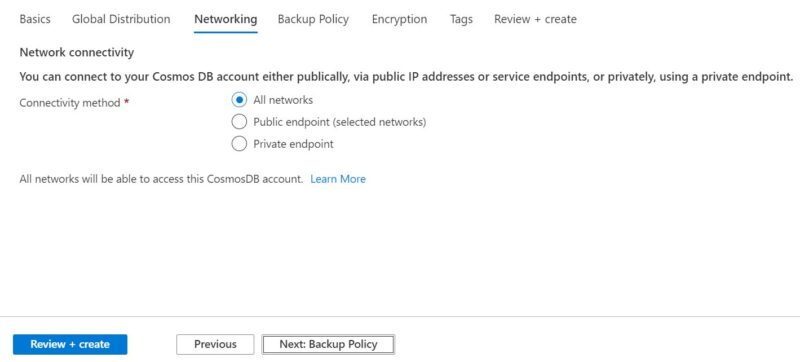
Then comes the networking section where you need to define how do you want to connect your Cosmos DB account. It can be all networks access which allows connection through both public and private or only publicly through selected public networks or through public service endpoints or if you just want to allow your connection privately then you need to choose private endpoint. Then Click on Next: Backup Policy.
d) Backup Policy
Next comes the Backup Policy where you have the option to choose from Periodic or Continuous Backup Policy. As of now I am choosing Periodic Backup policy with backup interval of 240 minutes and retention period of 8 hours. You can change these time period as per your requirement. As you can see below, by default you will get 2 copies of retained data. Then lastly you need to set the Backup storage redundancy. I am choosing Geo-redundant backup storage as my redundancy option. Then Click on Next: Encryption.

e) Encryption
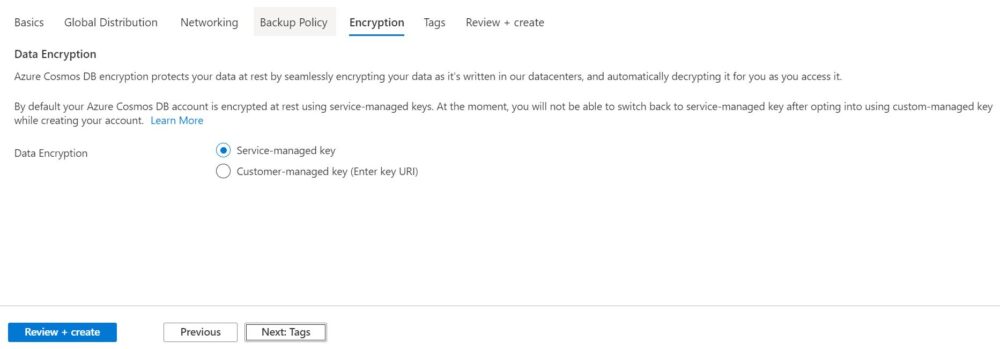
Data Encryption is an Integral part of data security. Azure Cosmos DB provides you the option to encrypt your data while storing in datacenters and the same will be decrypted during retrieval. You can either use Service-managed key or Customer-managed key to encrypt the data. In my case, I am choosing Service-managed key so that I don't have to take the headache of managing the encryption key. Then Click on Next: Tags.
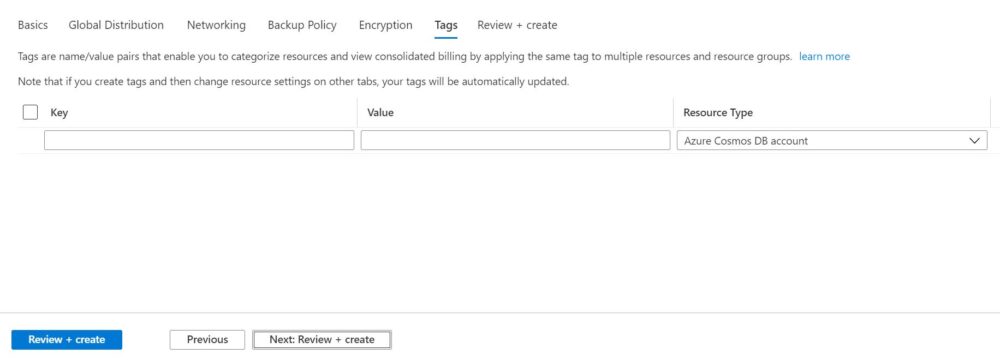
f) Tags
Like the other resources here also you will get an option to tag this resource in the form of key/value pairs. As of now I am not going to tag my resource so I will just Click on Next: Review + create
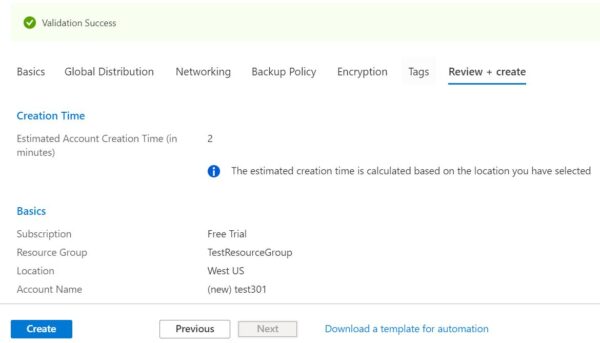
g) Review+Create
Finally you can review all your given configuration here and if everything looks ok then you can Click on Create to start with the resource deployment.
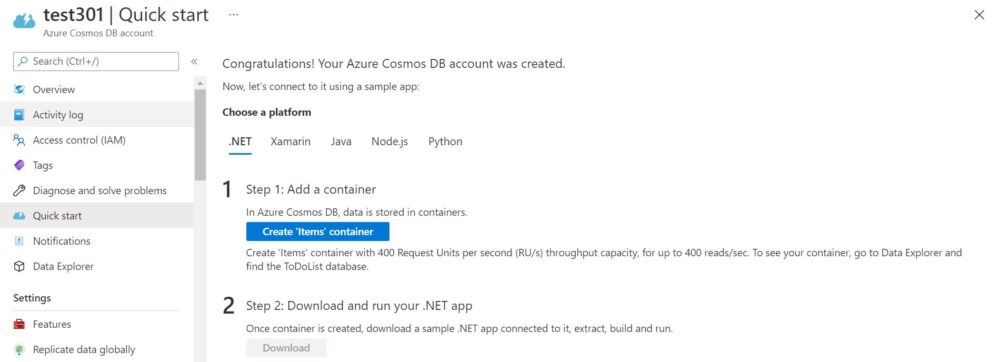
Once the deployment started you need to wait for few mins before it finishes out. Once done, it should look like below.
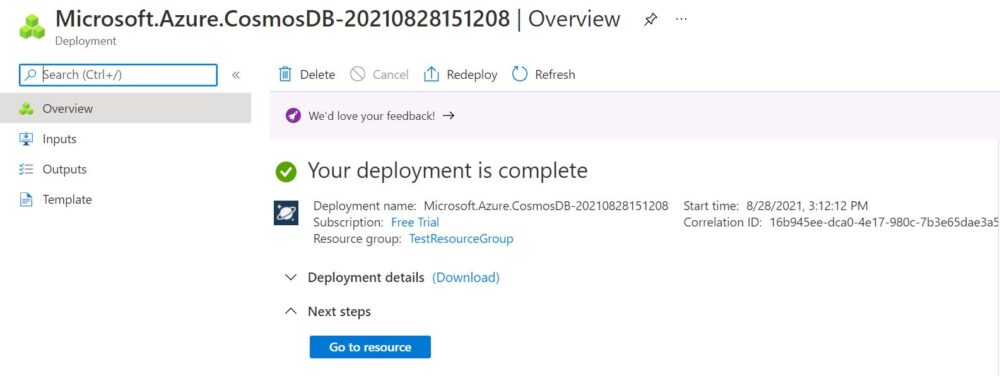
You can now Click on Go to resource and proceed with the next steps of creating container as you can see below. I will cover more about this topic in upcoming articles.