
Table of Contents
In this article, I will take you through the steps to Install Java on Ubuntu 20.04. Java is a very popular Object Oriented Language. It is Known as Platform independent Language due to its ability to run in various hardware architecture platforms. You will see Java based Applications on almost all the digital platforms around yourselves. Java is designed to enable the development of high performance applications which can be deployed in a distributed architecture. Java has a rich set of API Libraries evolved over the years to provide a wide range support to cross platform architecture. Here, we will go through the detailed steps required to install Java on Ubuntu 20.04.

Steps to Install Java on Ubuntu 20.04
Also Read: Solved: Curl error: Failed writing received data to disk/application on Linux
Step 1: Prerequisites
a) You need to have a running Ubuntu 20.04 Server.
b) You should have apt tool installed in your Server. You can check 20 Useful apt get examples on Ubuntu. to know more about apt-get tool.
d) You should have sudo access to run Privileged Commands. Please Check How to Add User to Sudoers to know more about providing sudo access to the User.
Step 2: Update Your Server
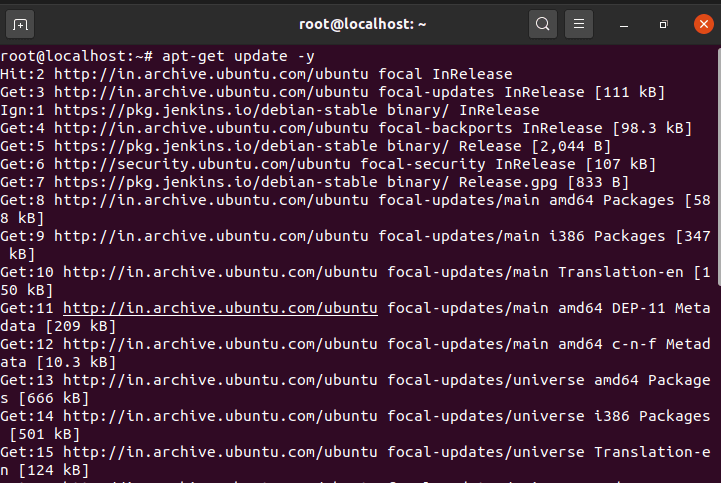
Before going through the steps to install java on Ubuntu 20.04 it is always recommended to update your server first using apt-get update -y command as shown below. This command will download and install all the latest available updates from Ubuntu Repository as shown below.
Step 3: Install Java on Ubuntu 20.04
After updating your Server you can now install Java 11 using apt install openjdk-11-jdk -y command as shown below. This is the latest Stable Java version that can be installed(at the time of writing this article). If you want to install earlier version like Java 8 then you can install it by using apt install openjdk-8-jdk -y command.

Step 4: Check Java version
You can check the installed Java version by using java -version command as shown below. As you can see from below output, current version is 11.0.8. More information on Java Official Documentation.

Step 5: Write Your First Java Program
Once java is installed successfully, you need to test it by writing a simple Program which displays "This is hello from CyberITHub" on the output as shown below.
root@localhost:~# vi hello.java
class hello
{
public static void main(String args[])
{
System.out.println("This is hello from CyberITHub");
}
}
Compile Your Program
root@localhost:~# javac hello.java
Run Your Program
root@localhost:~# java hello
This is hello from CyberITHub
Step 6: Uninstall Java from Ubuntu 20.04
If you want to uninstall Java from your Ubuntu Server then you need to use apt remove openjdk-11-jdk -y command as shown below.
root@localhost:~# apt remove openjdk-11-jdk -y
Reading package lists... Done
Building dependency tree
Reading state information... Done
The following packages were automatically installed and are no longer required:
apturl-common ca-certificates-java default-jdk-headless default-jre default-jre-headless fonts-dejavu-extra gir1.2-dbusmenu-glib-0.4 gir1.2-dee-1.0 gir1.2-goa-1.0
gir1.2-javascriptcoregtk-4.0 gir1.2-snapd-1 gir1.2-unity-5.0 gir1.2-webkit2-4.0 java-common libatk-wrapper-java libatk-wrapper-java-jni libice-dev
libpthread-stubs0-dev libsm-dev libx11-dev libxau-dev libxcb1-dev libxdmcp-dev libxt-dev linux-headers-5.4.0-45 linux-headers-5.4.0-45-generic
linux-image-5.4.0-45-generic linux-modules-5.4.0-45-generic steps to install java linux-modules-extra-5.4.0-45-generic openjdk-11-jdk-headless openjdk-11-jre openjdk-11-jre-headless
patch perl-openssl-defaults python3-dateutil python3-debconf python3-debian python3-software-properties sgml-base software-properties-common unattended-upgrades
update-notifier-common x11proto-core-dev x11proto-dev xml-core xorg-sgml-doctools xtrans-dev
Use 'apt autoremove' to remove them.
The following packages will be REMOVED:
openjdk-11-jdk
0 upgraded, 0 newly installed, 1 to remove and 114 not upgraded.
After this operation, 5,412 kB disk space will be freed.
(Reading database ... 206290 files and directories currently installed.)
Removing openjdk-11-jdk:amd64 (11.0.8+10-0ubuntu1~20.04) ...
Popular Recommendations:-
Best Explanation of Wrapper Classes in Java: Autoboxing and Unboxing with Examples
Best Steps to Install Java on RHEL 8/CentOS 8
15 ansible-vault command examples to encrypt and decrypt sensitive data/files on Linux
Learn HTML Image Maps(v5) with Best Examples
C# data types with Best Examples (.NET v4.7)
How to Install PHP on RedHat/CentOS 7 with Easy Steps