
Table of Contents
In this article, I will take you through the steps to install Nginx on Ubuntu 18.04. Nginx, pronounced eNgineEx, a web server developed by Igor Sysoev in 2002. It was officially released in 2004.
According to the Official Nginx Website, it is defined as an HTTP and reverse proxy server, a mail proxy server, and a generic TCP/UDP proxy server. As per Netcraft, Nginx has served or proxied more than 28% of the busiest websites in February 2017.
Why Should Anyone Use Nginx?
It is very important to understand why should anyone start using Nginx. That is because you don't have to drop your existing web server or to totally change your infrastructure to enjoy the power of Nginx. It can nicely fit into your setup and enhance it. Nginx provides:-
- Speed: It is probably the most deciding factor to install Nginx in any Environments(either in Dev, UAT or Prod).Today for customers Page Loading time is a very important factor as they cannot afford the slowness.
- Acceleration: If you already have two or more web servers running the same application. Nginx can accelerate performance by routing traffic to those web servers in a way that enhances the overall speed.
- Load Balancing: A Load Balancer is a device/service that distributes traffic load on two or more web servers.That provides fault tolerance and increases performance. There are commercial hardware load balancers available but they are very expensive and somewhat complex to setup and service. Nginx can easily act as a robust load balancer that will cut off coasts yet give you the needed load distribution.
- Concurrent Connections: Traditional Web Servers(like Apache and IIS) can serve incoming requests without a problem, until the number of concurrent requests reaches a certain limit(say 100).Whenever this number rises,performance starts to degrade.That is because the way those servers were designed and the model by which they server web requests. Unfortunately, increasing the installed CPU Cores and RAM will not give you the intended results.If 4GB of RAM are sufficient for serving 1K of concurrent requests. 8GB will not enable the server to handle 2k at the same level. Nginx does not suffer from this problem and it can easily handle increasing number of concurrent requests.
- Low Cost Infrastructure: Nginx can be deployed on servers with very limited hardware capabilities and still perform much better than its counterparts on the same hardware.
- Smooth Upgrade: Yes, Nginx is one of the very few systems that can be patched or upgraded without having to take a downtime and disrupt your business.Personally, I would use Nginx for my environments just for that reason.
- Less Installation and Maintenance Overhead: As we move on, you will find that Nginx is relatively easier that what you think when it comes to basic(and even advanced)usage.

Install Nginx Tutorial On Ubuntu
Also Read: Top 10 Ping Command Examples in Linux
Also Read: How to Install and Enable ssh on Ubuntu
Step 1: Prerequisites
a)You need to have a running Ubuntu 18.04 System.
b)You need have a User with sudo access to perform all administrative tasks. Here i will use test user which has sudo access to perform all the steps. You can refer How to add User to Sudoers on Ubuntu to check about providing sudo access to User.
Step 2: Update System
Before going through the Nginx installation, it is important to update all the packages in your system using sudo apt-get update command.
test@localhost:~$ sudo apt-get update
Hit:1 http://in.archive.ubuntu.com/ubuntu bionic InRelease
Get:2 http://in.archive.ubuntu.com/ubuntu bionic-updates InRelease [88.7 kB]
Hit:3 https://artifacts.elastic.co/packages/7.x/apt stable InRelease
Get:4 http://in.archive.ubuntu.com/ubuntu bionic-backports InRelease [74.6 kB]
Get:5 http://security.ubuntu.com/ubuntu bionic-security InRelease [88.7 kB]
Get:6 http://in.archive.ubuntu.com/ubuntu bionic-updates/main amd64 DEP-11 Metadata [294 kB]
Get:7 http://in.archive.ubuntu.com/ubuntu bionic-updates/main DEP-11 48x48 Icons [73.8 kB]
..........................................................................................................................
Step 3: Nginx Download
Now you can use sudo apt-get install nginx command to download and install Nginx package in your system.
test@localhost:~$ sudo apt-get install nginx
Reading package lists... Done
Building dependency tree
Reading state information... Done
The following additional packages will be installed:
libnginx-mod-http-geoip libnginx-mod-http-image-filter libnginx-mod-http-xslt-filter libnginx-mod-mail libnginx-mod-stream nginx-common nginx-core
Suggested packages:
fcgiwrap nginx-doc
The following NEW packages will be installed:
libnginx-mod-http-geoip libnginx-mod-http-image-filter libnginx-mod-http-xslt-filter libnginx-mod-mail libnginx-mod-stream nginx nginx-common nginx-core
.................................................................................................
Step 4: Test Nginx Default Configuration
Before starting Nginx Service, you need to test the configuration using sudo nginx -t command. This command will verify all the syntax and configuration provided in /etc/nginx/nginx.conf. If it says ok or successful, then we are good to go. Please verify the configuration file if you get any nginx test config error.
test@localhost:~$ sudo nginx -t
nginx: the configuration file /etc/nginx/nginx.conf syntax is ok
nginx: configuration file /etc/nginx/nginx.conf test is successful
Step 5: Allow through Firewall
You need to check your firewall settings and confirm if the services are allowed through firewall or not using sudo ufw app list command.
test@localhost:~$ sudo ufw app list
Available applications:
CUPS
Nginx Full
Nginx HTTP
Nginx HTTPS
OpenSSH
If the Nginx Service are not allowed through firewall, you need to sudo ufw allow <application> command to allow them.
sudo ufw allow 'Nginx Full'
sudo ufw allow 'Nginx HTTP'
sudo ufw allow 'Nginx HTTPS'
Nginx Full: This profile is to allow both Port 80 and Port 443 Traffic.
Nginx HTTP: This profile is to allow only Port 80 Traffic.
Nginx HTTPS: This profile is to allow only Port 443 Traffic.
After performing the change, you can check the status using sudo ufw status command.
test@localhost:~$ sudo ufw status
Status: inactive
Sometimes, if ufw is not enabled it will show you in inactive state. To activate them you need to use sudo ufw enable command.
test@localhost:~$ sudo ufw enable
Command may disrupt existing ssh connections. Proceed with operation (y|n)? Y
Step 6: Start Nginx Service
Once installed check Nginx service if it is running or not using sudo systemctl status nginx command.
test@localhost:~$ sudo systemctl status nginx
● nginx.service - A high performance web server and a reverse proxy server
Loaded: loaded (/lib/systemd/system/nginx.service; enabled; vendor preset: enabled)
Active: active (running) since Sat 2020-01-04 04:20:32 IST; 2min 19s ago
Docs: man:nginx(8)
Process: 3626 ExecStart=/usr/sbin/nginx -g daemon on; master_process on; (code=exited, status=0/SUCCESS)
Process: 3625 ExecStartPre=/usr/sbin/nginx -t -q -g daemon on; master_process on; (code=exited, status=0/SUCCESS)
Main PID: 3627 (nginx)
Tasks: 2 (limit: 2304)
CGroup: /system.slice/nginx.service
├─3627 nginx: master process /usr/sbin/nginx -g daemon on; master_process on;
└─3628 nginx: worker process

Jan 04 04:20:32 localhost systemd[1]: Starting A high performance web server and a reverse proxy server...
Jan 04 04:20:32 localhost systemd[1]: nginx.service: Failed to parse PID from file /run/nginx.pid: Invalid argument
Jan 04 04:20:32 localhost systemd[1]: Started A high performance web server and a reverse proxy server.
Start the service if it is not running using sudo systemctl start nginx command.
test@localhost:~$ sudo systemctl start nginx
Step 7: Enable Nginx Service
If you want your service to be enabled under Systemd Script, you need to use sudo systemctl enable nginx command as shown below.
test@localhost:~$ sudo systemctl enable nginx
Synchronizing state of nginx.service with SysV service script with /lib/systemd/systemd-sysv-install.
Executing: /lib/systemd/systemd-sysv-install enable nginx
Step 8: Stop, Reload or Restart Nginx Service
You can also stop or restart the service using sudo systemctl stop nginx command and sudo systemctl restart nginx command.
test@localhost:~$ sudo systemctl stop nginx
test@localhost:~$ sudo systemctl restart nginx
You can also reload Nginx service using sudo systemctl reload nginx command.
test@localhost:~$ sudo systemctl reload nginx
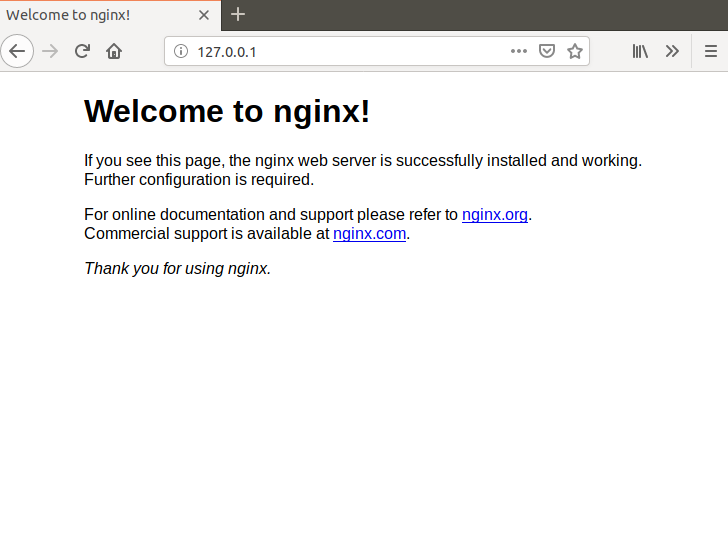
Step 9: Verify Nginx webserver
You can Open http://<ip_address> in your web browser and check once:-
Step 10: Check Nginx webserver status through curl
You can also check Nginx webserver status through curl command using curl -XGET <nginx_server_ip>command. You can see the http response from Nginx webserver as shown below:-
test@localhost:~$ curl -XGET http://127.0.0.1:80
<!DOCTYPE html>
<html>
<head>
<title>Welcome to nginx!</title>
<style>
body {
width: 35em;
margin: 0 auto;
font-family: Tahoma, Verdana, Arial, sans-serif;
}
</style>
</head>
<body>
<h1>Welcome to nginx!</h1>
<p>If you see this page, the nginx web server is successfully installed and
working. Further configuration is required.</p>

<p>For online documentation and support please refer to
<a href="http://nginx.org/">nginx.org</a>.<br/>
Commercial support is available at
<a href="http://nginx.com/">nginx.com</a>.</p>

<p><em>Thank you for using nginx.</em></p>
</body>
</html>
Congratulations!!!! You have successfully completed the steps to install nginx on your Ubuntu 18.04 System.
Popular Searches
- Nginx Download
- Install Nginx Ubuntu
- Ubuntu Restart
- Nginx Tutorial
- Ubuntu Install ssh server
- Nginx Test Config