
Table of Contents
In this article, I will take you through the steps to install uTorrent on Ubuntu 20.04 LTS (Focal Fossa). If you love to download files from Internet using BitTorrent client then probably uTorrent is one you should go for. uTorrent is a fast, light and powerful torrent client application available for use in multi platform environments. It is very much recommended in Desktop environments for both new and experienced users due to its wide range of features. It is currently available in multiple commercial versions. You can choose the one which is best suited for your requirements. More on official website.
Features
- It can enable simultaneous torrent downloads which can be managed from a single location.
- It auto adjusts the bandwidth usage depending on the local network and internet connection.
- It sets the day and time for your torrent downloads to start, stop or seed.
- It can add torrent to uTorrent classic remotely from a web browser on any device.
- It allows you to play the torrents while you are downloading.

How to Install uTorrent on Ubuntu 20.04 LTS (Focal Fossa)
Also Read: Solved "ModuleNotFoundError: No module named PyQt5"
Step 1: Prerequisites
a) You should have a running Ubuntu 20.04 LTS Server.
b) You should have sudo or root access to run privileged commands.
c) You should have wget and apt utility available in your Server.
Step 2: Update Your System
Before going through the steps to install uTorrent client interface, it is always a good idea to update the System Cache with all the latest package information and updates available from all the enabled repositories using apt update command as shown below. If any of the packages needs to be upgraded then run apt upgrade command as well.
root@cyberithub:~# apt update
Hit:2 http://in.archive.ubuntu.com/ubuntu focal InRelease
Hit:3 http://in.archive.ubuntu.com/ubuntu focal-updates InRelease
Hit:4 http://in.archive.ubuntu.com/ubuntu focal-backports InRelease
Hit:5 http://download.opensuse.org/repositories/home:/selmf/xUbuntu_20.04 InRelease
Hit:6 http://ppa.launchpad.net/graphics-drivers/ppa/ubuntu focal InRelease
Hit:7 https://dl.google.com/linux/chrome/deb stable InRelease
Hit:8 http://ppa.launchpad.net/nilarimogard/webupd8/ubuntu focal InRelease
Hit:9 http://security.ubuntu.com/ubuntu focal-security InRelease
Hit:10 https://repo.protonvpn.com/debian stable InRelease
Hit:11 http://apt.postgresql.org/pub/repos/apt focal-pgdg InRelease
Hit:1 https://downloads.apache.org/cassandra/debian 40x InRelease
...........................................
Step 3: Install libssl-dev
One of the pre required library that needs to be available in your System is libssl-dev. If it is not available then you can install this library by using apt install libssl-dev command as shown below.
root@cyberithub:~# apt install libssl-dev
Reading package lists... Done
Building dependency tree
Reading state information... Done
Suggested packages:
libssl-doc
The following NEW packages will be installed:
libssl-dev
0 upgraded, 1 newly installed, 0 to remove and 13 not upgraded.
Need to get 0 B/1,584 kB of archives.
After this operation, 8,009 kB of additional disk space will be used.
Selecting previously unselected package libssl-dev:amd64.
(Reading database ... 198253 files and directories currently installed.)
Preparing to unpack .../libssl-dev_1.1.1f-1ubuntu2.12_amd64.deb ...
Unpacking libssl-dev:amd64 (1.1.1f-1ubuntu2.12) ...
Setting up libssl-dev:amd64 (1.1.1f-1ubuntu2.12) ...
Step 4: Install libssl
Another important library that needs to be available in your System is libssl. The required version of this library is not available by default from Ubuntu Repo. So this needs to be downloaded from external source and installed manually using apt install command.
a) Download libssl
You can download the libssl package using wget utility as shown below. This will download the .deb package in the present working directory.
root@cyberithub:~# wget http://archive.ubuntu.com/ubuntu/pool/main/o/openssl1.0/libssl1.0.0_1.0.2n-1ubuntu5_amd64.deb
--2022-04-19 22:04:51-- http://archive.ubuntu.com/ubuntu/pool/main/o/openssl1.0/libssl1.0.0_1.0.2n-1ubuntu5_amd64.deb install utorrent
Resolving archive.ubuntu.com (archive.ubuntu.com)... 2620:2d:4000:1::16, 2620:2d:4000:1::19, 2001:67c:1562::18, ...install utorrent
Connecting to archive.ubuntu.com (archive.ubuntu.com)|185.125.190.36|:80... connected.
HTTP request sent, awaiting response... 200 OK
Length: 1086852 (1.0M) [application/x-debian-package]
Saving to: ‘libssl1.0.0_1.0.2n-1ubuntu5_amd64.deb’

libssl1.0.0_1.0.2n-1ubuntu5_amd64.deb 100%[============================================================================>] 1.04M 982KB/s in 1.1s

2022-04-19 22:13:37 (982 KB/s) - ‘libssl1.0.0_1.0.2n-1ubuntu5_amd64.deb’ saved [1086852/1086852]

[1]+ Done wget https://packages.debian.org/search?suite=jessie
b) Install
You can then install the downloaded package by using apt install ./libssl1.0.0_1.0.2n-1ubuntu5_amd64.deb command as shown below.
root@cyberithub:~# apt install ./libssl1.0.0_1.0.2n-1ubuntu5_amd64.deb
Reading package lists... Done
Building dependency tree
Reading state information... Done
Note, selecting 'libssl1.0.0' instead of './libssl1.0.0_1.0.2n-1ubuntu5_amd64.deb'
The following NEW packages will be installed:
libssl1.0.0
0 upgraded, 1 newly installed, 0 to remove and 23 not upgraded.
Need to get 0 B/1,087 kB of archives.
After this operation, 3,497 kB of additional disk space will be used.
Get:1 /root/libssl1.0.0_1.0.2n-1ubuntu5_amd64.deb libssl1.0.0 amd64 1.0.2n-1ubuntu5 [1,087 kB] install utorrent
Preconfiguring packages ...
Selecting previously unselected package libssl1.0.0:amd64.
(Reading database ... 198370 files and directories currently installed.)
Preparing to unpack .../libssl1.0.0_1.0.2n-1ubuntu5_amd64.deb ...
Unpacking libssl1.0.0:amd64 (1.0.2n-1ubuntu5) ...
Setting up libssl1.0.0:amd64 (1.0.2n-1ubuntu5) ...
Processing triggers for libc-bin (2.31-0ubuntu9.7) ...
Step 3: Download uTorrent
You can go to uTorrent Official website and download the client package using wget utility as shown below. Below command will download the package as utserver.tar file in local system directory.
root@cyberithub:~# wget https://download-hr.utorrent.com/track/beta/endpoint/utserver/os/linux-x64-ubuntu-13-04 -O utserver.tar
--2022-04-19 21:17:15-- https://download-hr.utorrent.com/track/beta/endpoint/utserver/os/linux-x64-ubuntu-13-04
Resolving download-hr.utorrent.com (download-hr.utorrent.com)... 82.221.103.243, 82.221.103.242
Connecting to download-hr.utorrent.com (download-hr.utorrent.com)|82.221.103.243|:443... connected.
HTTP request sent, awaiting response... 200 OK
Length: 2259698 (2.2M) [application/octet-stream]
Saving to: ‘utserver.tar’

utserver.tar 100%[============================================================================>] 2.15M 1.34MB/s in 1.6s

2022-04-19 21:17:18 (1.34 MB/s) - ‘utserver.tar’ saved [2259698/2259698]
Once it is downloaded, you can list the file by using ls -ltr utserver.tar command as shown below.
root@cyberithub:~# ls -ltr utserver.tar
-rw-r--r-- 1 root root 2259698 May 20 2020 utserver.tar
Step 4: Extract the Package
Next step is to extract the file by using tar -xvf utserver.tar command as shown below. This will extract all the files under utorrent-server-alpha-v3_3 in the present working directory.
root@cyberithub:~# tar -xvf utserver.tar
utorrent-server-alpha-v3_3/
utorrent-server-alpha-v3_3/webui.zip
utorrent-server-alpha-v3_3/utserver
utorrent-server-alpha-v3_3/docs/
utorrent-server-alpha-v3_3/docs/style.css
utorrent-server-alpha-v3_3/docs/license.txt
utorrent-server-alpha-v3_3/docs/Changes.txt
utorrent-server-alpha-v3_3/docs/Server_Changes.pdf
utorrent-server-alpha-v3_3/docs/footer_ut_address.gif
utorrent-server-alpha-v3_3/docs/Server_Changes.html
utorrent-server-alpha-v3_3/docs/Server_Changes.txt
utorrent-server-alpha-v3_3/docs/uTorrent_Server.txt
utorrent-server-alpha-v3_3/docs/uTorrent_Server.pdf
utorrent-server-alpha-v3_3/docs/ut-logo.gif
utorrent-server-alpha-v3_3/docs/uTorrent_Server.html
Step 5: Copy uTorrent Files
Next step is to copy all the files under /opt path so that it will be available system wide. You can use cp -rvf utorrent-server-alpha-v3_3 /opt to copy all the files recursively.
root@cyberithub:~# cp -rvf utorrent-server-alpha-v3_3 /opt
'utorrent-server-alpha-v3_3' -> '/opt/utorrent-server-alpha-v3_3'
'utorrent-server-alpha-v3_3/webui.zip' -> '/opt/utorrent-server-alpha-v3_3/webui.zip'
'utorrent-server-alpha-v3_3/utserver' -> '/opt/utorrent-server-alpha-v3_3/utserver'
'utorrent-server-alpha-v3_3/docs' -> '/opt/utorrent-server-alpha-v3_3/docs'
'utorrent-server-alpha-v3_3/docs/style.css' -> '/opt/utorrent-server-alpha-v3_3/docs/style.css'
'utorrent-server-alpha-v3_3/docs/license.txt' -> '/opt/utorrent-server-alpha-v3_3/docs/license.txt'
'utorrent-server-alpha-v3_3/docs/Changes.txt' -> '/opt/utorrent-server-alpha-v3_3/docs/Changes.txt'
'utorrent-server-alpha-v3_3/docs/Server_Changes.pdf' -> '/opt/utorrent-server-alpha-v3_3/docs/Server_Changes.pdf'
'utorrent-server-alpha-v3_3/docs/footer_ut_address.gif' -> '/opt/utorrent-server-alpha-v3_3/docs/footer_ut_address.gif'
'utorrent-server-alpha-v3_3/docs/Server_Changes.html' -> '/opt/utorrent-server-alpha-v3_3/docs/Server_Changes.html'
'utorrent-server-alpha-v3_3/docs/Server_Changes.txt' -> '/opt/utorrent-server-alpha-v3_3/docs/Server_Changes.txt'
'utorrent-server-alpha-v3_3/docs/uTorrent_Server.txt' -> '/opt/utorrent-server-alpha-v3_3/docs/uTorrent_Server.txt'
'utorrent-server-alpha-v3_3/docs/uTorrent_Server.pdf' -> '/opt/utorrent-server-alpha-v3_3/docs/uTorrent_Server.pdf'
'utorrent-server-alpha-v3_3/docs/ut-logo.gif' -> '/opt/utorrent-server-alpha-v3_3/docs/ut-logo.gif'
'utorrent-server-alpha-v3_3/docs/uTorrent_Server.html' -> '/opt/utorrent-server-alpha-v3_3/docs/uTorrent_Server.html'
Step 6: Create Symbolic Link
You can also create a symbolic link to the existing file /opt/utorrent-server-alpha-v3_3/utserver using below command so that it would be easy to use utserver utility every time.
root@cyberithub:~# ln -s /opt/utorrent-server-alpha-v3_3/utserver /usr/bin/utserver
Step 7: Start uTorrent Server
To start uTorrent Server in the background, you can use utserver -settingspath /opt/utorrent-server-alpha-v3_3/ & command as shown below.
root@cyberithub:~# utserver -settingspath /opt/utorrent-server-alpha-v3_3/ &
[1] 1727
Step 8: Allow from Firewall
If you are running ufw firewall then you need to allow TCP Ports 8080 and 6881 through the firewall by using ufw allow 8080/tcp and ufw allow 6881/tcp command as shown below.
root@cyberithub:~# ufw allow 8080/tcp
Rules updated
Rules updated (v6)
root@cyberithub:~# ufw allow 6881/tcp
Rules updated
Rules updated (v6)
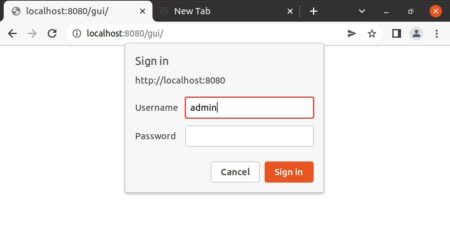
Step 9: Launch uTorrent Interface
Go to your favorite web browser and open URL http://localhost:8080 as shown below. Once it is opened, it should ask you for Username and Password. Here you need to provide the default Username as admin and leave the password field as blank. Then Click on Sign In.
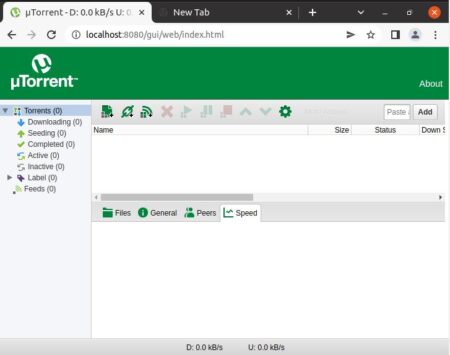
Once you are signed In, you should see below uTorrent web client interface. You can now add the torrent and start downloading your files.
Thanks It Works For Installing Torrent
but make article on how to intall through file of tar.gz