
Table of Contents
In this article, I will take you through the steps to install Bitbucket on Linux. Bitbucket is a Git based source code repository by Atlassian. Bitbucket offers both commercial plans and free accounts with an unlimited number of private repositories. It provides an excellent solution to an organization who does not want to keep their project source code in a public repository like GitHub. Bitbucket allows developers to store, manage and track changes to their code in an efficient manner. More on official website. The installation and setup of Bitbucket is also as easy as it looks. Here we will see the steps to install Bitbucket Server on Linux(in our case it is Ubuntu 20.04 LTS) in great detail.
How to Install Bitbucket on Linux Using 7 Simple Steps
Also Read: How to Create and Work on your Own Bitbucket Feature Branch
Step 1: Prerequisites
a) You should have a running Ubuntu 20.04 LTS Server.
b) You should have sudo or root access to run privileged commands.
c) You should have apt or apt-get utility available in your Server.
Step 2: Download Bitbucket
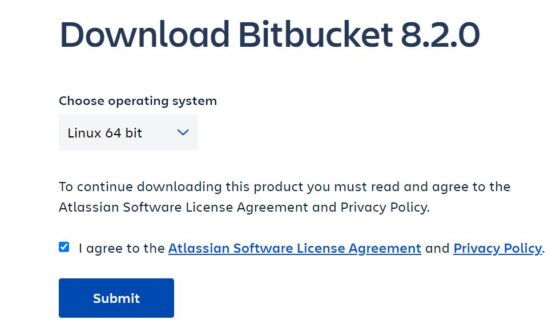
You need to go to Bitbucket official download page and choose Linux 64 bit Operating System as shown below. Then Click on I agree checkbox and submit. This will start downloading the Bitbucket Server in your local system download folder.
Step 3: Install Git
Before installing Bitbucket you need to make sure git package is available in your System. You can simply use sudo apt-get install git -y command to download and install the git package along with all its dependencies from default Ubuntu repo as shown below.
cyberithub@ubuntu:~$ sudo apt-get install git -y
Reading package lists... Done
Building dependency tree
Reading state information... Done
The following additional packages will be installed:
git-man
Suggested packages:
git-daemon-run | git-daemon-sysvinit git-doc git-email git-gui gitk gitweb git-cvs git-mediawiki git-svn
The following NEW packages will be installed:
git
The following packages will be upgraded:
git-man
1 upgraded, 1 newly installed, 0 to remove and 0 not upgraded.
Need to get 8,223 kB of archives.
After this operation, 40.4 MB of additional disk space will be used.
Get:1 http://ppa.launchpad.net/git-core/ppa/ubuntu focal/main amd64 git-man all 1:2.37.0-0ppa1~ubuntu20.04.1 [1,956 kB]
Get:2 http://ppa.launchpad.net/git-core/ppa/ubuntu focal/main amd64 git amd64 1:2.37.0-0ppa1~ubuntu20.04.1 [6,267 kB]
Fetched 8,223 kB in 4s (2,213 kB/s)
(Reading database ... 197553 files and directories currently installed.)
Preparing to unpack .../git-man_1%3a2.37.0-0ppa1~ubuntu20.04.1_all.deb ...
Unpacking git-man (1:2.37.0-0ppa1~ubuntu20.04.1) over (1:2.25.1-1ubuntu3.4) ...
Selecting previously unselected package git.
Preparing to unpack .../git_1%3a2.37.0-0ppa1~ubuntu20.04.1_amd64.deb ...
Unpacking git (1:2.37.0-0ppa1~ubuntu20.04.1) ...
Setting up git-man (1:2.37.0-0ppa1~ubuntu20.04.1) ...
Setting up git (1:2.37.0-0ppa1~ubuntu20.04.1) ...
Processing triggers for man-db (2.9.1-1) ...
Step 4: Check Git Version
Once Git package is successfully installed, you can verify the current version by using git --version command as shown below. To use the latest Bitbucket Server, it is mandatory to have Git version 2.25.0 and above.
cyberithub@ubuntu:~$ git --version
git version 2.37.0
Step 5: Run Bitbucket Installer
Before running the installer, you need to provide execute permission on installer file by using chmod +x atlassian-bitbucket-8.2.0-x64.bin command as shown below.
cyberithub@ubuntu:~$ chmod +x atlassian-bitbucket-8.2.0-x64.bin
Once execute permission is given, you can install the application by running below installer file.
cyberithub@ubuntu:~$ ./atlassian-bitbucket-8.2.0-x64.bin
Unpacking JRE ...
Starting Installer ...
You do not have administrator rights to this machine.
You will not be allowed to install Bitbucket as a service or listen on any port that's not permitted by your firewall or security policy.

Are you sure you want to continue?
Yes [y, Enter], No [n]
y

Bitbucket 8.2.0 installation wizard
Would you like to install or upgrade an instance?
Install a new instance [1, Enter], Upgrade an existing instance [2]
1

Install Bitbucket 8.2.0
What type of instance are you looking to install?
Install a Server instance [1, Enter], Install a Data Center instance [2], Install a Smart Mirroring instance [3]
1
Where should Bitbucket be installed?

Select the folder where you would like Bitbucket 8.2.0 to be installed, then
click Next.
[/home/cyberithub/atlassian/bitbucket/8.2.0]

Default location for Bitbucket home directory

The location for Bitbucket data.
This will be the default location for repositories, plugins, and other data.

Ensure that this location is not used by another Bitbucket installation.
[/home/cyberithub/atlassian/application-data/bitbucket]

Configure which ports Bitbucket will use.


Configure TCP Ports
Bitbucket requires a TCP port that isn't being used by other applications.

The HTTP port is where users access Bitbucket through their browsers.

Bitbucket also requires ports 7992 and 7993 are available to run the bundled
search server that provides search functionality to Bitbucket.
HTTP Port Number
[7990]

Please review your Bitbucket installation settings


Installation Summary
Installation Directory: /home/cyberithub/atlassian/bitbucket/8.2.0
Home Directory: /home/cyberithub/atlassian/application-data/bitbucket
HTTP Port: 7990
Install as a service: No

Install [i, Enter], Exit [e]
i

Extracting files ...


Installation of Bitbucket is complete
Would you like to launch Bitbucket?
Yes [y, Enter], No [n]
y

Please wait a few moments while Bitbucket starts up.
Launching Bitbucket ...

Installation of Bitbucket 8.2.0 is complete
Your installation of Bitbucket 8.2.0 is now ready and can be accessed via
your browser.
Bitbucket 8.2.0 can be accessed at http://localhost:7990
Launch Bitbucket 8.2.0 in browser?
Yes [y, Enter], No [n]
y
Finishing installation ...
NOTE:
Port 7990 and TCP Ports 7992 and 7993 through it so that it can be used by Bitbucket application.
Step 6: Setup Bitbucket
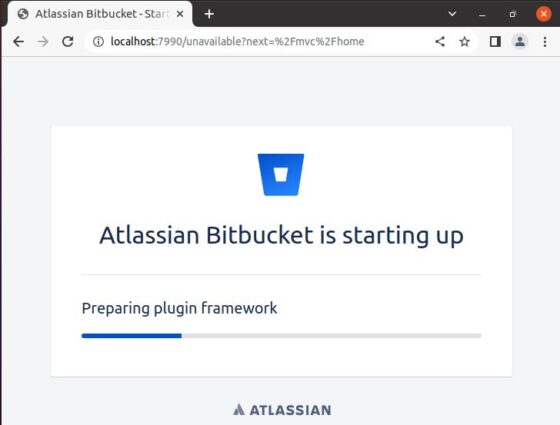
Once the Server is successfully installed, you can start setting it up by accessing it through the browser using URL http://localhost:7990 as shown below.
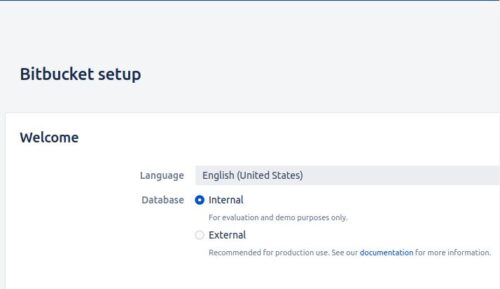
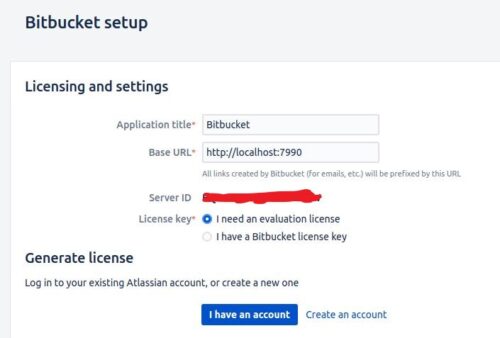
At the setup page, you need to select the preferred Language and then select Internal Database for using Bitbucket for evaluation and demo purposes and then click on Next. It will initialize the database.
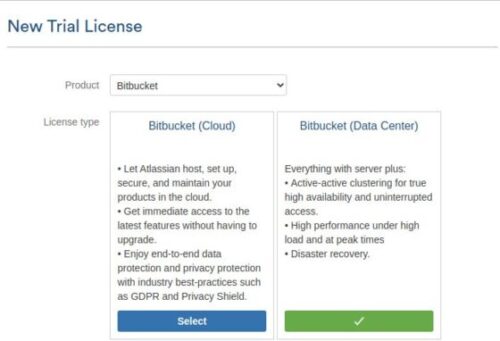
Next step is to generate an evaluation license. For that you need to setup an Atlassian account and then login using the same. You can click on Create an account as shown below to setup your account.
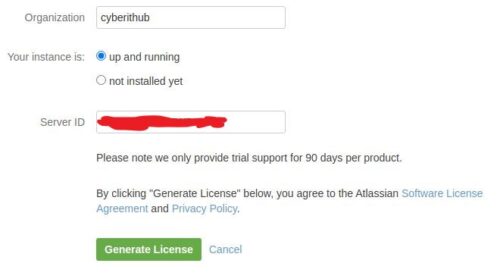
Once you created and logged in to your account, it will automatically detect the current running instance and other details as shown below. You just need to click on Generate License.
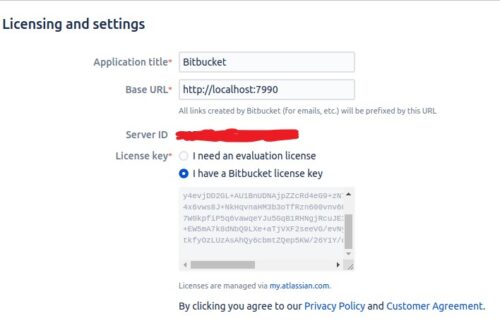
In the next screen you can check your trial License Key generated for Bitbucket Server as shown below.
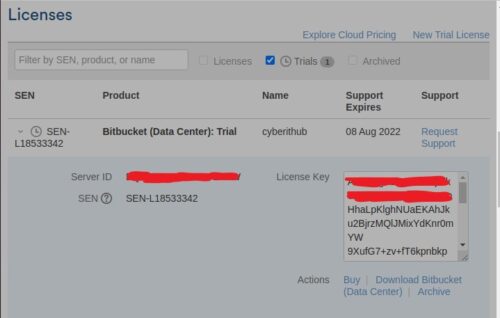
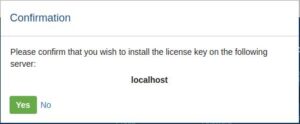
Then click on yes to confirm and install the License key on the localhost Server.
After confirming all the the details, Click on Next.
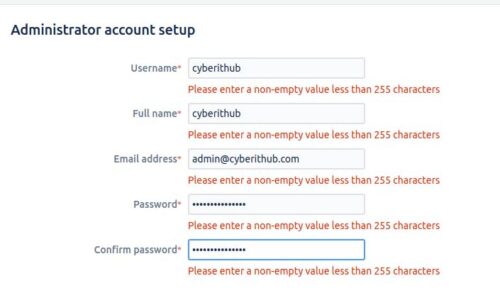
After setting up the administrator account. You can either Integrate with JIRA or click on Go to Bitbucket to login using administrator account.
You will be redirected to login page where you need to enter your administrator username and password just created. Then click on Log In.
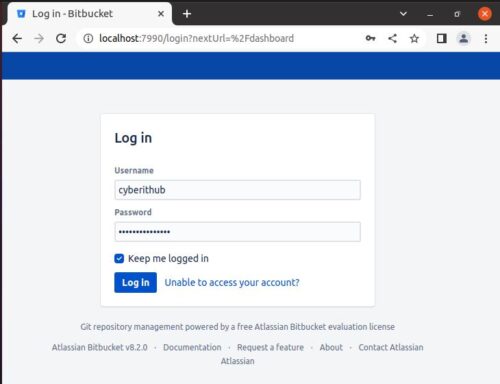
After providing valid credentials, you will be logged in successfully as shown below.

Stop 7: Stop/Start Bitbucket
Once you are done with Bitbucket, you can choose to stop the application by running stop script stored in $HOME/atlassian/bitbucket/8.2.0/bin/ directory.
cyberithub@ubuntu:~$ cd atlassian/bitbucket/8.2.0/bin
cyberithub@ubuntu:~/atlassian/bitbucket/8.2.0/bin$ ./stop-bitbucket.sh
Stopping Atlassian Bitbucket as the current user

Stopping Bitbucket webapp
The Bitbucket webapp has stopped

Stopping the bundled search server
The bundled search server has stopped
Similarly, if you again want to start the Bitbucket application then you need to run the start script stored in $HOME/atlassian/bitbucket/8.2.0/bin directory.
cyberithub@ubuntu:~/atlassian/bitbucket/8.2.0/bin$ ./start-bitbucket.sh
Starting Atlassian Bitbucket as the current user

Starting the bundled search server
Hint: Run start-bitbucket.sh --no-search to skip starting the bundled search server
future versions of OpenSearch will require Java 11; your Java version from [/home/cyberithub/atlassian/bitbucket/8.2.0/jre] does not meet this requirement
future versions of OpenSearch will require Java 11; your Java version from [/home/cyberithub/atlassian/bitbucket/8.2.0/jre] does not meet this requirement
Bundled search server started successfully

Bitbucket is being run with a umask that contains potentially unsafe settings.
The following issues were found with the mask "u=rwx,g=rwx,o=rx" (0002):
- Access is allowed to 'others'. It is recommended that 'others' be denied
all access for security reasons.
- Write access is allowed to 'group'. It is recommend that 'group' be
denied write access. Read access to a restricted group is recommended
to allow access to the logs.
The recommended umask for Bitbucket is "u=,g=w,o=rwx" (0027) and can be
configured in _start-webapp.sh

The current open files limit is set to less than 6192
Attempting to increase limit...
Limit increased to 6192 open files

Starting Bitbucket webapp at http://localhost:7990
The Bitbucket webapp has been started.

If you cannot access Bitbucket within 3 minutes, or encounter other issues, check the troubleshooting guide at:
https://go.atlassian.com/bbs-troubleshooting-installations