
Table of Contents
In this article, I will show you how you can work on your own Bitbucket feature branch. Usually in a team of developers, when multiple people are working on a project then each of the team member will have their own feature branch created to work on a particular feature. So that when the work gets completed, it will be easy to review the code. Bitbucket is a very popular Git based source code repository used by most of the Organizations to manage and maintain their project source code. Hence here we will see how a developer can create and work on their own Bitbucket feature branch. More about Bitbucket.

How to Create and Work on your Own Bitbucket Feature Branch
Also Read: Solved "fatal: Need to specify how to reconcile divergent branches"
Step 1: Prerequisites
a) You should have access to Bitbucket application.
b) You should have access to clone your Project specific repo.
c) You should have access to create your own Bitbucket feature branch.
c) You should have commit access to your Bitbucket feature branch.
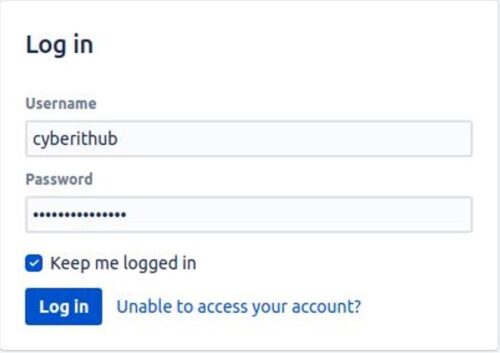
Step 2: Login to Bitbucket
You need to first login to your Bitbucket using valid Username and Password. Then you need to go to your Project and select the repo in which you need to work on. For the moment here we are using a project called Test Project and a repo called example-app repo.
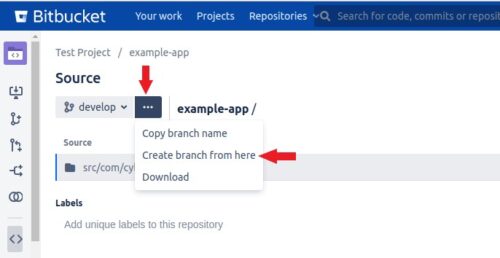
Step 3: Create Feature Branch
Here you need to first select the branch from where you want to create your feature branch. Once selected, click on three dot(...) and then select Create branch from here as highlighted below.
Here you can select the Branch type as feature and then give the Branch name as feature/exampleProject.
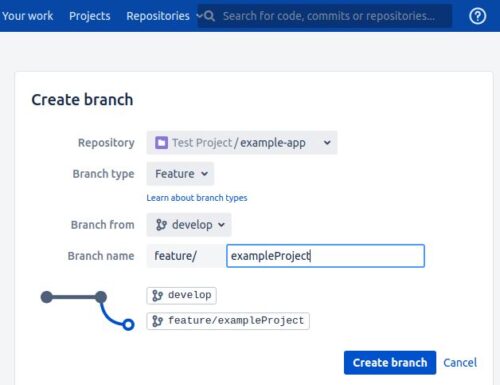
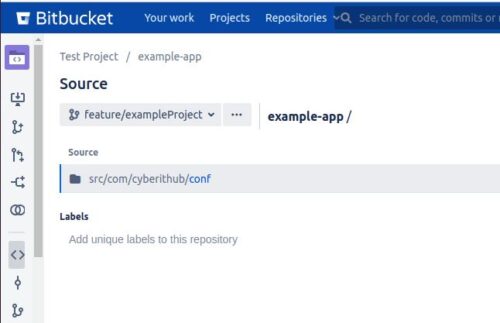
Once given, click on Create branch. It will create your feature branch with all the files cloned from develop branch as shown below.
Step 4: Clone the Repo
Now you need to clone the repo in your local system by using git clone https://app.cyberithub.com/bitbucket/scm/hello/example-app.git command as shown below. To get the repo URL, click on Clone on the left pane and copy the URL.
cyberithub@ubuntu:~$ git clone https://app.cyberithub.com/bitbucket/scm/hello/example-app.git
Cloning into 'example-app'...
remote: Enumerating objects: 4747, done.
remote: Counting objects: 100% (4747/4747), done.
remote: Compressing objects: 100% (2499/2499), done.
remote: Total 4747 (delta 2213), reused 2676 (delta 1190), pack-reused 0
Receiving objects: 100% (4747/4747), 366.45 KiB | 244.00 KiB/s, done.
Resolving deltas: 100% (2213/2213), done.
Then go to that repo by using cd example-app command as shown below.
cyberithub@ubuntu:~$ cd example-app
Here you need to check your current branch by using git branch command. By default, you should be either in master or develop or may be in some other branch depending on the branching policy you have. As you can see, here we are in develop branch.
cyberithub@ubuntu:~/example-app$ git branch
* develop
Step 5: Create Local Branch
To work on your own branch, you need to create a local branch and switch on it by using git checkout -b feature/exampleProject command as shown below.
cyberithub@ubuntu:~/example-app$ git checkout -b feature/exampleProject
Switched to a new branch 'feature/exampleProject'
Now if you check your branch again by using git branch command then you can see that star(*) mark will now show to your local branch that you just created and switched. It means you are now in your local branch and can start working on your branch.
cyberithub@ubuntu:~/example-app$ git branch
  develop
* feature/exampleProject
Step 6: Pull the changes(Optional)
If you want to pull all the changes from a specific branch(let's say main in our case) before starting to work on our feature branch then that also you can do by first pulling the changes using git pull origin main command as shown below.
cyberithub@ubuntu:~/example-app$ git pull origin main
warning: Pulling without specifying how to reconcile divergent branches is
discouraged. You can squelch this message by running one of the following
commands sometime before your next pull:

git config pull.rebase false # merge (the default strategy)
git config pull.rebase true # rebase
git config pull.ff only # fast-forward only

You can replace "git config" with "git config --global" to set a default
preference for all repositories. You can also pass --rebase, --no-rebase,
or --ff-only on the command line to override the configured default per
invocation.

From https://app.cyberithub.com/bitbucket/scm/hello/example-app
 * branch             main -> FETCH_HEAD
Updating 8754921..ffa96ad
Fast-Forward
 .gitignore
 src/com/cyberithub/conf/main.json                         | 1 +
 src/com/cyberithub/conf/server.json                       | 6 +++---
 src/com/cyberithub/conf/pom.xml                           | 4 ++--
 3 files changed, 6 insertions(+), 4 deletions(-)
Step 7: Add & Commit Your Changes
Once all the project work is completed, you can check the changes that needs to be added using git status command.
cyberithub@ubuntu:~/example-app$ git status
On branch feature/exampleProject
Untracked files:
  (use "git add <file>..." to include in what will be committed)
        src/com/cyberithub/conf/

nothing added to commit but untracked files present (use "git add" to track)
To add all the changes to the current branch, use git add . command.
cyberithub@ubuntu:~/example-app$ git add .
Then to commit all the added changes, use git commit -m "Adding minor changes in pom.xml" command.
cyberithub@ubuntu:~/example-app$ git commit -m "Adding minor changes in pom.xml"
 [feature/exampleProject 076400b] Adding minor changes in pom.xml
  1 file changed, 2 insertions(+)
Step 8: Push Your Changes
Once all the changes are committed, you can push those changes to the remote branch by using git push -u origin feature/exampleProject command as shown below.
NOTE:
cyberithub@ubuntu:~/example-app$ git push -u origin feature/exampleProject
Enumerating objects: 24, done.
Counting objects: 100% (24/24), done.
Delta compression using up to 16 threads
Compressing objects: 100% (14/14) done.
Writing objects: 100% (18/18), 2.37 KiB | 2.37 MiB/s, done.
Total 18 (delta 4), reused 2 (delta 1), pack-reused 0
remote: Checking connectivity:13, done
remote:
remote: Create pull request for feature/exampleProject:
remote:   https://app.cyberithub.com/bitbucket/projects/hello/repos/example-app/pull-requests?create&sourceBranch=refs/heads/feature/exampleProject
remote:
To https://app.cyberithub.com/bitbucket/scm/hello/example-app.git
   ffa96ad..076400b  feature/exampleProject -> feature/exampleProject
Branch 'feature/exampleProject' set up to track remote branch 'feature/exampleProject' from 'origin'.
Step 9: Raise a Pull Request(PR)
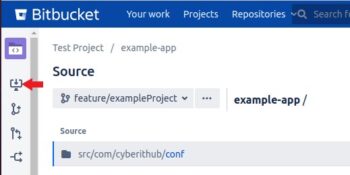
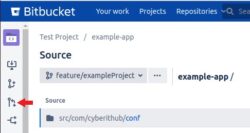
You can check all the changes if pushed correctly in your remote feature branch. Now it is time to create PR(pull request) to merge your feature branch to the master or develop depending upon your branching policy. You can click on Create Pull Request on the left column as highlighted below.
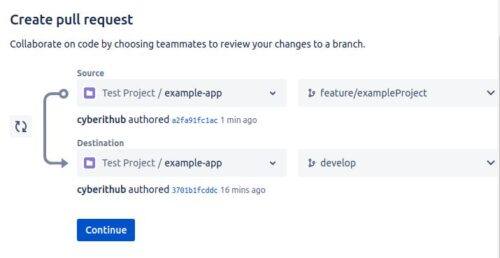
Then select the branch you want to merge your feature branch with. In our case, we want to merge feature/exampleProject with develop. So we will select develop on the Destination branch.
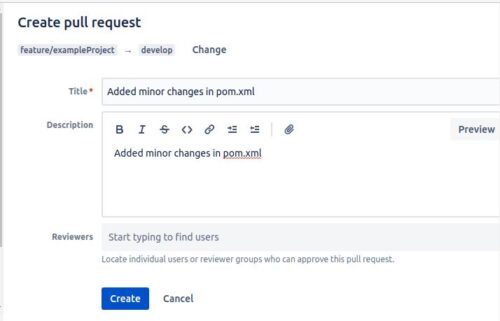
Finally select the approvers in the approval list who will review the PR. Once done, click on Create. Later on, once your PR is approved you can merge the feature branch and verify the changes. During merging, you will get an option selected called Delete Source branch after merging during merge. You can either choose to delete your source feature branch at the time of merging or you can also delete it later, in that case you need to deselect Delete Source branch after merging option.
Step 10: Delete Local Branch
Once the feature branch is merged and then later deleted, you can come back to your local system and delete the local feature branch as well. If you want you can also delete the cloned directory by using rm -rf example-app command as shown below.
cyberithub@ubuntu:~/example-app$ cd ../
cyberithub@ubuntu:~$ rm -rf example-app