Table of Contents
In this article, we will go through step by step guide to deploy a website on GKE(Google Kubernetes Engine). There are multiple ways to deploy a website on GKE or on any other server. In this tutorial, we will focus on how to do the deployment on GKE in GCP. We have divided our deployment into below three steps.
- Create your own sample website.
- Create image of the website using container.
- Deploy container in the cluster.
Step by Step Guide to Deploy a Website on GKE(Google Kubernetes Engine)
Also Read: 3 Best Ways to List all the Changed Files After Git Commit
Step 1: Create Your Own Sample Website
Created an easy and short index.html file which will do a simple job. It will show some messages once deployed along with default layout. Customize the page according to your requirement.
<!DOCTYPE html>
<html lang="en">
<head>
    <title> Home Page </title>
    <meta charset="UTF-8">
    <meta name="viewport" content="width=device-width, initial-scale=1">
 <style>
    {
       box-sizing: border-box;
     }
     body {
        font-family: Arial, Helvetica, sans-serif;
        margin: 0;
      }

   .header {
         padding: 215px;
         text-align: center;
         background: #333;
         color: white;
                }

     .bottomlink {
          overflow: hidden;
          background-color: #1abc9c;
                 }

      .bottomlink a {
            float: left;
            display: block;
            color: black;
            text-align: center;
             padding: 14px 20px;
             text-decoration: none;
                    }
   </style>
</head>
<body>
      <div class="header">
       <h1>Welcome to GKE</h1>
       <p>Website Successfully Deployed.</p>
      </div>
      <div class="bottomlink">
       <a href="#">column1</a>
       <a href="#">column2</a>
      </div>
    </body>
</html>
Step 2: Create Image of the Website Using Container
Next we will deploy the website on Nginx server through Cloud shell. Open the Cloud shell and perform below activities. Run the latest version of Nginx image instance(running image is called container).
NOTE:
a) Check the installed docker version in cloud shell using docker --version command.
cyberithub@cloudshell:~ (cloud-build-312308)$ docker --version
Docker version 20.10.6, build 370c289
b) Connect to the working project.
cyberithub@cloudshell:~ (cloud-build-312308)$ gcloud config set project cloud-build-312308
Updated property [core/project]
c) Create a writable container layer over the specified image (nginx image here).
cyberithub@cloudshell:~ (cloud-build-312308)$ docker run -p 8080:80 nginx:latest
Unable to find image 'nginx:latest' locally
latest: Pulling from library/nginx
69692152171a: Pull complete
49f7d34d62c1: Pull complete
5f97dc5d71ab: Pull complete
cfcd0711b93a: Pull complete
be6172d7651b: Pull complete
de9813870342: Pull complete
Digest: sha256:df13abe416e37eb3db4722840dd479b00ba193ac6606e7902331dcea50f4f1f2
Status: Downloaded newer image for nginx:latest
/docker-entrypoint.sh: /docker-entrypoint.d/ is not empty, will attempt to perform configuration
/docker-entrypoint.sh: Looking for shell scripts in /docker-entrypoint.d/
/docker-entrypoint.sh: Launching /docker-entrypoint.d/10-listen-on-ipv6-by-default.sh
10-listen-on-ipv6-by-default.sh: info: Getting the checksum of /etc/nginx/conf.d/default.conf
10-listen-on-ipv6-by-default.sh: info: Enabled listen on IPv6 in /etc/nginx/conf.d/default.conf
/docker-entrypoint.sh: Launching /docker-entrypoint.d/20-envsubst-on-templates.sh
/docker-entrypoint.sh: Launching /docker-entrypoint.d/30-tune-worker-processes.sh
/docker-entrypoint.sh: Configuration complete; ready for start up
Note : Use “-d” flag to run the container in background
docker run -d -p 8080:80 nginx:latest
8080 -> cloud shell default port
80 -> nginx server's default port
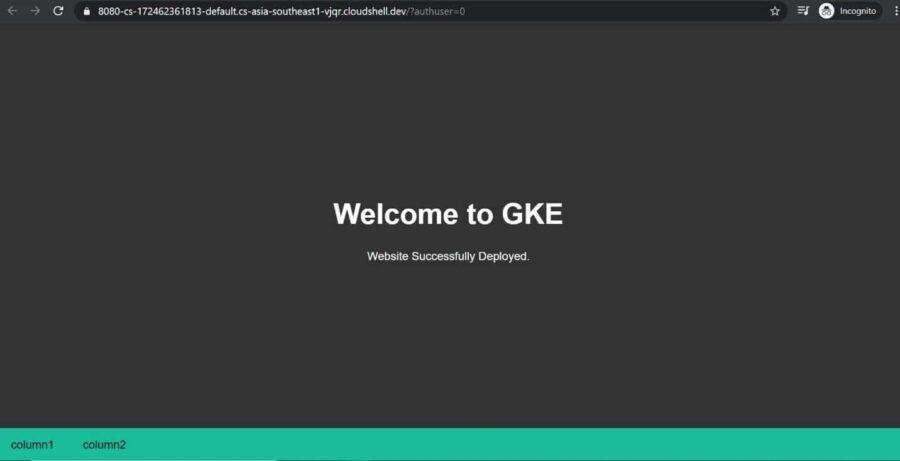
d) Click on "Web Preview" at the top right and open the URL on Port 8080(you can run on any port, specify while running the container). It will show the Nginx Home page.

e) To see all the running container, use docker ps command as shown below.
cyberithub@cloudshell:~ (cloud-build-312308)$ docker ps
CONTAINER ID       IMAGE           COMMAND               CREATED          STATUS                PORTS                                   NAMES
4b43bd34107e   nginx:latest   "/docker-entrypoint.…"   5 minutes ago   Up 5 minutes   0.0.0.0:8080->80/tcp, :::8080->80/tcp   hardcore_jemison
Let's now deploy our website on Nginx server.
a) Keep “Index.html” file in current working directory of project.
cyberithub@cloudshell:~ (cloud-build-312308)$ ls -lhtr
-rw-r--r-- 1 cyberithub cyberithub  967 May 14 12:58 index.html
b) Copy the file in below path to create image out of it.
cyberithub@cloudshell:~ (cloud-build-312308)$ docker cp index.html
4b43bd34107e:/usr/share/nginx/html/
NOTE:
/usr/share/nginx/html/ is the default Nginx path in Linux where index.html is placed.Refresh the URL, you should be now able to see your website homepage. We have deployed our website in the container which still has old code. So let's add our changes in the container and push the newly created image from our local to google cloud registry. Follow the google cloud documentation to get the well documented steps to do the job.
c) Commit the latest container changes in the local repository.
cyberithub@cloudshell:~ (cloud-build-312308)$ docker commit 4b43bd34107e website:version1
sha256:b6dd5a00f65c70275d8d22c7d98504994bc1a6b73231c8313a3f785401c25bec
d) Check the newly created image.
cyberithub@cloudshell:~ (cloud-build-312308)$ docker images
REPOSITORY   TAG        IMAGE ID       CREATED          SIZE
website      version1   b6dd5a00f65c   51 seconds ago   133MB
nginx        latest     f0b8a9a54136   2 days ago       133MB
NOTE:
e) Tag the image before pushing into registry.
cyberithub@cloudshell:~ (cloud-build-312308)$ docker tag website:version1 asia.gcr.io/cloud-build-312308/website-page:v1
Where,
- website:version1 is the current image name
- asia.gcr.io is the hostname
- cloud-build-312308 is the project id
- website-page:v1 is the new image name along with version
f) Check the newly created image by using docker images command.
cyberithub@cloudshell:~ (cloud-build-312308)$ docker images
REPOSITORY                                     TAG        IMAGE ID          CREATED        SIZE
asia.gcr.io/cloud-build-312308/website-page     v1       b6dd5a00f65c    14 minutes ago   133MB
website                                      version1    b6dd5a00f65c    14 minutes ago   133MB
nginx                                         latest     f0b8a9a54136    2 days ago       133MB
We see a new image got created with the tag "v1".
g) Push the image into Container registry.
cyberithub@cloudshell:~ (cloud-build-312308)$ docker push asia.gcr.io/cloud-build-312308/website-page:v1
The push refers to repository [asia.gcr.io/cloud-build-312308/website-page]f95756fc57b3: Pushed
f0f30197ccf9: Pushed
eeb14ff930d4: Pushed
c9732df61184: Pushed
4b8db2d7f35a: Pushed
431f409d4c5a: Pushed
02c055ef67f5: Pushed
v1: digest: sha256:c61cb1cb30d0c53e9f43ca58cb640d6dfe6a27c3f23b9f5899505a0e6e4fdfce size: 1778
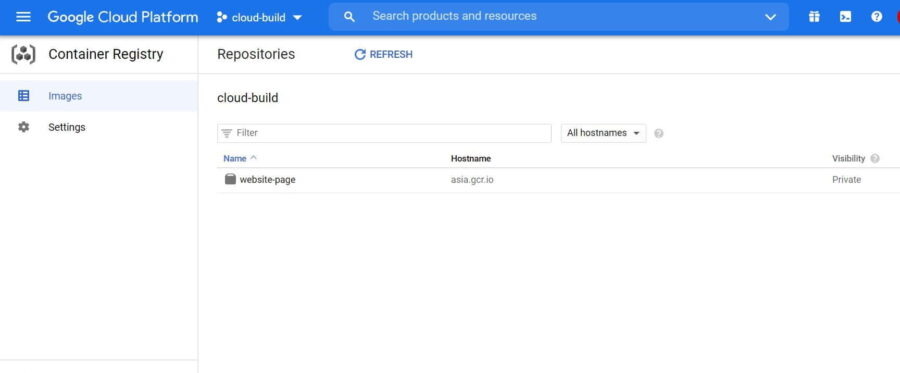
Go to "Container Registry" service in GCP. you should see the latest pushed image there like below
Step 3: Deploy Container in the Cluster
You can deploy the image either using GUI or CLI.
a) To deploy using GUI use below steps
- Click on
"Deploy"to see the available deployment option like below.
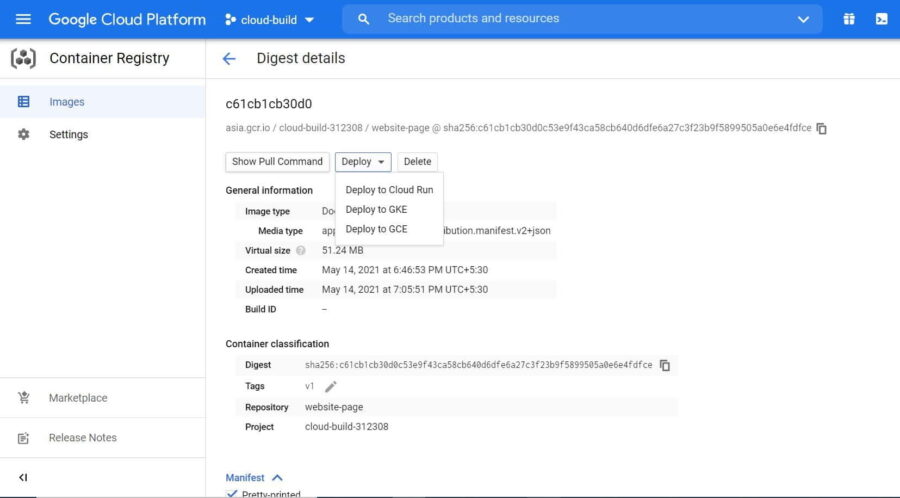
- Select
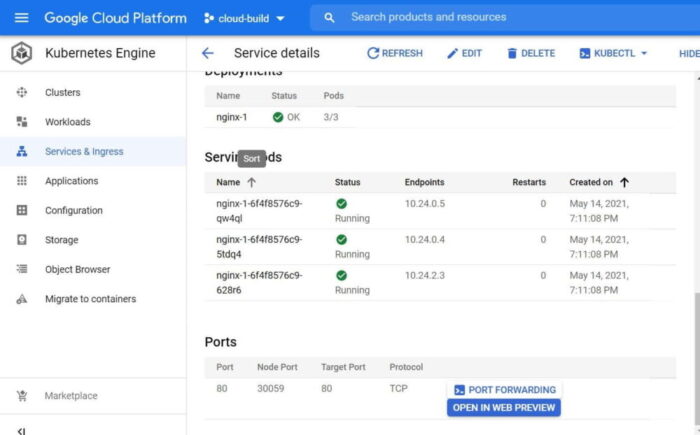
"Deploy to GKE"for now and follow the GUI instruction to deploy and expose the image. - Once it's done, click on
"Open in Web Preview"to see your website in the browser like below.
b) To deploy using CLI, follow below steps
- Create cluster using GKE service
- Enable
GKE API - Go to
“Kubernetes Engine”service and create cluster - Connect to the created cluster
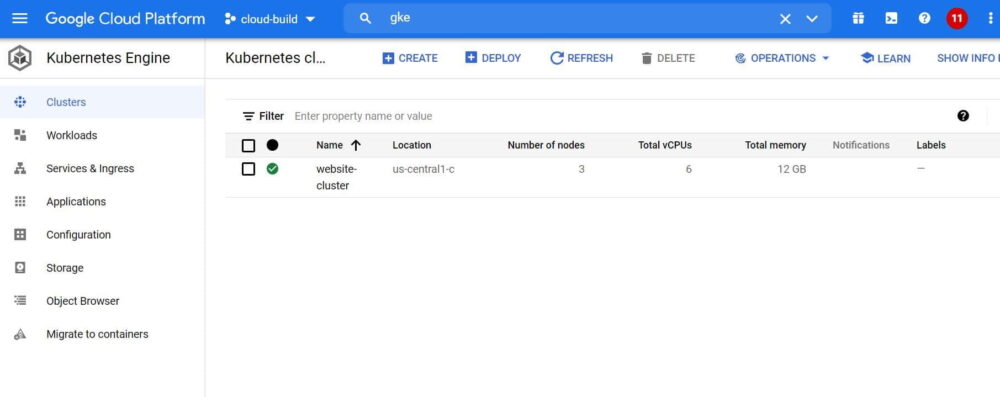
cyberithub@cloudshell:~ (cloud-build-312308)$ gcloud container clusters get-credentials website-cluster --zone us-central1-c --project cloud-build-312308
Fetching cluster endpoint and auth data.
kubeconfig entry generated for website-cluster.
As you can see by default 3 nodes will be added to the cluster.
cyberithub@cloudshell:~ (cloud-build-312308)$ kubectl get nodes
NAME                                             STATUS   ROLES    AGE     VERSION
gke-website-cluster-default-pool-2324d535-0zqr   Ready    <none>   2m20s   v1.19.9-gke.1400
gke-website-cluster-default-pool-2324d535-bczn   Ready    <none>   2m22s   v1.19.9-gke.1400
gke-website-cluster-default-pool-2324d535-nfq9   Ready    <none>   2m20s   v1.19.9-gke.1400
Now you need to create a deployment to launch the web server in the GKE Cluster.
cyberithub@cloudshell:~ (cloud-build-312308)$ kubectl create deployment web-server --image=asia.gcr.io/cloud-build-312308/website-page
deployment.apps/web-server created
Once created, you can check the deployment by using kubectl get deployment command.
cyberithub@cloudshell:~ (cloud-build-312308)$ kubectl get deployment
NAME         READY   UP-TO-DATE   AVAILABLE   AGE
web-server   0/1     1            0           60s
To make this web server accessible, you need to expose the deployment using below command.
cyberithub@cloudshell:~ (cloud-build-312308)$ kubectl expose deployment web-server --type LoadBalancer --port 80 --target-port 8080
service/web-server exposed
You can use kubectl get service command to list all the created services.
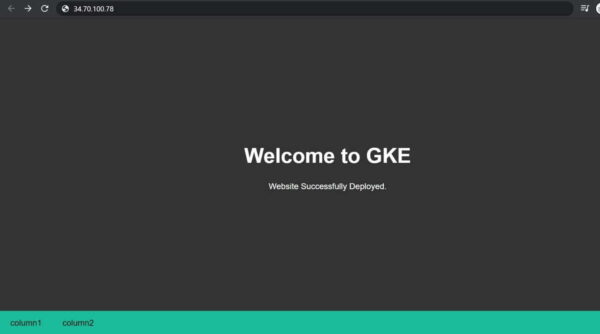
cyberithub@cloudshell:~ (cloud-build-312308)$ kubectl get service
NAME         TYPE           CLUSTER-IP   EXTERNAL-IP    PORT(S)        AGE
kubernetes   ClusterIP      10.28.0.1    <none>         443/TCP        10m
web-server   LoadBalancer   10.28.14.3   34.70.100.78   80:30770/TCP   88s
Pods status can be checked using kubectl get pods command.
cyberithub@cloudshell:~ (cloud-build-312308)$ kubectl get pods
NAME                                                READY      STATUS                RESTARTS        AGE
web-server-675559b59d-prkvk       0/1        ImagePullBackOff            0              5m18s
c) Copy the External IP (34.70.100.78 in my case)of the service and paste it in the browser, you should see the website like below.