
Table of Contents
In this tutorial, We will go through step by step procedure to create an EC2 Instance in AWS. Amazon Elastic Compute Cloud (Amazon EC2) is a web service that provides secure, resizable compute capacity in the cloud. It is designed to make web-scale cloud computing easier for developers.
Create an EC2 Instance in AWS
Also Read: How to Install AWS CLI in Linux(RHEL/CentOS 7/8) Using 6 Easy Steps
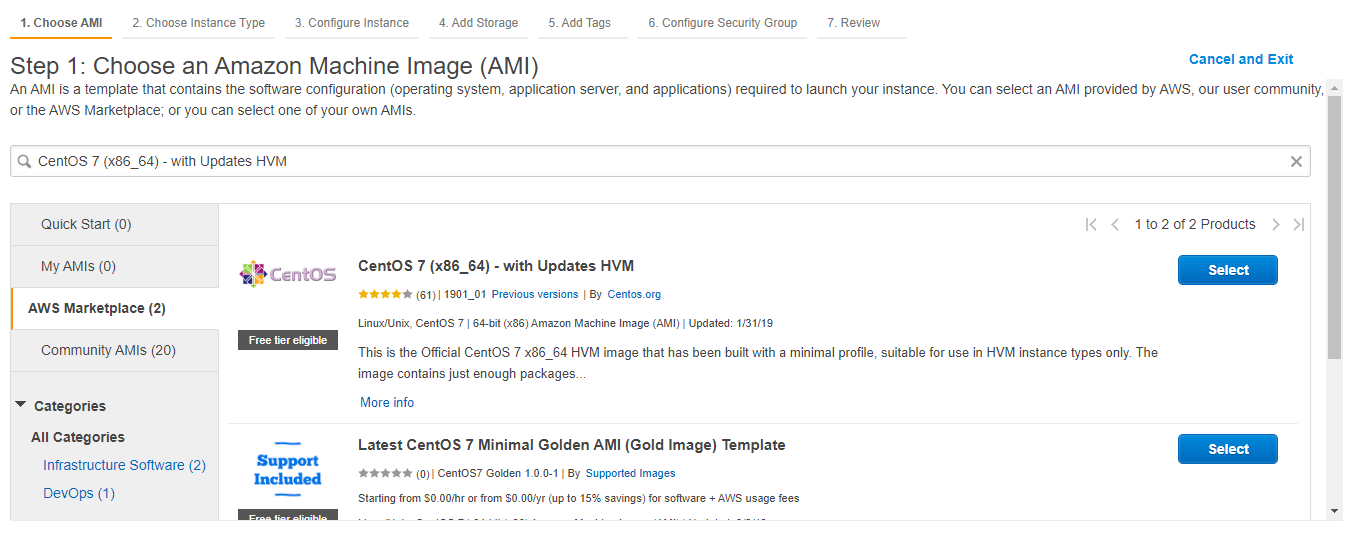
Step 1: Select an AMI
We will use CentOS 7 AMI Image for our example. Search CentOS 7 (x86_64) - with Updates HVM from the AWS Marketplace. Click on Select.
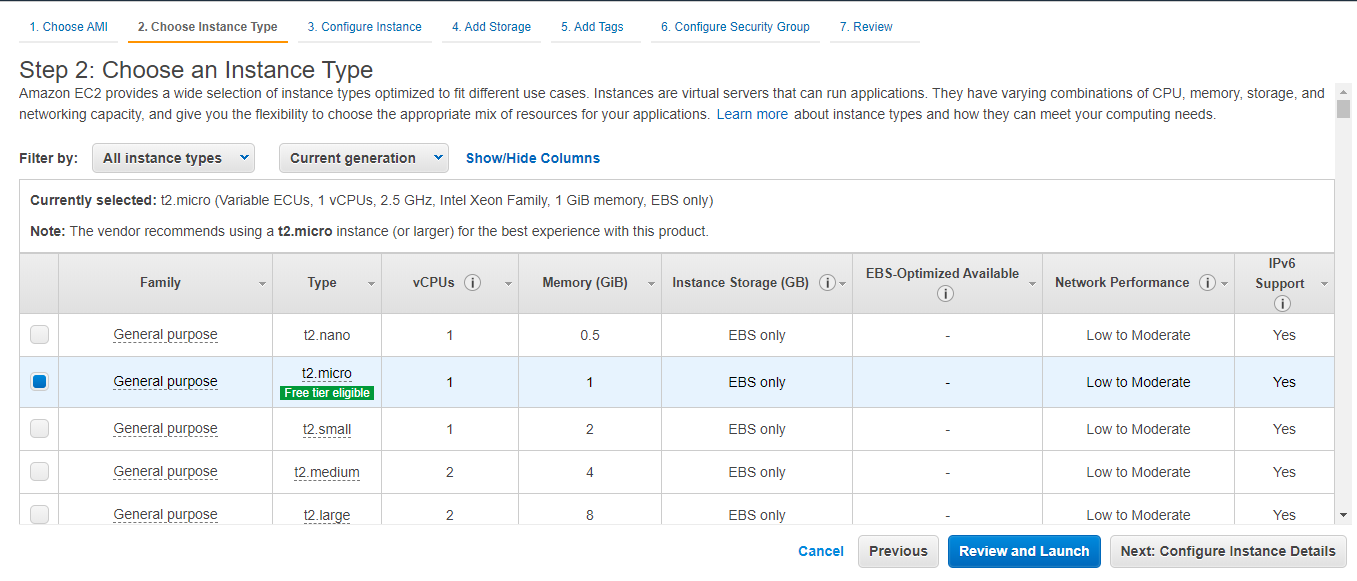
Step 2: Select Instance Type
We will use the minimal t2.micro instance type for our example.
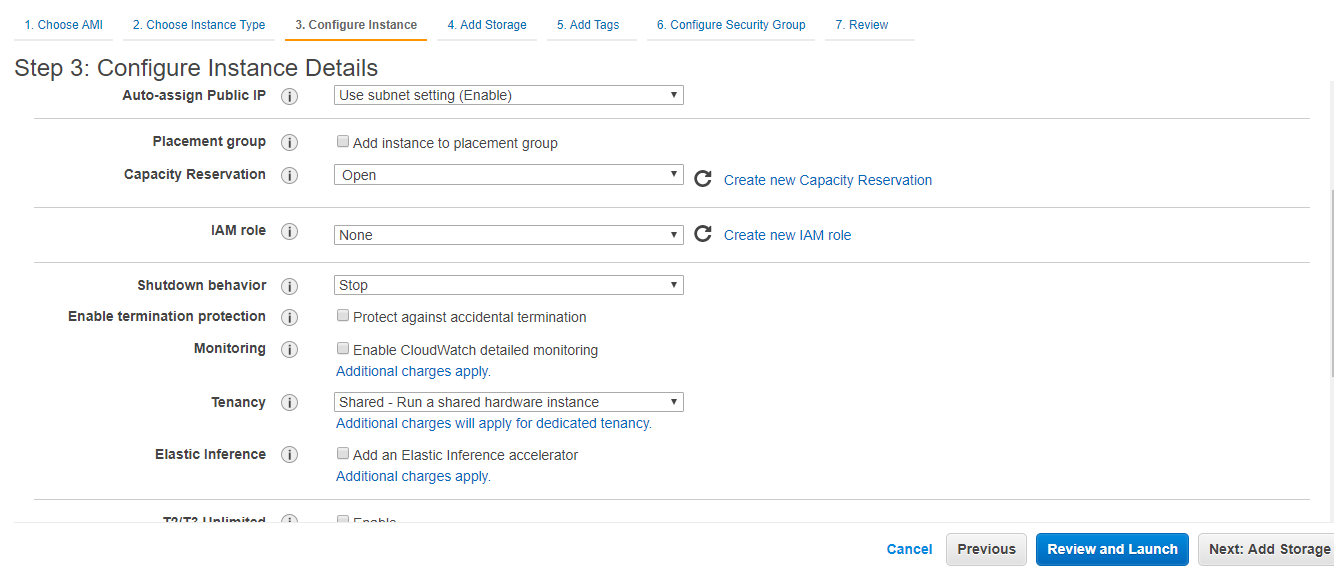
Step 3: Configure Instance Details
Here, we will use default configuration.
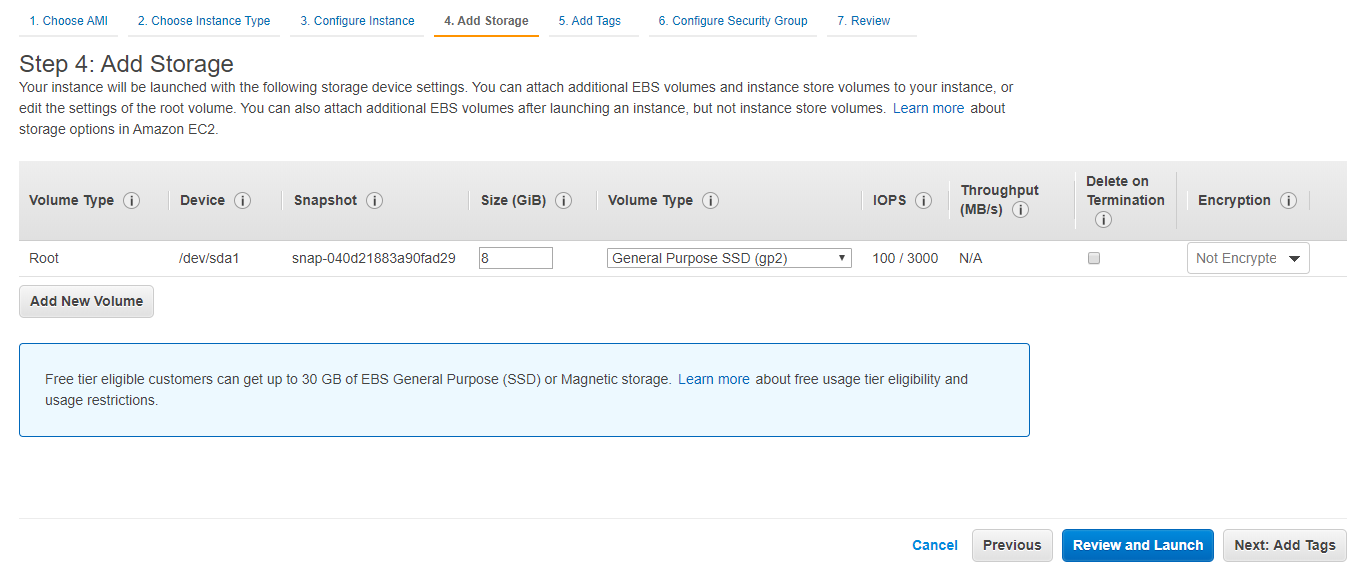
Step 4: Add Storage
We will use minimal storage for our example.
Storage Size: 8 GB
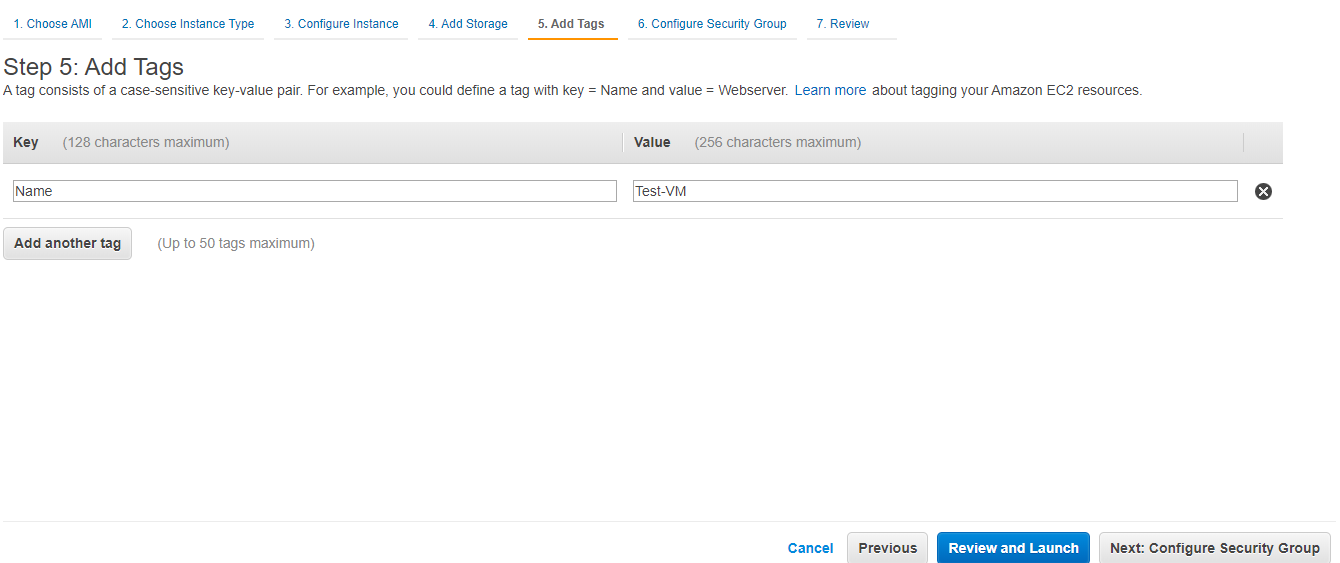
Step 5: Add Tags
Here, we will provide Name key and Test-VM Value.
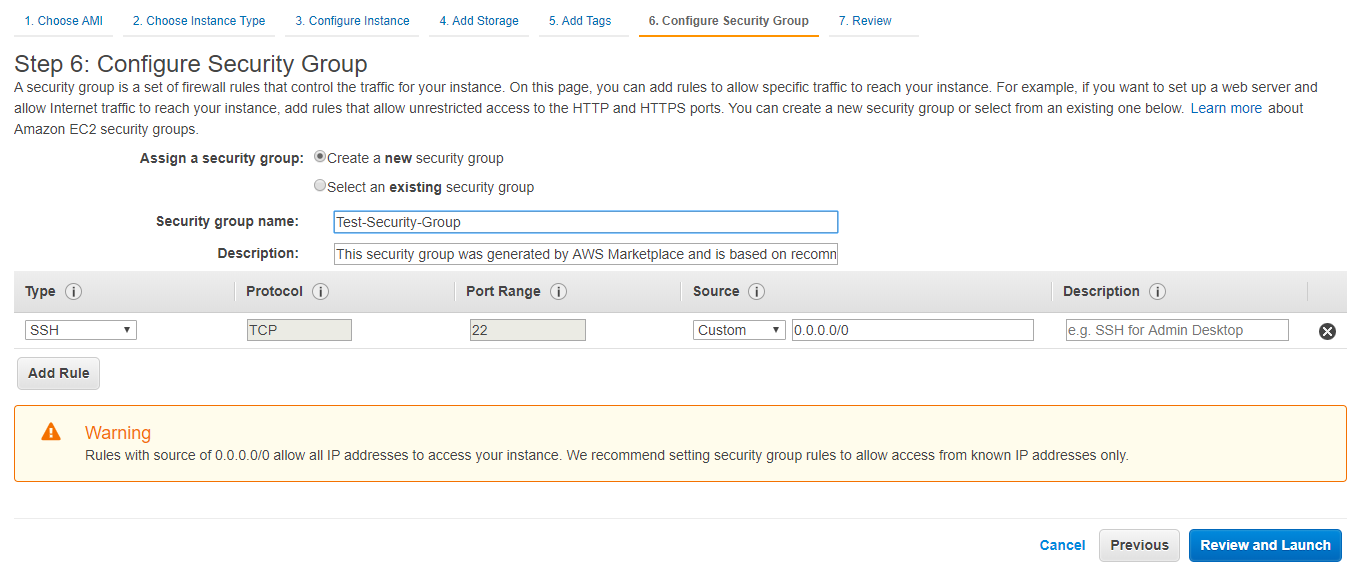
Step 6: Configure Security Group
We will create security group Test-Security-Group with default port 22 open.
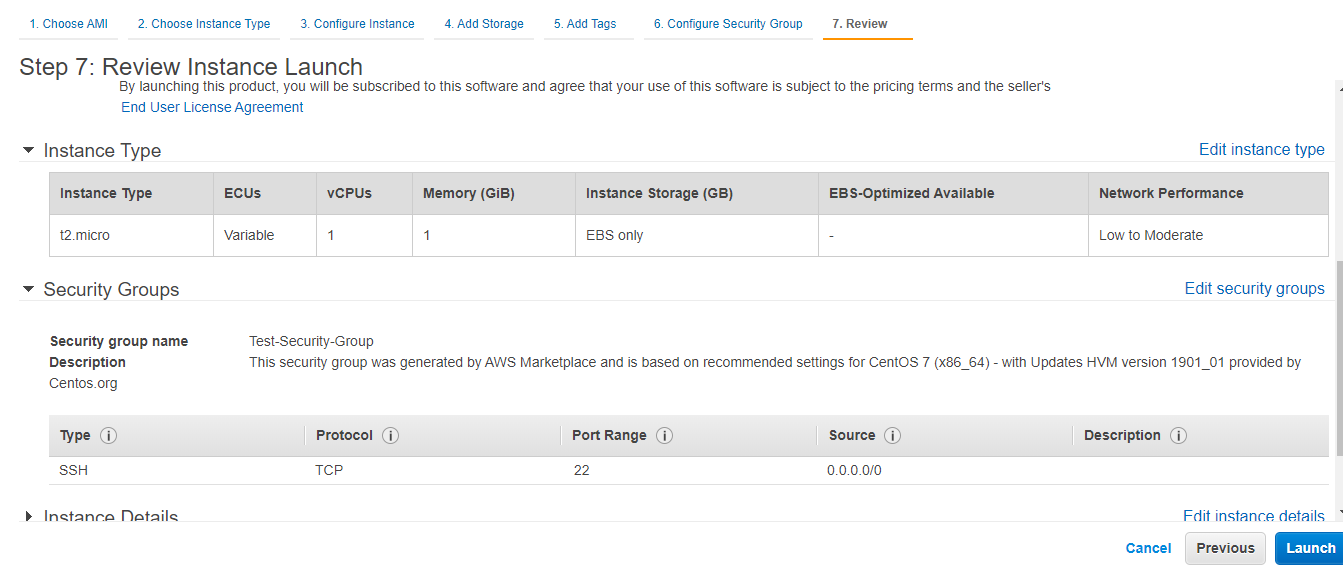
Step 7: Review the Instance Configuration
Once all the configuration done, Click on Launch.
Step 8: Test-VM created successfully
Congratulations, You have created an EC2 Instance in AWS. You can now login to EC2 Instance using your public ip.
Public IP: 10.244.132.6
Also Read: IAM User and Policies
Reference: AWS Documentation