
Table of Contents
In this article, I will take you through the steps to install and use DBeaver Universal Database Tool on Ubuntu 20.04 LTS. DBeaver is a free and multi-platform database management tool for database administrators, developers, programmers and to all the people working with databases. It supports more than 80 databases which includes all the popular DB like MySQL, PostgreSQL, SQLite, Oracle, DB2, SQL Server, Sybase, MS Access, Teradata, Firebird, Apache Hive, Phoenix, Presto, etc. More on DBeaver Official website. We will see how to install and use this database management tool in below section with the help of an example.
Features of DBeaver
- Easy to manipulate database data.
- Provides the ability of data and schema migration.
- Ability to monitor database connection sessions.
- Capability to work with various extensions for integration with Excel, Git and others.
- Supports Enterprise Security Standard
- Ability to edit/rename/delete database connections and objects.
- Ability to modify most metadata entities depending on the availability of database drivers.
- Ability to import data directly from CSV file into database table.
- It has the feature of Mock Data Generator which can generate random data for tables.
- Ability to analyze and execute complex queries.

How to Install and Use DBeaver Universal Database Tool on Ubuntu 20.04 LTS
Also Read: How to Install kubectl on Ubuntu 20.04 LTS (Focal Fossa)
Step 1: Prerequisites
a) You should have a running Ubuntu 20.04 LTS Server.
b) You should have sudo or root access to run privileged commands.
c) You should have apt and snap utility available in your System.
d) You should have PostgreSQL DB Server installed and running.
e) Database Port 5432 must be opened from the Firewall if you have any.
Step 2: Lab Setup
On our Ubuntu 20.04 LTS Server, we are running PostgreSQL DB Server on localhost with below configuration:-
Host: localhost
Port: 5432
Username: postgres
Password: postgres
Database: postgres
Step 3: Update Your Server
Before proceeding with the steps, let's make sure system is synced with the latest available updates from all the enabled repo using apt update command as shown below. If any of the packages requires an upgrade then run apt upgrade command as well.
root@cyberithub:~# apt update
Hit:2 http://in.archive.ubuntu.com/ubuntu focal InRelease
Hit:3 http://in.archive.ubuntu.com/ubuntu focal-updates InRelease
Hit:4 http://in.archive.ubuntu.com/ubuntu focal-backports InRelease
Hit:5 http://security.ubuntu.com/ubuntu focal-security InRelease
Hit:6 http://ppa.launchpad.net/nilarimogard/webupd8/ubuntu focal InRelease
Hit:7 http://apt.postgresql.org/pub/repos/apt focal-pgdg InRelease
Hit:8 https://dl.google.com/linux/chrome/deb stable InRelease
Hit:1 https://downloads.apache.org/cassandra/debian 40x InRelease
Reading package lists... Done
Building dependency tree
Reading state information... Done
Step 4: Install DBeaver
There are multiple ways to install DBeaver package. Here we are installing it as a snap package from Snap store using snap install dbeaver-ce command as shown below.
root@cyberithub:~# snap install dbeaver-ce
dbeaver-ce 22.0.1.202203181646 from DBeaver (dbeaver-corp) installed
Step 5: Setup Database Connection
You can go to Activities->Search and then type DBeaver in the Search box. Once it appears, Click on it to open as shown below.

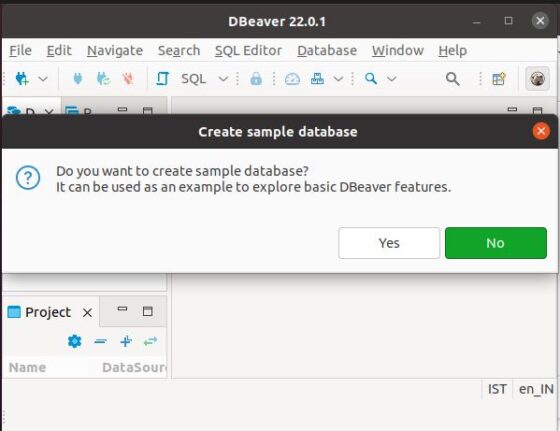
As soon as it opened, it will ask to create sample database. You can click on No for now to proceed.
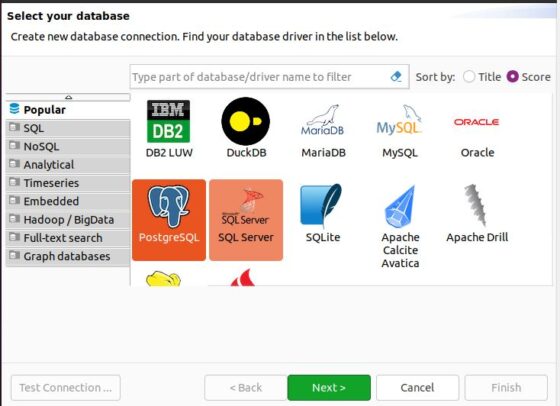
Next you will see below database connection window where you need to select your database for which you need to create a new connection. In our case it is PostgreSQL so we will select this and then Click on Next.
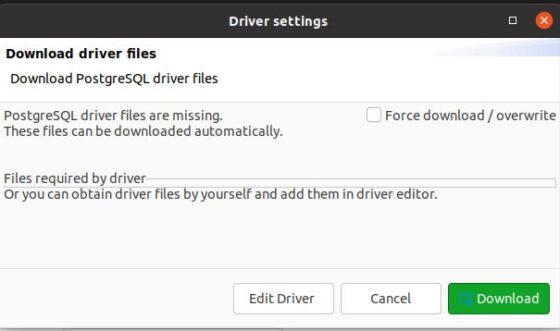
If you do not have PostgreSQL driver files then it will ask you to download in the next step as you can see below. Make sure you have active Internet connection if you choose to Download. Otherwise you can also get it from outside and then just add them in driver editor.
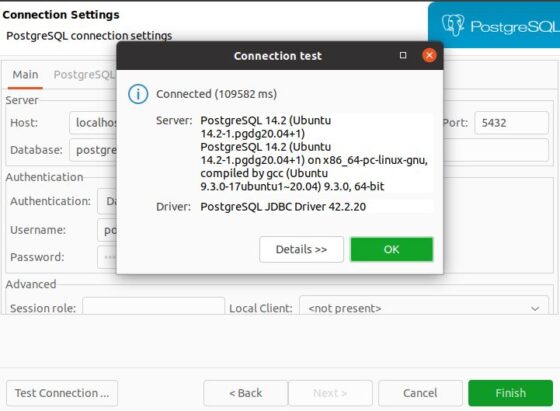
Once the driver files are downloaded, you will get below screen where it will ask you to provide PostgreSQL DB connection details. We will provide the details as per our Lab Setup as mentioned earlier. Once done, we need to test the connection by Clicking on Test Connection.
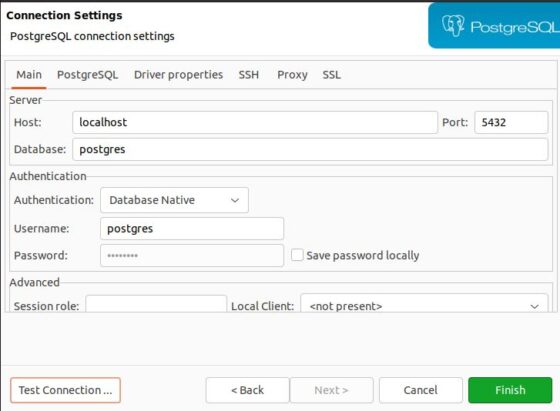
If the PostgreSQL DB authentication goes successful then you will see below dialog box with message Connected. If it fails, then you need to check your connection setting details and try again. Then Click on OK to close the dialog box and then Click on Finish to complete the setup.
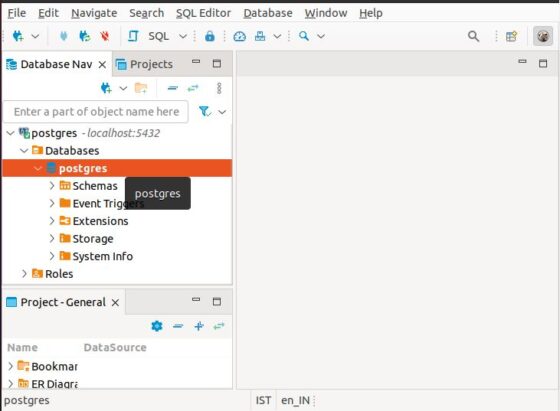
The database connection will now start showing on the left column as you can see below. You need to expand the connection to check all the Databases, Roles etc. Since as of now we only have default postgres db available so it is showing that one only. In your case if it is multiple db, then it will show all the databases here only.
Step 6: Uninstall DBeaver
Once you are done with DBeaver database tool then you can choose to uninstall it from your System by using snap remove dbeaver-ce command as shown below.
root@cyberithub:~# snap remove dbeaver-ce
dbeaver-ce removed