
Table of Contents
In this article, I will take you through the steps to install Issabel on CentOS 7 using 6 Easy Steps. Issabel is a free and open source software that brings together all the IP communication services in one place. It is an excellent platform to simplify the management of your business interaction channels, incorporating a Telephone exchange (VoIP) with email, CRM, fax, videoconference, recording, reports and more. More on official website. It is also very easy to install in almost all the famous Linux distributions. Here we are going to install Issabel on CentOS 7 Linux distribution.
Important Features
- No Users limit
- Ability to share desktop or specific windows
- Access to the conference from the web browser, without the need to install additional software
- Edition of documents together and in real time
- Integrated chat

How to Install Issabel on CentOS 7 Using 6 Easy Steps
Also Read: Solved "Could not chdir to home directory /home/xxxx" in Linux
Step 1: Prerequisites
a) You should have a running CentOS 7 Server.
b) You should have sudo or root access to run privileged commands.
c) You should have yum and wget utility available in your Server.
Step 2: Update Your Server
Before going through the steps to install Issabel on CentOS 7, it is best to update your installed packages to the latest version by using yum update command as shown below. You can also run yum upgrade in case any of the packages needs to be upgraded.
[root@localhost ~]# yum update
Loaded plugins: fastestmirror
Determining fastest mirrors
epel/x86_64/metalink | 27 kB 00:00:00
* base: centos.excellmedia.net
* epel: d2lzkl7pfhq30w.cloudfront.net
* extras: centos.excellmedia.net
* updates: centos.excellmedia.net
base | 3.6 kB 00:00:00
epel | 4.7 kB 00:00:00
extras | 2.9 kB 00:00:00
updates | 2.9 kB 00:00:00
(1/5): epel/x86_64/group_gz | 98 kB 00:00:00
(2/5): epel/x86_64/updateinfo | 1.0 MB 00:00:00
(3/5): extras/7/x86_64/primary_db | 249 kB 00:00:00
(4/5): epel/x86_64/primary_db | 7.0 MB 00:00:01
(5/5): updates/7/x86_64/primary_db | 18 MB 00:00:07
Resolving Dependencies
--> Running transaction check
---> Package bind-export-libs.x86_64 32:9.11.4-26.P2.el7_9.9 will be updated
---> Package bind-export-libs.x86_64 32:9.11.4-26.P2.el7_9.10 will be an update
---> Package ca-certificates.noarch 0:2021.2.50-72.el7_9 will be updated
---> Package ca-certificates.noarch 0:2022.2.54-74.el7_9 will be an update
---> Package expat.x86_64 0:2.1.0-14.el7_9 will be updated
---> Package expat.x86_64 0:2.1.0-15.el7_9 will be an update
---> Package glibc.x86_64 0:2.17-325.el7_9 will be updated
---> Package glibc.x86_64 0:2.17-326.el7_9 will be an update
.......................................................
Step 3: Install Issabel
You can install Issabel from repo by using below wget command.
[root@localhost ~]# wget -O - http://repo.issabel.org/issabel4-netinstall.sh | bash
--2022-11-11 07:30:14-- http://repo.issabel.org/issabel4-netinstall.sh
Resolving repo.issabel.org (repo.issabel.org)... 144.217.169.163
Connecting to repo.issabel.org (repo.issabel.org)|144.217.169.163|:80... connected.
HTTP request sent, awaiting response... 200 OK
Length: 112 [application/x-sh]
Saving to: ‘STDOUT’

100%[===================================================================================================================>] 112 --.-K/s in 0s

2022-11-11 07:30:15 (6.25 MB/s) - written to stdout [112/112]

% Total % Received % Xferd Average Speed Time Time Time Current
Dload Upload Total Spent Left Speed
100 1010 0 1010 0 0 1323 0 --:--:-- --:--:-- --:--:-- 1323
100 367 100 367 0 0 209 0 0:00:01 0:00:01 --:--:-- 0
100 20717 100 20717 0 0 6048 0 0:00:03 0:00:03 --:--:-- 32020
Looking for dialog...


Not found

Installing dialog...


Loaded plugins: fastestmirror
Loading mirror speeds from cached hostfile
* base: centos.excellmedia.net
* epel: d2lzkl7pfhq30w.cloudfront.net
* extras: centos.excellmedia.net
* updates: centos.excellmedia.net
Resolving Dependencies
--> Running transaction check
---> Package dialog.x86_64 0:1.2-5.20130523.el7 will be installed
--> Finished Dependency Resolution
.................................................
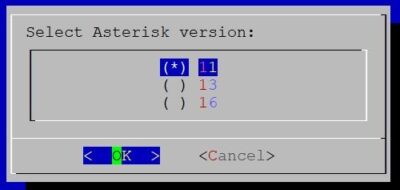
During installation, it will ask you to select the asterisk version from below. For the moment, we have selected the default version and clicked on OK.
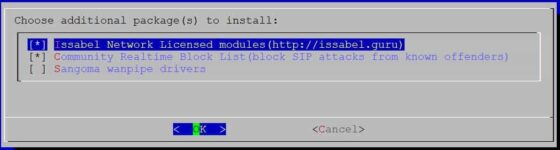
Then it will ask you to choose additional package that needs to be installed. By default Issabel Network Licensed modules and Community Realtime Block List will be selected. You can choose the one you needed and click on OK to proceed.
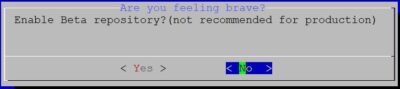
In the next dialog box, it will ask you enable Beta repository. You can click on No for now to avoid this.
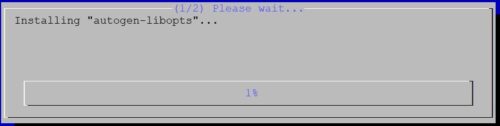
Then it will start installing as shown below.
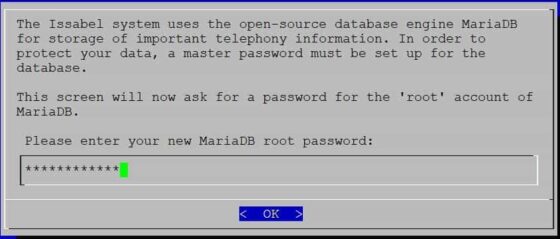
After few mins it will ask you to provide the password for the root account of MariaDB. You can provide the password and then click on OK.
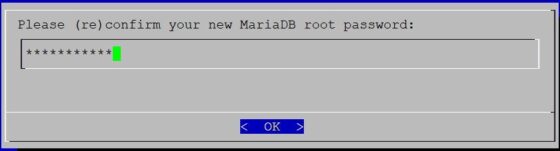
Confirm your password again. Click on OK to proceed.
It will start applying MariaDB sql script like below.

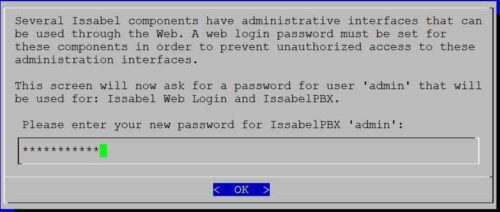
Once completed, you will see below screen where you will be asked to enter your new password for IssabelPBX 'admin' user.
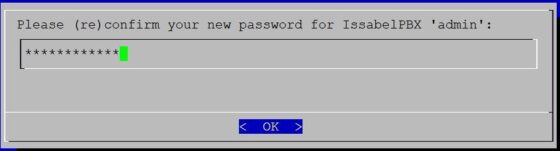
Confirm the password again and then click on OK.
It will start updating Asterisk Manager Interface password as shown below.

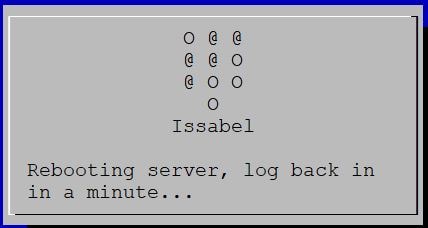
After finishing up the installation, it will initiate rebooting of server as shown below.
Step 4: Verify Asterisk Service
After successfully rebooting the server, you can check asterisk running status by using systemctl status asterisk command as shown below.
[root@localhost ~]# systemctl status asterisk
● asterisk.service - LSB: Asterisk PBX
Loaded: loaded (/usr/lib/systemd/system/asterisk.service; enabled; vendor preset: disabled)
Active: active (running) since Fri 2022-11-11 08:06:14 EST; 4h 40min ago
Main PID: 4208 (asterisk)
Tasks: 44
Memory: 48.9M
CGroup: /system.slice/asterisk.service
└─4208 /usr/sbin/asterisk -U asterisk -G asterisk -mqf -C /etc/asterisk/asterisk.conf

Nov 11 08:06:14 localhost.localdomain systemd[1]: Started LSB: Asterisk PBX.
Step 5: Connect to Asterisk Process
If you want to connect to a running Asterisk process then you need to use asterisk -r command as shown below.
[root@localhost ~]# asterisk -r
Asterisk 11.25.3, Copyright (C) 1999 - 2013 Digium, Inc. and others.
Created by Mark Spencer <markster@digium.com>
Asterisk comes with ABSOLUTELY NO WARRANTY; type 'core show warranty' for details.
This is free software, with components licensed under the GNU General Public
License version 2 and other licenses; you are welcome to redistribute it under
certain conditions. Type 'core show license' for details.
=========================================================================
Connected to Asterisk 11.25.3 currently running on localhost (pid = 4208)
localhost*CLI>
Step 6: Shutdown Asterisk
To shutdown Asterisk process, you need to issue core stop gracefully command as shown below.
localhost*CLI> core stop gracefully
localhost*CLI>
Disconnected from Asterisk server
Asterisk cleanly ending (0).
Executing last minute cleanups