
Table of Contents
In this article, I will take you through the steps to install Filezilla on Ubuntu 20.04 LTS (Focal Fossa). FileZilla Client is a fast, reliable, full-featured, cross-platform FTP, FTPS and SFTP client with an easy to use graphical user interface. It is used by millions of users around the world to transfer file securely from a Server. It is written in C++ and uses the wxWidgets library. It can be easily installed on both Windows and Linux based systems(both 64-bit and 32-bit). Here we will see how to install filezilla on Ubuntu 20.04 LTS based Systems.
Important Features
- Easy to use
- Supports FTP, FTP over SSL/TLS (FTPS) and SSH File Transfer Protocol (SFTP)
- Cross-platform. Runs on Windows, Linux, *BSD, macOS and more
- IPv6 support
- Available in many languages
- Supports resume and transfer of large files >4GB
- Tabbed user interface
- Powerful Site Manager and transfer queue
- Bookmarks
- Drag & drop support
- Configurable transfer speed limits
- Filename filters
- Directory comparison
- Network configuration wizard
- Remote file editing
- Keep-alive
- HTTP/1.1, SOCKS5 and FTP-Proxy support
- Logging to file
- Synchronized directory browsing
- Remote file search
How to Install Filezilla on Ubuntu 20.04 LTS (Focal Fossa)
Also Read: How to Install NordVPN on Ubuntu 20.04 LTS (Focal Fossa)
Step 1: Prerequisites
a) You should have a running Ubuntu 20.04 LTS Server.
b) You should have sudo or root access to run privileged commands.
c) You should have apt or apt-get utility available in your System.
Step 2: Update Your Server
In the first step, you need to sync all the installed packages with the latest available versions from the default Ubuntu repo and upgrade the required packages by using sudo apt-get update && sudo apt-get upgrade command as shown below.
cyberithub@ubuntu:~$ sudo apt update && sudo apt upgrade
[sudo] password for cyberithub:
Hit:1 https://download.docker.com/linux/ubuntu focal InRelease
Hit:2 https://dl.winehq.org/wine-builds/ubuntu focal InRelease
Hit:3 https://dl.google.com/linux/chrome/deb stable InRelease
Hit:4 https://repo.nordvpn.com//deb/nordvpn/debian stable InRelease
Hit:5 http://ppa.launchpad.net/ubuntu-toolchain-r/test/ubuntu focal InRelease
Hit:6 http://in.archive.ubuntu.com/ubuntu focal InRelease
Get:7 http://security.ubuntu.com/ubuntu focal-security InRelease [114 kB]
Get:8 http://in.archive.ubuntu.com/ubuntu focal-updates InRelease [114 kB]
Hit:9 http://ppa.launchpad.net/wireshark-dev/stable/ubuntu focal InRelease
Hit:10 https://apt.boltops.com stable InRelease
Get:11 http://security.ubuntu.com/ubuntu focal-security/main amd64 DEP-11 Metadata [40.7 kB]
Get:12 http://in.archive.ubuntu.com/ubuntu focal-backports InRelease [108 kB]
Get:13 http://security.ubuntu.com/ubuntu focal-security/universe amd64 DEP-11 Metadata [92.9 kB]
Get:14 http://security.ubuntu.com/ubuntu focal-security/multiverse amd64 DEP-11 Metadata [2,464 B]
Get:15 http://in.archive.ubuntu.com/ubuntu focal-updates/main i386 Packages [745 kB]
Get:16 http://in.archive.ubuntu.com/ubuntu focal-updates/main amd64 Packages [2,196 kB]
Get:17 http://in.archive.ubuntu.com/ubuntu focal-updates/main amd64 DEP-11 Metadata [275 kB]
Get:18 http://in.archive.ubuntu.com/ubuntu focal-updates/universe amd64 DEP-11 Metadata [405 kB]
Get:19 http://in.archive.ubuntu.com/ubuntu focal-updates/multiverse amd64 DEP-11 Metadata [944 B]
Get:20 http://in.archive.ubuntu.com/ubuntu focal-backports/main amd64 DEP-11 Metadata [7,968 B]
Get:21 http://in.archive.ubuntu.com/ubuntu focal-backports/universe amd64 DEP-11 Metadata [30.5 kB]
Fetched 4,132 kB in 4s (1,154 kB/s)
Reading package lists... Done
Building dependency tree
Reading state information... Done
1 package can be upgraded. Run 'apt list --upgradable' to see it.
N: Skipping acquire of configured file 'main/binary-i386/Packages' as repository 'https://apt.boltops.com stable InRelease' doesn't support architecture 'i386'
Reading package lists... Done
Building dependency tree
Reading state information... Done
Calculating upgrade... Done
Try Ubuntu Pro beta with a free personal subscription on up to 5 machines.
Learn more at https://ubuntu.com/pro
The following packages will be upgraded:
linux-firmware
.......................................
Step 3: Install Filezilla
There are multiple ways to install Filezilla on Ubuntu 20.04 LTS System. You can choose any of the below method depending on your requirement.
a) Using default repo
The quickest and easiest way to install filezilla is through the default Ubuntu repo. You just need to run sudo apt install filezilla command as shown below. But there is a possibility that you might not get the latest filezilla version from repo.
cyberithub@ubuntu:~$ sudo apt install filezilla
Reading package lists... Done
Building dependency tree
Reading state information... Done
The following additional packages will be installed:
filezilla-common libfilezilla0 libpugixml1v5
The following NEW packages will be installed:
filezilla filezilla-common libfilezilla0 libpugixml1v5
0 upgraded, 4 newly installed, 0 to remove and 0 not upgraded.
Need to get 4,480 kB of archives.
After this operation, 19.4 MB of additional disk space will be used.
Do you want to continue? [Y/n] Y
Get:1 http://in.archive.ubuntu.com/ubuntu focal/universe amd64 filezilla-common all 3.46.3-1build1 [2,267 kB]
Get:2 http://in.archive.ubuntu.com/ubuntu focal/universe amd64 libfilezilla0 amd64 0.19.3-1build1 [198 kB]
Get:3 http://in.archive.ubuntu.com/ubuntu focal/universe amd64 libpugixml1v5 amd64 1.10-1 [89.9 kB]
Get:4 http://in.archive.ubuntu.com/ubuntu focal/universe amd64 filezilla amd64 3.46.3-1build1 [1,925 kB]
Fetched 4,480 kB in 3s (1,509 kB/s)
Selecting previously unselected package filezilla-common.
(Reading database ... 270848 files and directories currently installed.)
Preparing to unpack .../filezilla-common_3.46.3-1build1_all.deb ...
Unpacking filezilla-common (3.46.3-1build1) ...
..............................................
b) Using bz2 file
If you are looking to install the latest version then visit Filezilla official website and download Linux 64-bit client from below shown link.
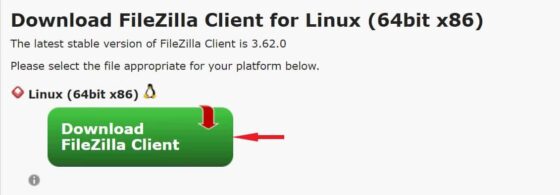
Once you click on download, it should start getting download your local Download directory. Once done, extract the package by using tar xvf FileZilla_3.62.0_x86_64-linux-gnu.tar.bz2 command as shown below.
cyberithub@ubuntu:~$ tar xvf FileZilla_3.62.0_x86_64-linux-gnu.tar.bz2
FileZilla3/
FileZilla3/bin/
FileZilla3/bin/filezilla
FileZilla3/bin/fzputtygen
FileZilla3/bin/fzsftp
FileZilla3/bin/fzstorj
FileZilla3/lib/
FileZilla3/lib/libfilezilla.so.32
FileZilla3/lib/libfzclient-commonui-private-3.62.0.so
FileZilla3/lib/libfzclient-private-3.62.0.so
FileZilla3/lib/libgmp.so.10
FileZilla3/lib/libgnutls.so.30
FileZilla3/lib/libhogweed.so.6
FileZilla3/lib/libnettle.so.8
FileZilla3/lib/libsqlite3.so.0
FileZilla3/lib/libwx_baseu-3.0.so.0
FileZilla3/lib/libwx_baseu_xml-3.0.so.0
FileZilla3/lib/libwx_gtk2u_adv-3.0.so.0
FileZilla3/lib/libwx_gtk2u_aui-3.0.so.0
FileZilla3/lib/libwx_gtk2u_core-3.0.so.0
FileZilla3/lib/libwx_gtk2u_xrc-3.0.so.0
FileZilla3/share/
...........................................
To make the binary utility available across the system, you need to add filezilla directory path in global PATH environment variable and then export it as shown below. But keep in mind that this is just a temporary way to export the path. To make it permanent, put an entry in ~/.profile or ~/.bashrc file. Then log off and login again to your System to make it work.
cyberithub@ubuntu:~$ export PATH=$PATH:/home/cyberithub/FileZilla3/bin/
c) Using Ubuntu Software Centre
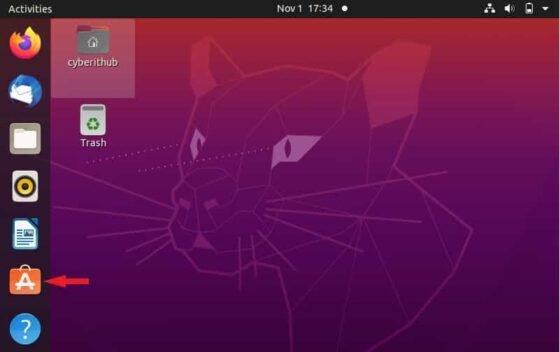
You also have the option install Filezilla from GUI through Ubuntu Software Centre. You need to go to Desktop and click on Ubuntu Software Icon as highlighted below.
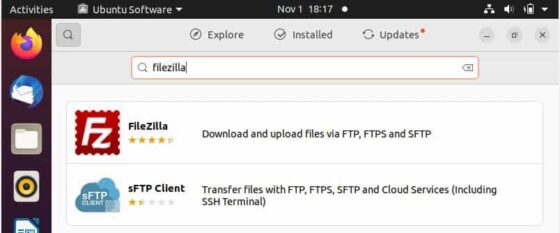
Then search filezilla in the search box as shown below. Once it appears, click on it to open.
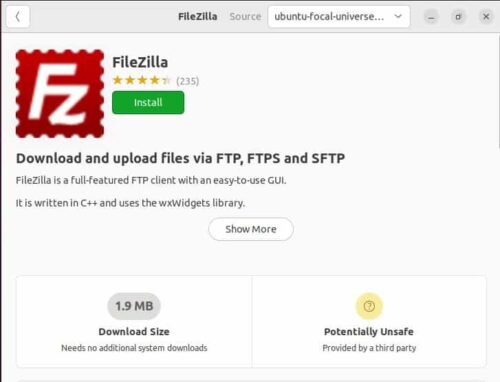
Click on Install to start installing the FTP Client. It may ask you to authenticate to proceed with the installation.
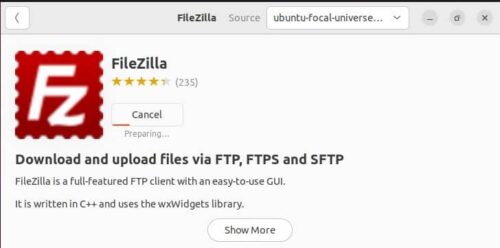
You can track the progress of installation on the below screen.
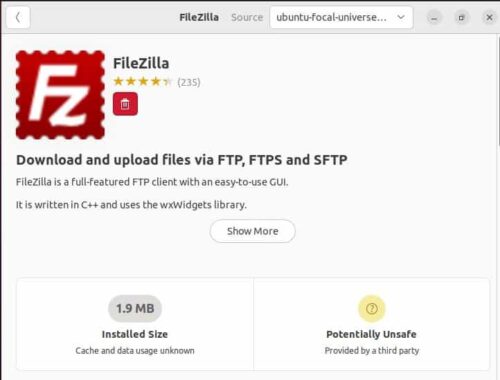
Finally after successful installation, you will see like below. This confirms that filezilla client successfully installed in your System.
Step 4: Check Version
After successful installation, you can check the filezilla version by using filezilla --version command as shown below.

Step 5: Launch Filezilla
There are two ways to launch Filezilla - either through terminal or through GUI interface. We will see both the ways.
a) Using Terminal
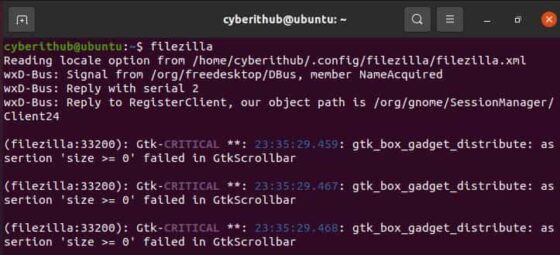
If would like to launch from terminal then you just need to run filezilla command on the terminal as shown below.
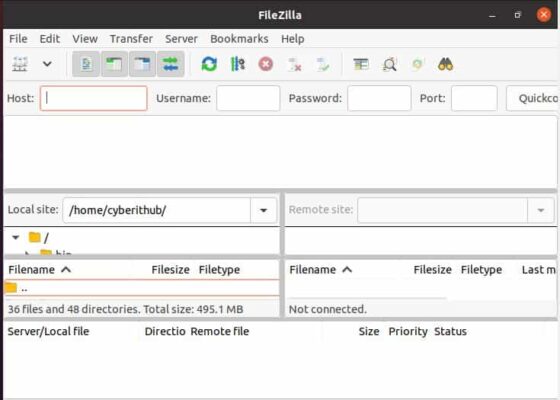
First time when you launch, it should look like below. You can close the Welcome screen.

Then connect the Server by providing Host IP Address, Username, Password and Port details.
b) Using GUI
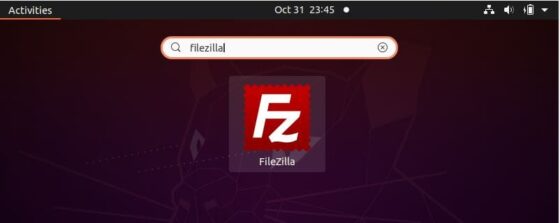
To launch from GUI, you need to Click on Activities and then search filezilla in the search box. When the application appears, click on it to open.
It should open like below. Now you can provide Host IP Address, Username, Password and Port details to connect the Server.
Step 6: Uninstall Filezilla
Once you are done using filezilla, you can choose to uninstall it from your System by using sudo apt remove filezilla command as shown below.
NOTE:
cyberithub@ubuntu:~$ sudo apt remove filezilla
[sudo] password for cyberithub:
Reading package lists... Done
Building dependency tree
Reading state information... Done
The following packages were automatically installed and are no longer required:
filezilla-common libfilezilla0 libpugixml1v5
Use 'sudo apt autoremove' to remove them.
The following packages will be REMOVED:
filezilla
0 upgraded, 0 newly installed, 1 to remove and 0 not upgraded.
After this operation, 7,235 kB disk space will be freed.
Do you want to continue? [Y/n] Y
(Reading database ... 271769 files and directories currently installed.)
Removing filezilla (3.46.3-1build1) ...
Processing triggers for mime-support (3.64ubuntu1) ...
Processing triggers for gnome-menus (3.36.0-1ubuntu1) ...
Processing triggers for man-db (2.9.1-1) ...
Processing triggers for desktop-file-utils (0.24-1ubuntu3) ...